Welcome to the definitive guide for installing
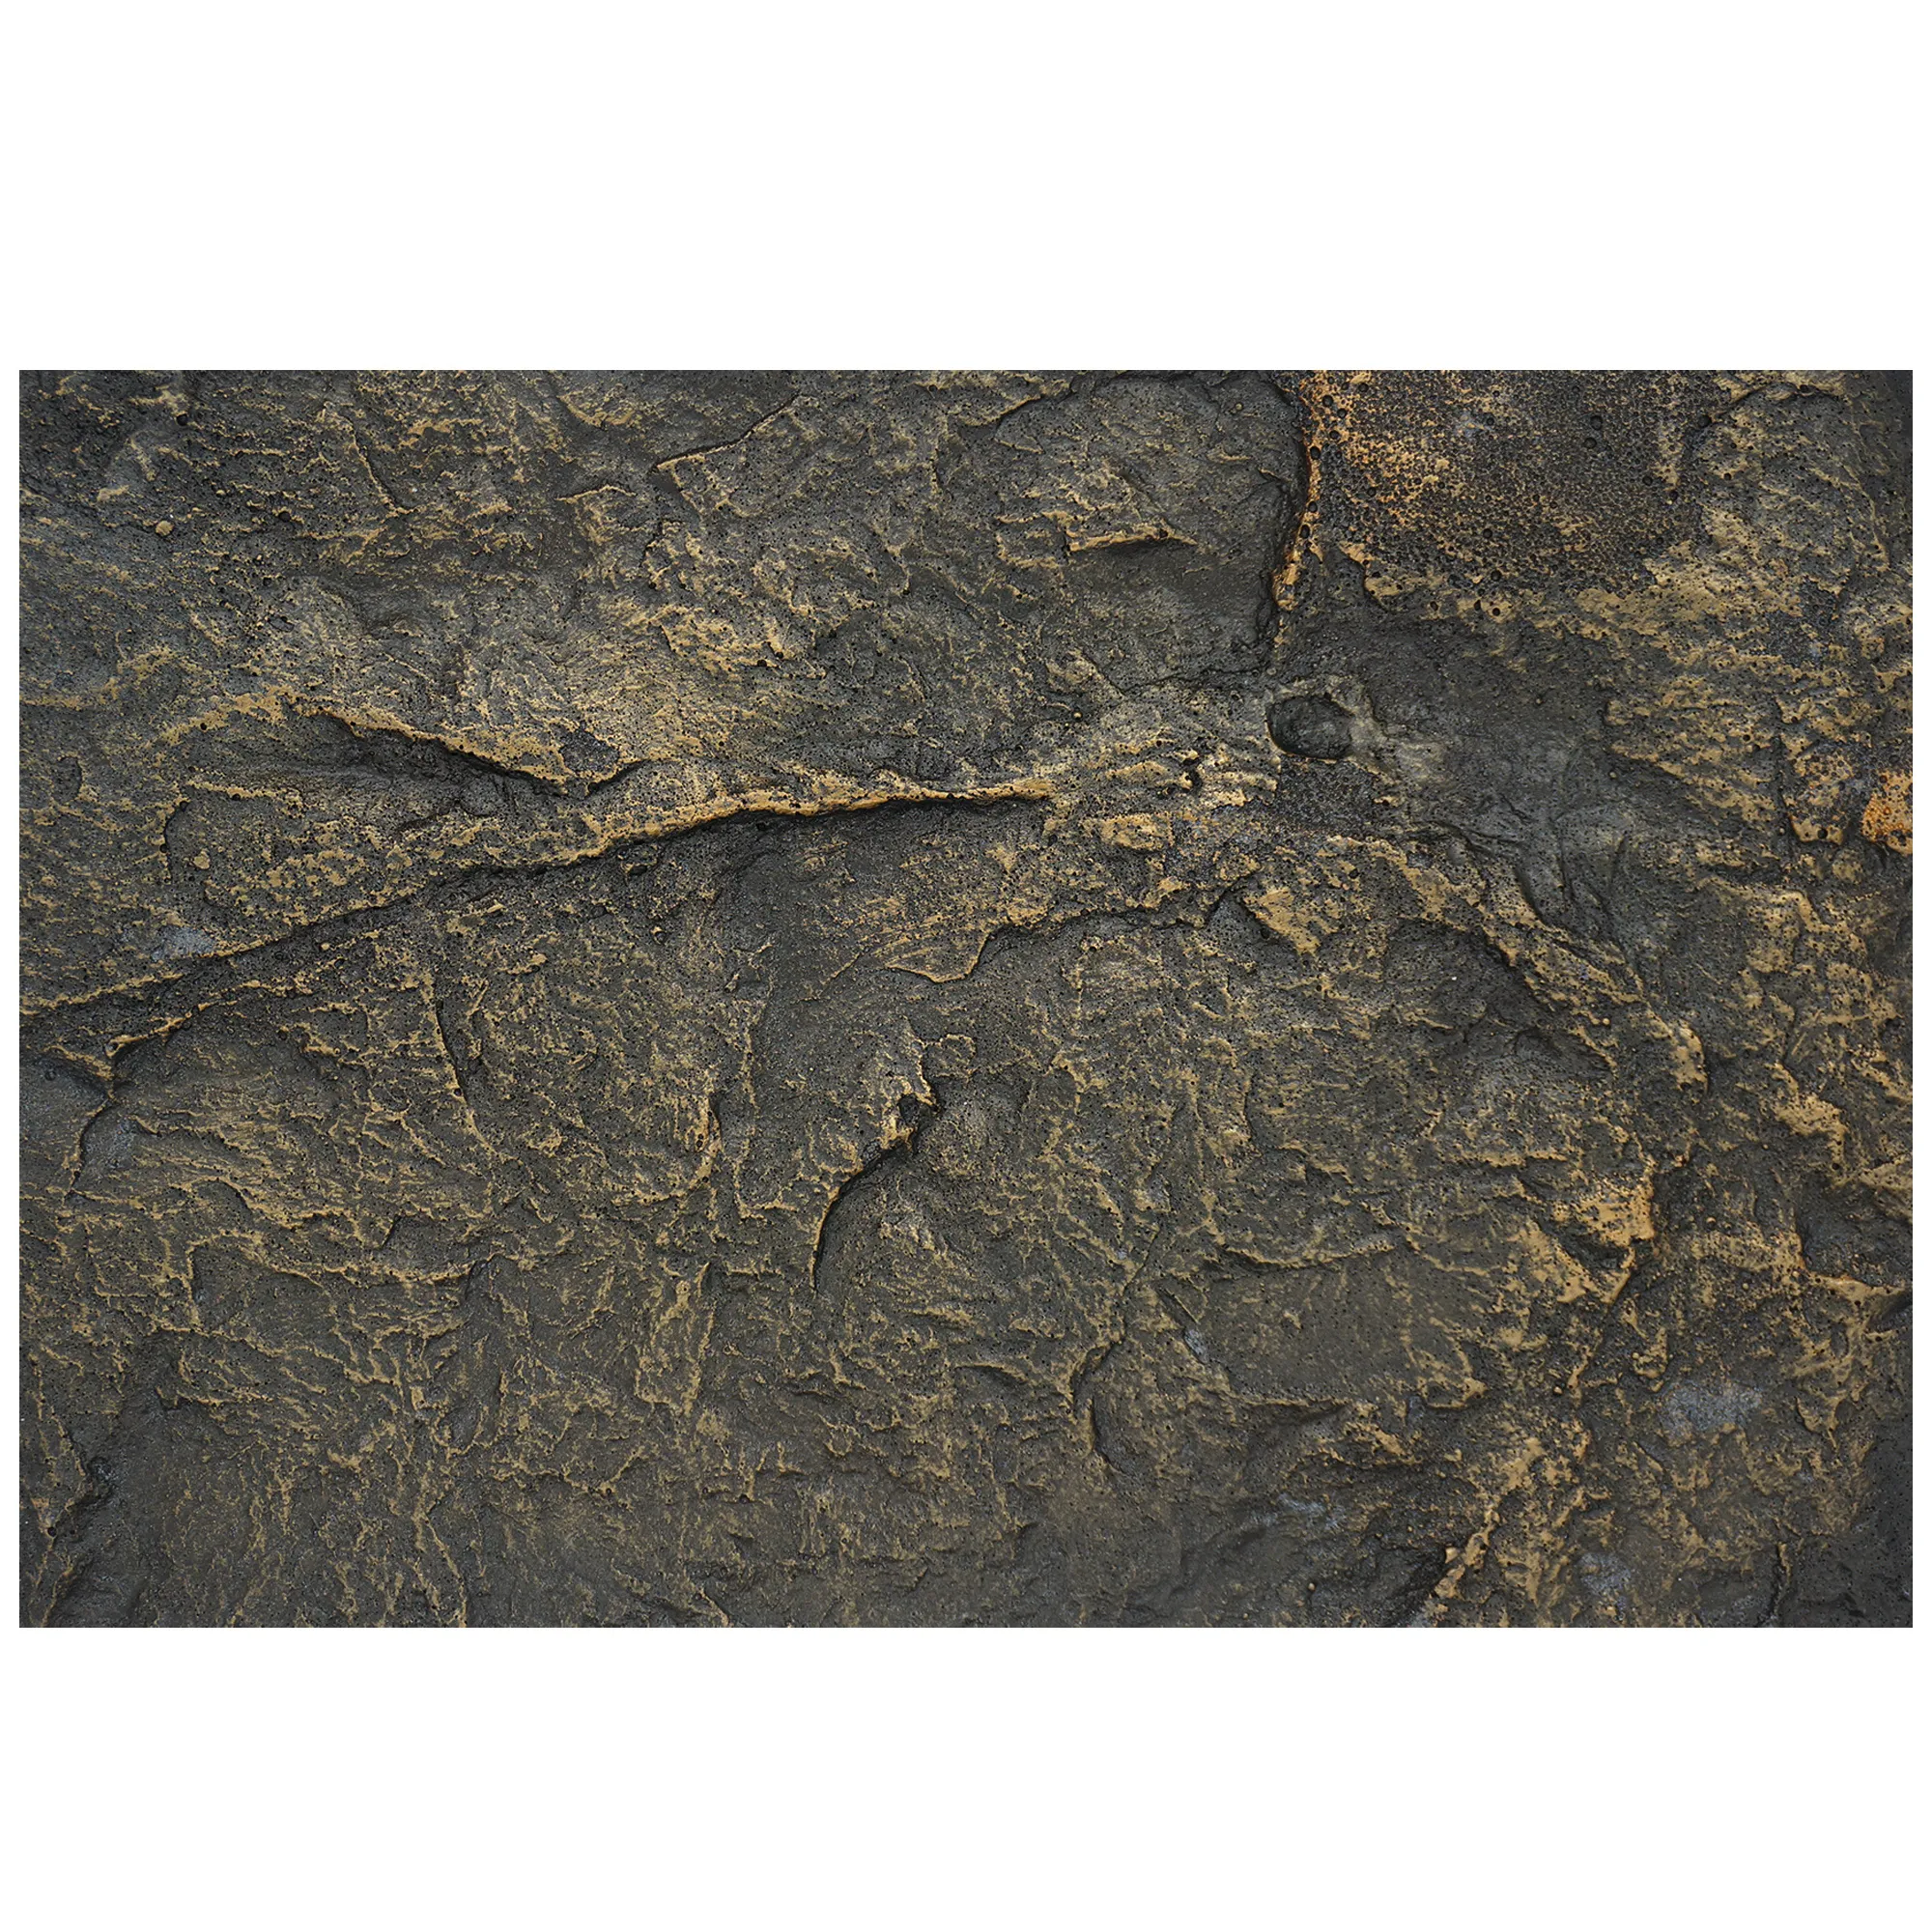
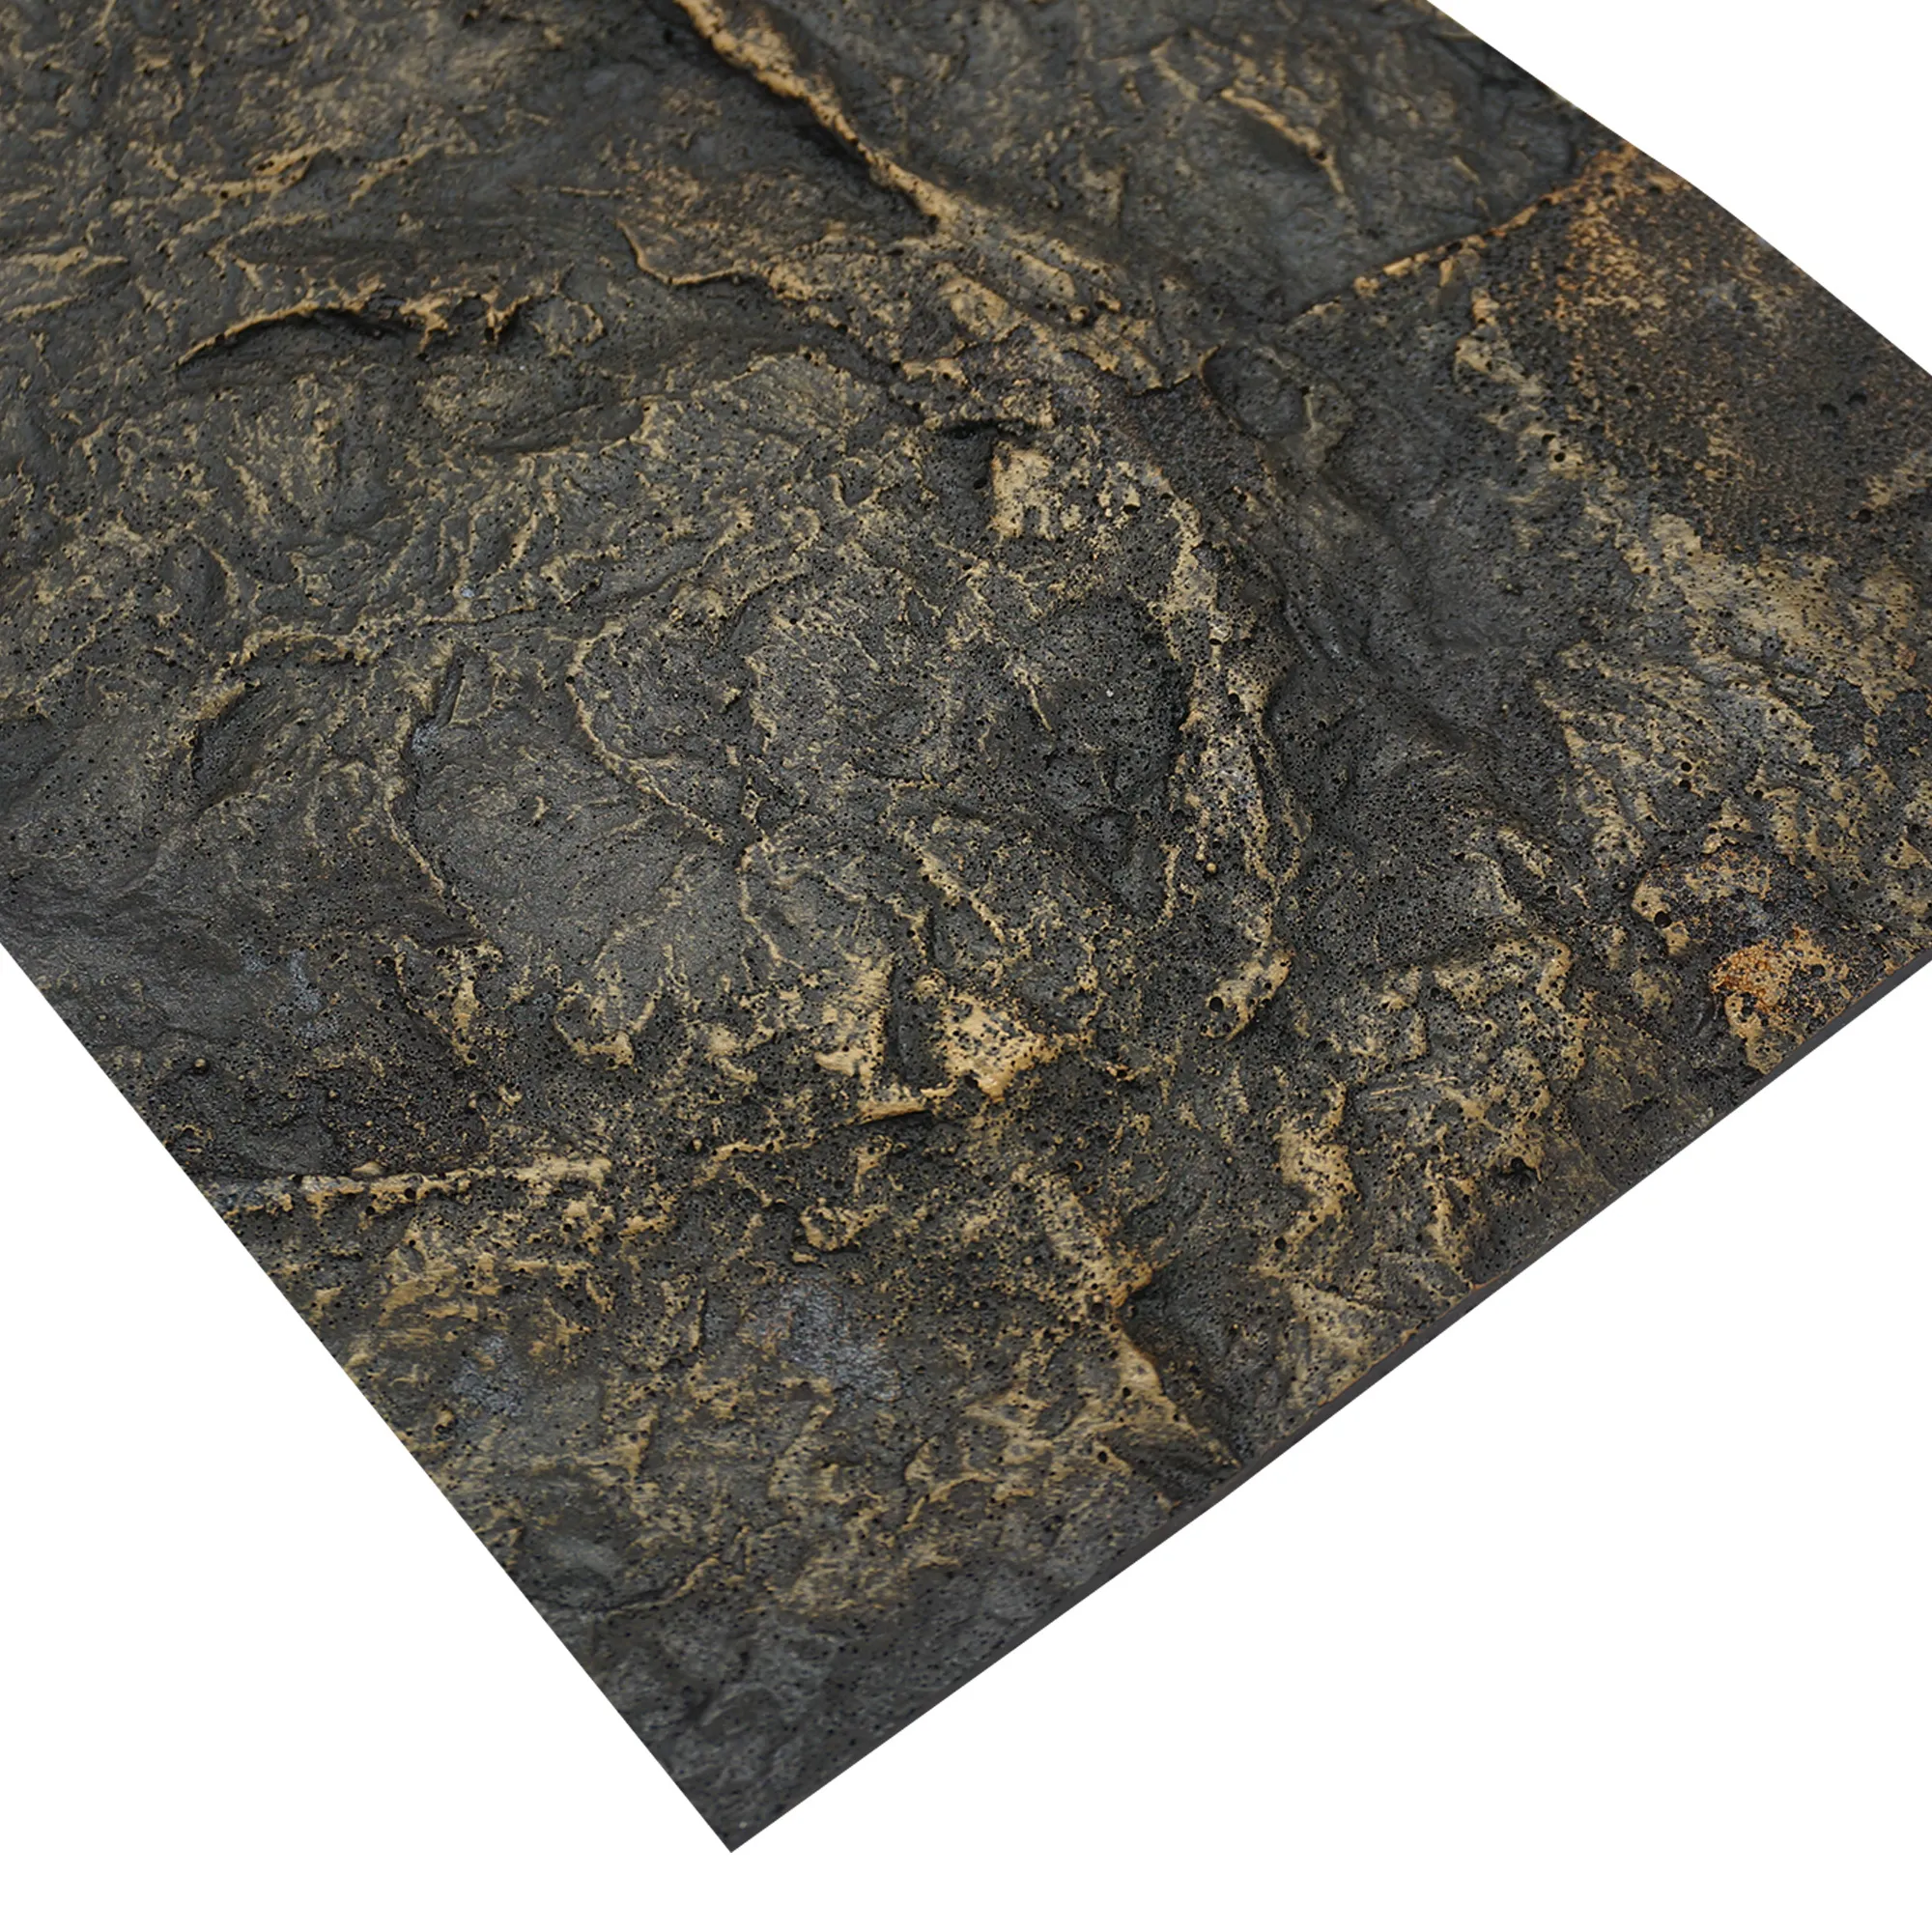
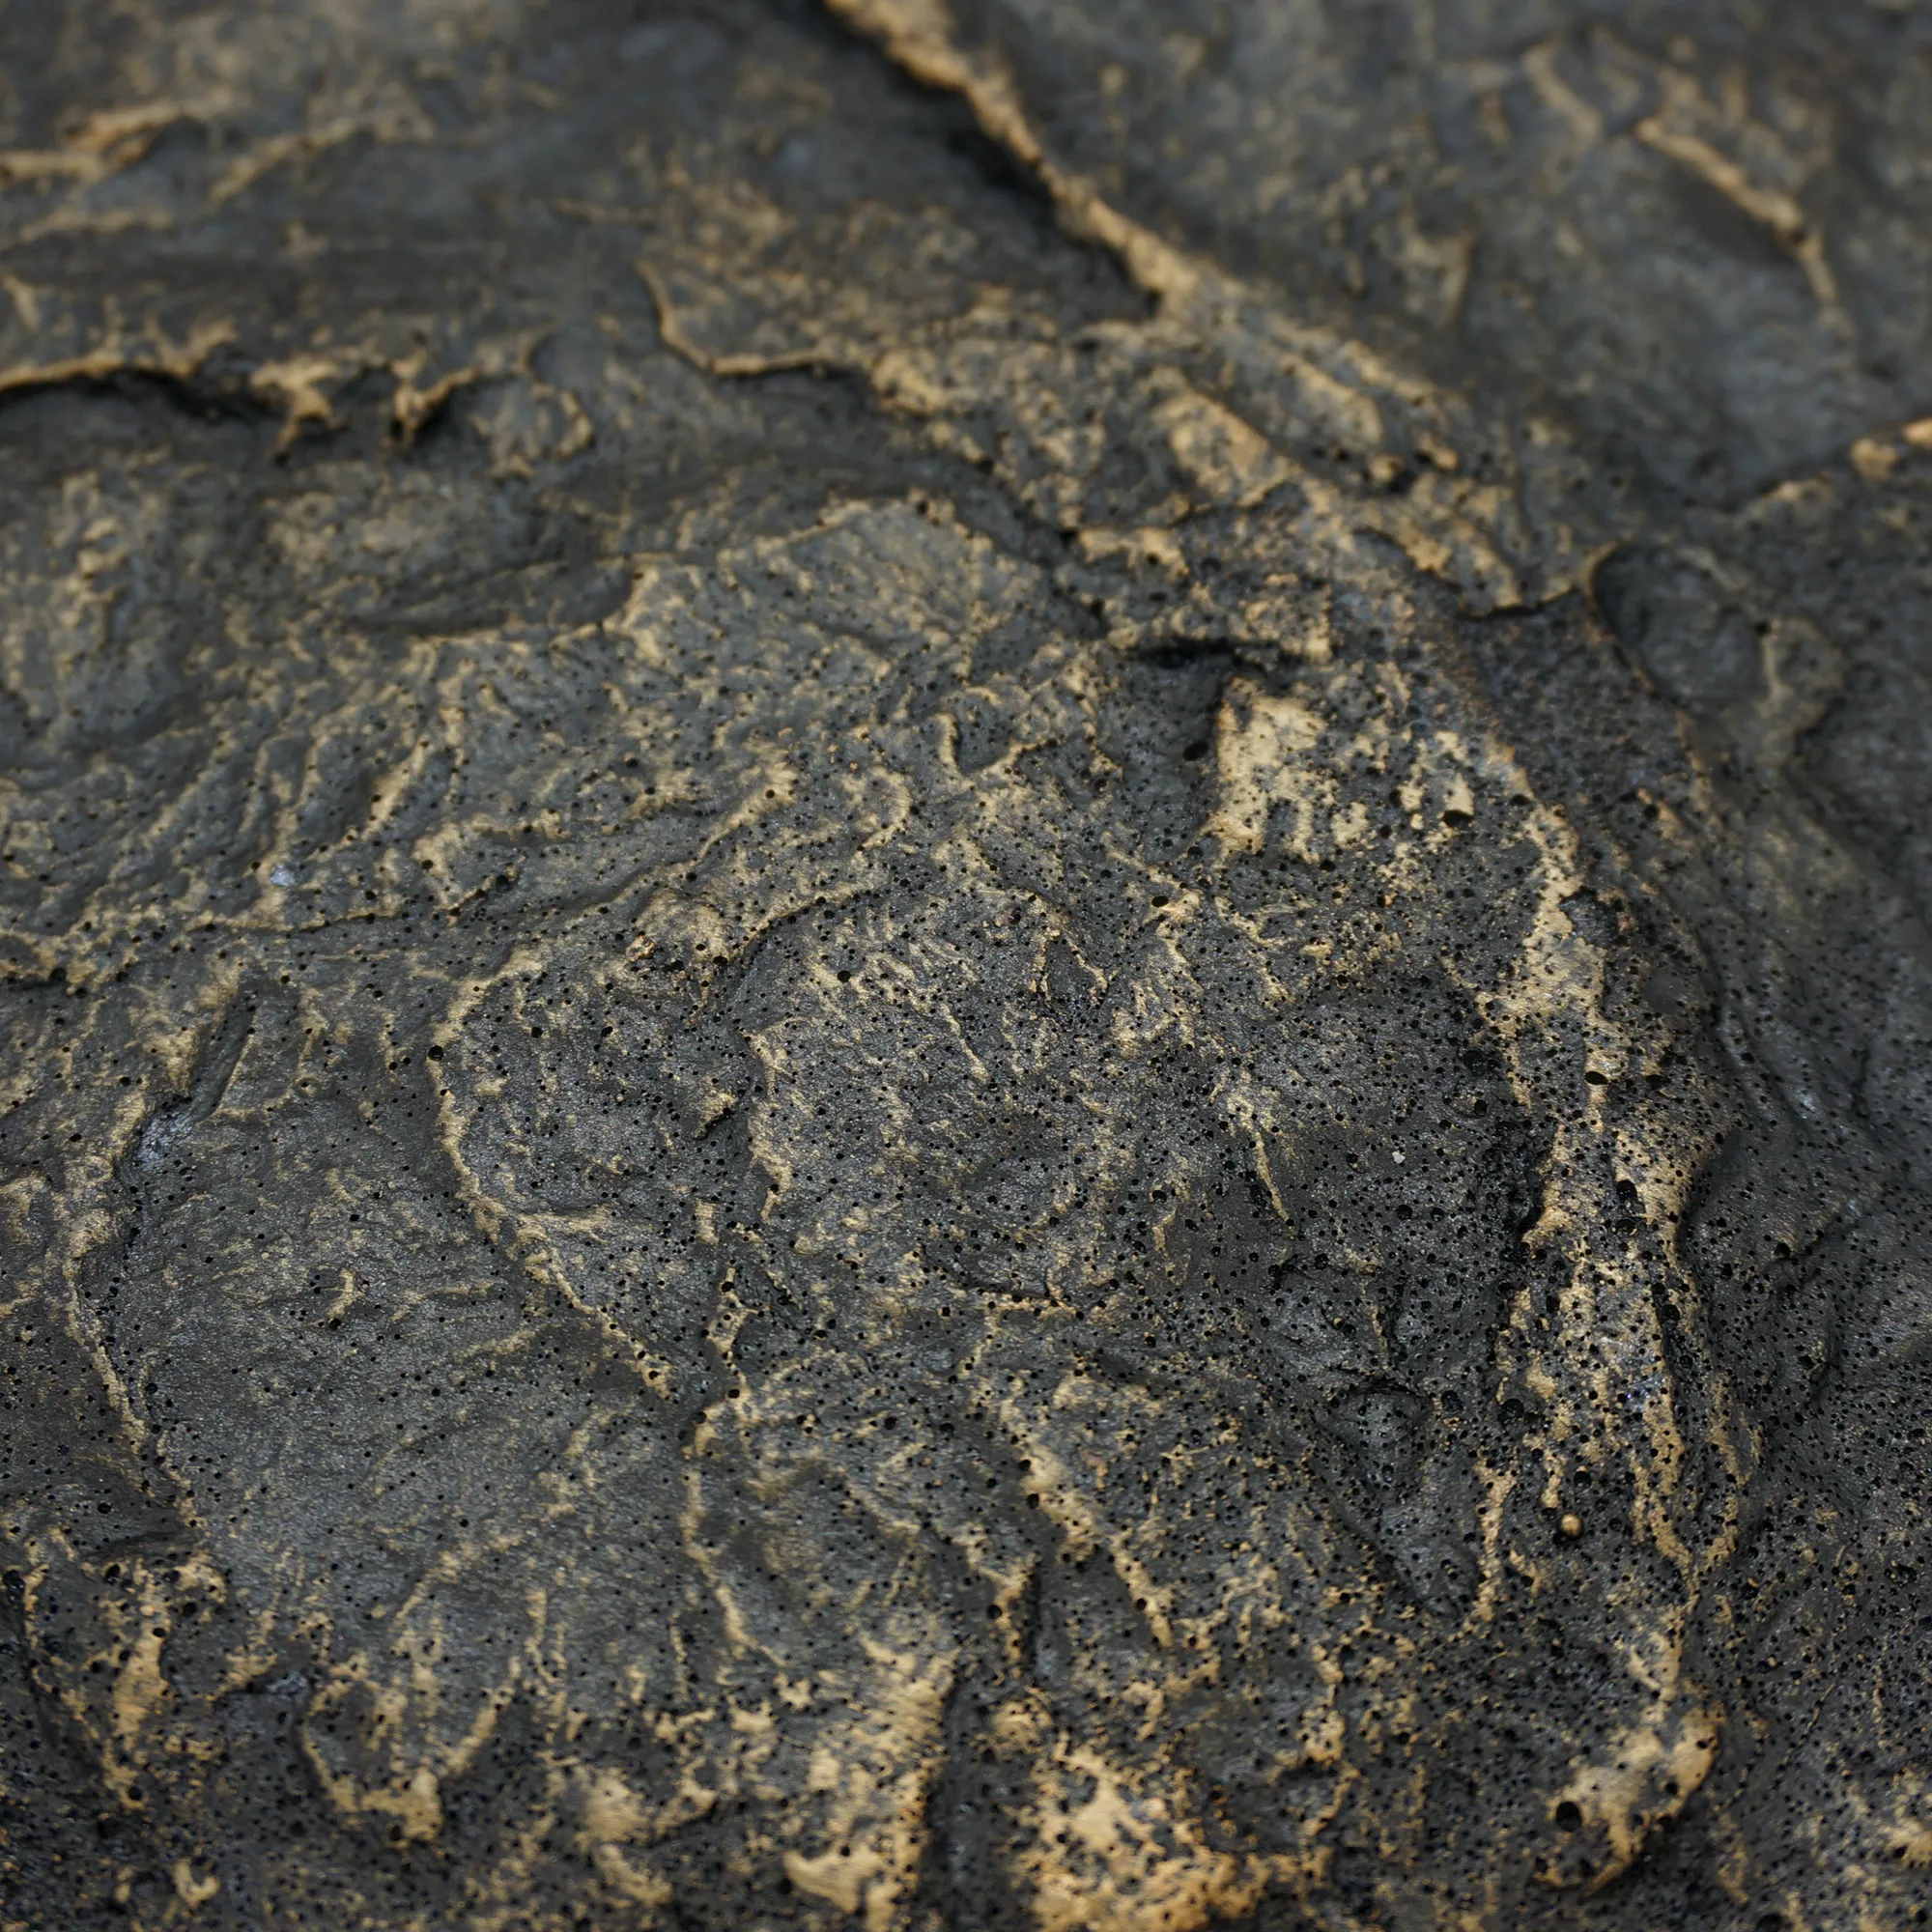
Boulder Slab (Vintage Gold)
, an exquisite material that brings unparalleled elegance and durability to any space. Whether you're a seasoned contractor aiming for perfection on a large-scale commercial project or a dedicated DIY enthusiast embarking on a home renovation, this guide is designed to equip you with all the knowledge you need. Our goal is to ensure a smooth, successful, and stunning installation that truly showcases the beauty of this unique product from COLORIA GROUP.
At COLORIA GROUP, we pride ourselves on being a comprehensive
one-stop solution provider
in the architectural materials domain. We understand that selecting the right material is just the first step; proper installation is key to unlocking its full potential and ensuring longevity. The
Boulder Slab (Vintage Gold)
, part of our innovative MCM (Modified Cementitious Material) series, is not just a building material; it's a statement piece, offering a luxurious vintage gold aesthetic combined with cutting-edge material science. This guide will walk you through every critical step, from initial planning to final touches, ensuring your project achieves a professional and lasting finish. Let's get started and transform your vision into reality!
Why Choose Boulder Slab (Vintage Gold)? The COLORIA GROUP Advantage
Before diving into the nuts and bolts of installation, it's worth understanding what makes
Boulder Slab (Vintage Gold)
stand out. This isn't just another decorative slab; it's a meticulously engineered material that brings a host of benefits to your project, whether for
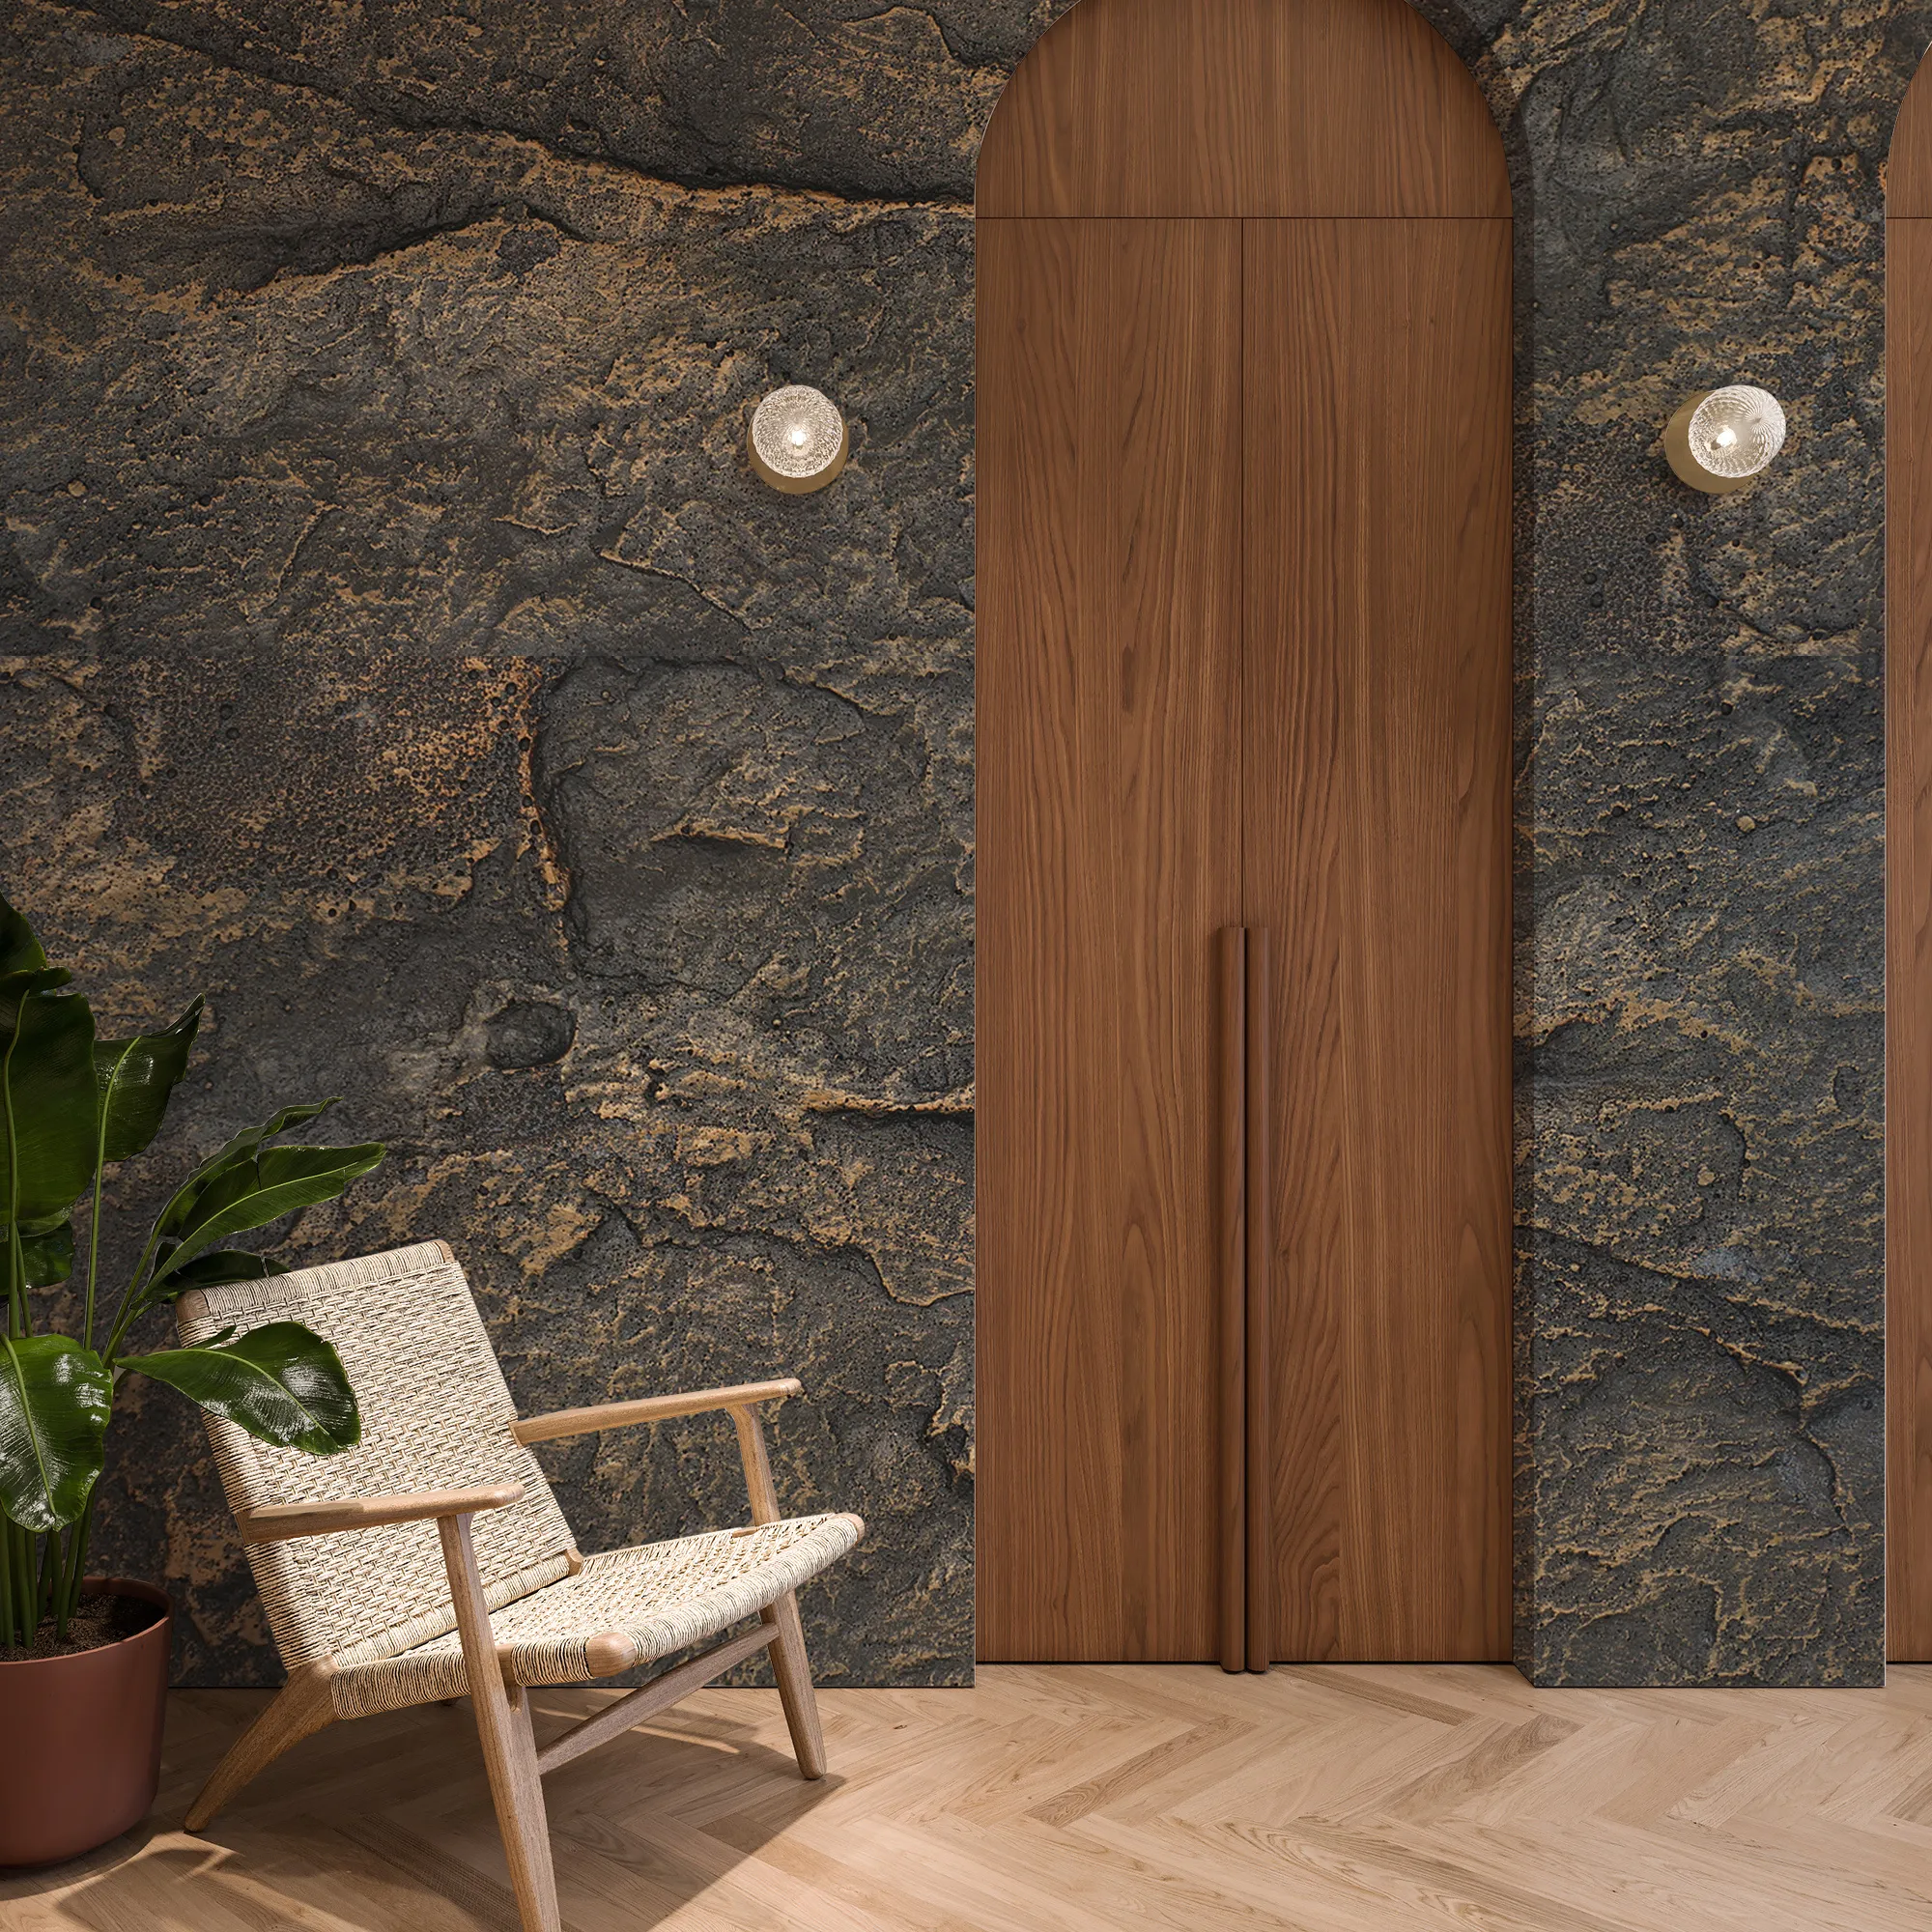
interior and exterior wall decoration
.
Unmatched Aesthetics: Vintage Gold Elegance
The vintage gold finish of the
Boulder Slab
offers a timeless appeal. It evokes a sense of classic luxury, warmth, and sophistication that can elevate any design scheme. Unlike conventional materials, its unique texture and coloration catch the light in a way that adds depth and character, making your walls a focal point. This particular shade of gold is carefully formulated to be rich without being ostentatious, providing a versatile backdrop for various furniture styles and color palettes. It's perfect for creating accent walls, grand entryways, opulent living spaces, or distinguished commercial lobbies, instantly adding a touch of class and distinction that discerning clients and homeowners appreciate.
Superior Performance: The Power of MCM
At the heart of
Boulder Slab (Vintage Gold)
lies our proprietary
MCM (Modified Cementitious Material)
technology. This innovative composite material redefines performance expectations for decorative surfaces. It's significantly lighter than natural stone, which eases handling and reduces structural load, yet it boasts comparable, if not superior, durability.
Key performance features include:
-
Exceptional Durability:
Resistant to impact, abrasion, and weathering, ensuring your walls look pristine for years. It holds up remarkably well in high-traffic areas and challenging environmental conditions, making it suitable for both interior refinement and robust exterior applications.
-
Water and Moisture Resistance:
Ideal for areas prone to humidity or direct water exposure, our MCM technology minimizes the risk of mold, mildew, and water damage, maintaining the integrity and appearance of your surfaces.
-
UV Stability:
The vintage gold hue is designed to resist fading and discoloration, even when exposed to prolonged sunlight, ensuring the aesthetic remains vibrant and true over time, especially crucial for exterior facades.
-
Fire Retardancy:
Enhances the safety profile of your building, providing peace of mind. Our materials meet rigorous safety standards, offering an additional layer of protection against fire hazards.
-
Thermal Insulation Properties:
Contributes to better energy efficiency by offering a degree of insulation, which can help regulate indoor temperatures and potentially reduce heating and cooling costs.
Eco-Friendly and Sustainable Choice
In today's world, sustainability is not just a buzzword; it's a responsibility. COLORIA GROUP is committed to providing
eco-friendly
building solutions, and
Boulder Slab (Vintage Gold)
is a testament to this commitment. Our MCM materials utilize a high proportion of recycled content and natural minerals, significantly reducing the demand for virgin resources. The manufacturing process itself is designed to be low-energy and low-emission, minimizing our environmental footprint. Furthermore, the longevity and low maintenance requirements of our products mean less waste over their lifecycle. Choosing
Boulder Slab (Vintage Gold)
means you're not just investing in beauty and durability, but also contributing to a healthier planet.
Versatility and Customization
While this guide focuses on the "Vintage Gold" aesthetic, it's important to highlight COLORIA GROUP's broader strength in
customization
. Our MCM series, including the
Boulder Slab
, can be adapted to various project requirements. For Boulder Slab (Vintage Gold), its versatility allows for application in diverse settings, from residential living rooms and bathrooms to high-end commercial spaces like hotels, restaurants, and retail stores. Its large format minimizes seams, creating a sleek, expansive look, while its inherent flexibility allows for application on curved surfaces to a certain extent, opening up architectural possibilities that rigid materials cannot match. We understand that every project is unique, and our ability to offer tailored solutions ensures your specific design vision can be realized with precision and flair.
Pre-Installation Essentials: Setting the Stage for Success
A successful installation begins long before the first slab is placed. Proper planning and preparation are paramount, especially when working with high-quality materials like
Boulder Slab (Vintage Gold)
. This section covers everything you need to check and prepare.
1. Tools and Materials Checklist
Having the right tools for the job can make a significant difference in efficiency and quality. Here's a list of essential items:
-
Measuring Tools:
Tape measure, straight edge, spirit level, laser level.
-
Cutting Tools:
Utility knife, scoring tool, specialized circular saw with a fine-tooth blade for MCM (if cutting large quantities or intricate shapes), possibly a jigsaw for curved cuts.
-
Adhesive Application:
Notched trowel (specific notch size as per adhesive manufacturer/COLORIA GROUP recommendation), adhesive mixer, bucket.
-
Installation Aids:
Rubber mallet, suction cups (for large slabs), spacers (if grouting), clean cloths/sponges, buckets of water.
-
Safety Gear:
Safety glasses, gloves, dust mask (especially when cutting), knee pads.
-
Cleaning Supplies:
Mild detergent, warm water, soft brushes for grout haze.
-
Specific Materials:
Boulder Slab (Vintage Gold)
, COLORIA GROUP recommended adhesive, COLORIA GROUP recommended grout (if applicable), primer (if needed), sealant (for exterior or wet areas).
Pro Tip for Adhesives:
Always use the adhesive specifically recommended by COLORIA GROUP for
MCM (Modified Cementitious Material)
products. Our recommended adhesives are formulated to work synergistically with the slabs, ensuring optimal bond strength, flexibility, and longevity, which is crucial for both interior and exterior applications. Do not substitute with generic tile adhesives.
2. Receiving and Inspecting the Slabs
Upon delivery, it's crucial to inspect your
Boulder Slab (Vintage Gold)
order immediately.
-
Check for Damage:
Carefully examine each slab for any chips, cracks, or surface imperfections that might have occurred during transit.
-
Verify Quantity:
Cross-reference the delivered quantity with your order form.
-
Color Consistency:
While natural variations can occur with MCM, quickly check if the overall color tone is consistent across all slabs. If there are significant discrepancies, set aside slabs from different batches or consult with your supplier.
-
Report Issues Promptly:
Any damage or discrepancies should be reported to COLORIA GROUP or your supplier within the specified timeframe (usually 24-48 hours) to ensure a smooth resolution.
-
Storage:
Store slabs flat on a level surface in a dry, covered area, away from direct sunlight and extreme temperatures, until ready for installation.
3. Acclimatization
Like many high-quality building materials,
MCM (Modified Cementitious Material)
products benefit from acclimatization.
-
Environmental Adjustment:
Bring the slabs into the installation area at least 24-48 hours before you plan to install them. This allows the material to adjust to the ambient temperature and humidity of the room, minimizing potential expansion or contraction issues post-installation.
-
Temperature Range:
Ensure the installation area's temperature is within the recommended range (typically 5°C to 30°C / 40°F to 85°F) for both the material and the adhesive.
4. Surface Preparation: The Foundation of Flawless Finish
The substrate preparation is arguably the most critical step. A poorly prepared surface can lead to adhesion failure, unevenness, and a compromised aesthetic.
For Walls (Interior & Exterior):
-
Cleanliness:
The surface must be completely clean, dry, and free of dust, grease, paint flakes, old wallpaper, or any other contaminants that could inhibit adhesion. Use a mild detergent if necessary, then rinse thoroughly and allow to dry.
-
Smoothness & Flatness:
The surface should be as flat and smooth as possible. Any significant irregularities (bumps, dips) should be patched or sanded down. For large slabs, even minor variations can be noticeable. Use a long straight edge to check for flatness.
-
Soundness:
Ensure the substrate is structurally sound and stable. Loose plaster, crumbling concrete, or flaky paint must be removed and repaired. New plaster or concrete surfaces should be fully cured according to manufacturer guidelines.
-
Priming:
Depending on the substrate (e.g., highly absorbent surfaces like plasterboard, or very smooth, non-porous surfaces), a suitable primer recommended by COLORIA GROUP may be necessary. Priming helps regulate absorption, improves adhesion, and creates a uniform surface for the adhesive. Always follow the primer manufacturer's instructions for application and drying time.
Specific Substrates:
-
Drywall/Plasterboard:
Ensure it's firmly attached to studs, mudded, taped, sanded smooth, and primed.
-
Concrete/Cement Board:
Must be fully cured, clean, and free of efflorescence. May require grinding or leveling compound for extreme unevenness. Priming is often beneficial.
-
Existing Tiles:
Not generally recommended for direct application. It's best to remove existing tiles and prepare the substrate underneath. If removal is not feasible, consult COLORIA GROUP for specialized preparation methods and adhesive types.
Safety First!
Always prioritize safety. Wear appropriate personal protective equipment (PPE) like safety glasses, gloves, and a dust mask. Ensure proper ventilation, especially when working with adhesives and primers. Keep your work area clean and organized to prevent tripping hazards.
The Installation Process: Step-by-Step with Boulder Slab (Vintage Gold)
With preparation complete, you're ready to transform your space. This detailed sequence guides you through the installation of
Boulder Slab (Vintage Gold)
, ensuring precision and a beautiful outcome for your
interior and exterior wall decoration
projects.
1. Layout Planning and Dry Lay
This step is critical, especially with decorative materials like
Boulder Slab (Vintage Gold)
, where pattern and flow are important.
-
Measure Your Area:
Accurately measure the height and width of the installation surface.
-
Determine Starting Point:
For walls, it's often best to start from the center and work outwards, or from a primary focal point, ensuring symmetry and minimizing small, awkward cuts at visible edges. Use a level to draw a plumb (vertical) and level (horizontal) line as your guide.
-
Dry Lay (Optional but Recommended):
For complex patterns or if you have multiple slab sizes, lay out the slabs on the floor or a large flat surface to visualize the pattern and make any necessary adjustments before applying adhesive. This helps anticipate cuts and optimize slab placement for the best aesthetic.
-
Consider Grout Lines:
While
Boulder Slabs
are often installed with minimal or no visible grout lines for a seamless large-slab effect, if you opt for small grout lines for a specific design, factor this into your layout.
2. Cutting Boulder Slabs
While
MCM (Modified Cementitious Material)
is durable, it's also relatively flexible and easy to cut with the right tools.
-
Scoring and Snapping (Thin Slabs):
For thinner
Boulder Slabs
, a heavy-duty utility knife or scoring tool can be used. Score deeply along your cut line, then place the slab over an edge and apply firm, even pressure to snap it cleanly.
-
Circular Saw (Thicker Slabs/Volume Cutting):
For thicker slabs or when making numerous cuts, a circular saw equipped with a fine-tooth blade (e.g., a diamond blade for cement-based materials) is recommended. Always use a straight edge as a guide.
-
Jigsaw/Angle Grinder:
For curved cuts or intricate shapes, a jigsaw with a suitable blade (e.g., carbide-tipped) or an angle grinder with a diamond wheel can be used. Exercise caution and wear full PPE.
-
Minimize Dust:
When cutting, especially with power tools, significant dust can be generated. Work in a well-ventilated area, use a dust mask, and ideally, have a dust extraction system.
-
Edge Finishing:
After cutting, lightly sand the cut edges if necessary to ensure they are smooth and free of burrs.
3. Adhesive Mixing and Application
The correct adhesive application is vital for strong, lasting adhesion.
-
Mix Adhesive:
Following COLORIA GROUP's recommendations, mix the adhesive according to the manufacturer's instructions. Use a paddle mixer attached to a drill to ensure a consistent, lump-free consistency. Allow it to "slake" (rest) for the recommended time before a final remix.
-
Spread Adhesive on Substrate:
Apply the adhesive to the substrate using the recommended notched trowel. Hold the trowel at a 45-degree angle to create consistent ridges. Work in small sections that you can comfortably cover with slabs within the adhesive's open time (the time before it starts to skin over).
-
Back-Butter Slabs (Recommended for Large Slabs):
For large format
Boulder Slabs
, it is highly recommended to "back-butter" each slab. Apply a thin, even coat of adhesive (the flat side of the trowel) to the back of the slab before placing it on the wall. This ensures maximum coverage and eliminates air pockets, especially important for exterior applications where full adhesion is critical for freeze-thaw resistance.
-
Achieve Full Coverage:
Aim for at least 85-95% adhesive coverage for interior applications and 100% for exterior or wet areas. Lack of coverage can lead to hollow spots, cracking, or slab detachment.
4. Slab Placement
This is where your vision comes to life. Precision here is key.
-
Position and Press:
Carefully align the
Boulder Slab (Vintage Gold)
with your layout lines and press it firmly into the wet adhesive.
-
Even Pressure:
Use a rubber mallet and a leveling tool to gently tap the slab, ensuring it's fully bedded into the adhesive and perfectly level with adjacent slabs. Work from the center of the slab outwards to release any trapped air.
-
Use Spacers (If Needed):
If you're opting for grout lines, insert appropriate spacers between slabs to maintain consistent spacing. For a seamless look, you might use minimal spacing (1-2mm) with wedges to ensure edges don't touch.
-
Check for Plumb and Level:
Continuously check each slab with a level to ensure it's plumb and level. Adjust immediately if needed while the adhesive is still workable.
-
Clean Excess Adhesive:
Immediately wipe away any adhesive that squeezes out from between slabs or onto the slab face using a damp sponge or cloth. Dried adhesive is much harder to remove and can damage the slab surface.
-
Suction Cups for Large Slabs:
For very large format
Boulder Slabs
, using suction cups can greatly assist in lifting, positioning, and adjusting the slabs with greater control and safety.
5. Grouting (If Applicable)
While many installations with
Boulder Slabs
prioritize a minimal seam, if your design calls for it, grouting follows.
-
Cure Time:
Allow the adhesive to cure completely before grouting, typically 24-48 hours, as per adhesive manufacturer's instructions.
-
Mix Grout:
Mix COLORIA GROUP recommended grout according to manufacturer's instructions to a smooth, workable consistency.
-
Apply Grout:
Using a rubber grout float, spread the grout diagonally across the slab joints, ensuring all gaps are fully filled.
-
Remove Excess:
After a short waiting period (5-15 minutes, depending on grout type and humidity), use the same grout float held at a 90-degree angle to scrape off excess grout from the slab surface.
-
Clean Haze:
Once the grout has partially set (but not fully hardened), use a damp (not soaking wet) sponge to gently wipe away grout haze from the slab surface. Rinse the sponge frequently. Multiple passes may be needed. Be careful not to remove grout from the joints.
-
Final Buff:
After the grout has fully cured (24-72 hours), a final buff with a clean, dry cloth can remove any remaining light haze.
6. Curing and Sealing (Optional but Recommended)
Allow the entire installation (adhesive and grout) to cure for the recommended time (usually several days) before subjecting it to heavy use or cleaning with harsh chemicals. For exterior applications or areas prone to moisture, applying a high-quality sealant recommended by COLORIA GROUP can provide additional protection against water penetration and staining, preserving the vibrant
Vintage Gold
finish.

Maintenance and Care for Your Boulder Slab (Vintage Gold)
One of the many advantages of
MCM (Modified Cementitious Material)
from COLORIA GROUP is its low maintenance. However, proper care will ensure your
Boulder Slab (Vintage Gold)
installation retains its beauty for decades, truly living up to its promise of being a lasting
interior and exterior wall decoration
solution.
Regular Cleaning
-
Dusting:
For interior walls, regular dusting with a soft, dry cloth or a feather duster is usually sufficient to keep the surface clean.
-
Wiping:
For more stubborn dirt or smudges, use a soft cloth dampened with warm water and a mild, pH-neutral cleaner. Avoid abrasive cleaners, harsh chemicals (e.g., bleach, ammonia-based products), or scrubbing pads, as these can damage the surface finish.
-
Rinse and Dry:
After cleaning, wipe the surface with a clean, damp cloth to remove any cleaner residue, then dry with a soft, clean cloth to prevent water spots, especially on the elegant
Vintage Gold
finish.
Addressing Stains
While
Boulder Slab (Vintage Gold)
is highly resistant to staining, accidents can happen.
-
Act Quickly:
The key to successful stain removal is speed. Blot up spills immediately before they have a chance to penetrate the surface.
-
Mild Cleaner First:
For most spills, a mild soap and water solution should suffice. Apply to a clean cloth, gently dab the stain, then rinse and dry.
-
Specific Stains:
For tougher stains, consult COLORIA GROUP or a professional cleaning expert for specific recommendations on suitable cleaning agents that won't harm the MCM surface or its finish.
Protecting Your Investment
-
Avoid Impact:
While durable, heavy impacts can potentially chip or crack any surface material. Take reasonable precautions to prevent hard objects from striking the slabs.
-
Sealant Reapplication:
If a sealant was applied (especially for exterior or wet area installations), periodic reapplication may be necessary based on the sealant manufacturer's recommendations. This helps maintain the material's protective properties and appearance over time.
-
Exterior Care:
For exterior
Boulder Slab (Vintage Gold)
installations, routine inspection for any signs of wear, especially in harsh climates, is advisable. Regular cleaning helps prevent the buildup of environmental grime, which can dull the finish over time.
Troubleshooting Common Installation Issues
Even with the best preparation, unforeseen issues can arise. Here's how to tackle some common challenges with
Boulder Slab (Vintage Gold)
installations.
1. Slabs Not Sticking/Adhesive Failure
-
Cause:
Inadequate surface preparation (dust, grease), incorrect adhesive, insufficient adhesive coverage, adhesive too dry (past open time), or unstable substrate.
-
Solution:
Remove the affected slab. Thoroughly clean and prepare the substrate. Ensure the correct COLORIA GROUP recommended adhesive is used, mixed properly, and applied with sufficient coverage within its open time. If the substrate is the issue, it must be repaired or stabilized before re-installation.
2. Uneven Slabs/Lippage
-
Cause:
Uneven substrate, inconsistent adhesive thickness, or improper leveling during placement.
-
Solution:
If caught early (before adhesive sets), carefully lift the slab, adjust adhesive, and re-level. If the adhesive has set, the slab may need to be removed and the substrate corrected before re-installation. Prevention is key here: meticulously prepare the substrate and use leveling tools consistently.
3. Grout Haze on Slab Surface
-
Cause:
Not cleaning excess grout promptly, or using a too-wet sponge during cleanup, spreading the haze rather than removing it.
-
Solution:
For fresh haze, use a clean, damp (not wet) sponge. For dried haze, specialized grout haze removers (pH-neutral, suitable for MCM surfaces) can be used, but always test in an inconspicuous area first. Avoid aggressive scrubbing.
4. Chipped Edges After Cutting
-
Cause:
Using the wrong blade, dull blade, or applying too much pressure/speed during cutting.
-
Solution:
Use a sharp, appropriate blade for
MCM (Modified Cementitious Material)
. Score lightly then deepen cuts. For power tools, use a moderate speed and ensure the slab is well supported. Minor chips can sometimes be camouflaged with a touch-up paint or colored filler that matches the
Vintage Gold
finish; for significant chips, replacing the slab is often the best solution.
Project Planning and Cost Considerations
Successful project execution, especially for contractors, involves not only technical skill but also effective planning and cost management. As your
one-stop solution provider
, COLORIA GROUP aims to simplify this.
Estimating Material Quantities
Accurate estimation prevents costly delays and waste.
-
Measure Twice, Cut Once:
Calculate the total square footage of your installation area.
-
Add for Waste:
Always factor in a waste percentage. For straightforward installations with minimal cuts, 5-10% is usually sufficient. For complex layouts, intricate cuts, or diagonal patterns, increase this to 15-20%. This buffer accounts for cutting errors, potential damage, or future repairs.
-
Account for Grout (if applicable):
While
Boulder Slabs
often have minimal grout, if you are grouting, calculate the grout needed based on slab dimensions and joint width. COLORIA GROUP can assist with specific calculations.
Budgeting for Labor and Time
While
MCM (Modified Cementitious Material)
is generally easier to handle than natural stone due to its lighter weight, proper installation still requires skill and time.
-
Contractors:
Factor in skilled labor rates, project management, and overheads. Provide clear quotes to clients, detailing materials and labor.
-
DIYers:
Be realistic about your skill level and available time. Rushing the process often leads to mistakes. Factor in tool rental costs if you don't own specialized equipment.
-
Curing Times:
Remember to include adhesive and grout curing times in your project schedule. These are non-negotiable and affect subsequent steps (e.g., painting, furniture placement).
Understanding Total Cost of Ownership
While the initial material cost is a factor, consider the long-term value provided by
Boulder Slab (Vintage Gold)
.
-
Durability:
Its robust nature means fewer repairs or replacements, saving money over time.
-
Low Maintenance:
Reduced need for specialized cleaning products or frequent maintenance translates to lower operational costs.
-
Aesthetic Longevity:
The timeless
Vintage Gold
aesthetic ensures your investment remains stylish and valuable for many years, enhancing property value.
-
Eco-Friendly Benefits:
Our
eco-friendly
materials contribute to green building certifications, which can offer financial incentives or market advantages for commercial projects.
|
Aspect
|
Contractor Tips
|
DIYer Tips
|
|
Planning
|
Utilize CAD for precise layouts, provide detailed material breakdowns. Leverage COLORIA GROUP's
one-stop solution provider
capabilities for material sourcing and technical support.
|
Create a detailed sketch. Measure twice. Watch online tutorials from COLORIA GROUP or reputable sources. Start in a less visible area if unsure.
|
|
Budgeting
|
Secure competitive bulk pricing from COLORIA GROUP. Factor in labor, overhead, and contingency (10-15%). Consider the long-term ROI for clients.
|
Get quotes for tools you might need to rent. Stick to your waste factor. Don't skimp on quality adhesive. Remember, quality materials like
Boulder Slab (Vintage Gold)
add significant value.
|
|
Time Management
|
Schedule deliveries and labor efficiently. Allow ample curing time between stages. Communicate timelines clearly with clients.
|
Don't rush. Break down the project into manageable tasks. Work during good daylight hours. Allow full curing times for adhesive and grout.
|
|
Expertise
|
Train your team on
MCM (Modified Cementitious Material)
specific installation techniques. Utilize COLORIA GROUP's technical support for complex scenarios.
|
Don't hesitate to consult COLORIA GROUP's resources. If a step feels beyond your skill, consider hiring a professional for that specific part.
|
Conclusion: A Legacy of Beauty and Performance
Installing
Boulder Slab (Vintage Gold)
is more than just attaching a material to a wall; it's about crafting an environment, creating an experience, and building a legacy of beauty and performance. As a premium
MCM (Modified Cementitious Material)
product from COLORIA GROUP, the
Boulder Slab (Vintage Gold)
offers an unparalleled combination of aesthetic appeal, robust durability, and
eco-friendly
credentials, making it an ideal choice for both sophisticated
interior and exterior wall decoration
.
By meticulously following the steps outlined in this guide – from careful planning and surface preparation to precise application and thoughtful maintenance – you are well-equipped to achieve a flawless installation. Whether you're a contractor managing a complex commercial undertaking or a DIYer enhancing your home, the principles of patience, precision, and adherence to manufacturer guidelines will be your greatest allies.
COLORIA GROUP stands behind its products, not just as a supplier of innovative building materials, but as your dedicated
one-stop solution provider
. We are committed to empowering our clients with the knowledge and support needed to bring their architectural visions to life with confidence and success. Embrace the timeless elegance of
Boulder Slab (Vintage Gold)
, and create spaces that inspire and endure for generations. Your beautiful, sustainable future begins with the right material and the right installation.