
Bringing Earth's Texture Home—One Panel at a Time
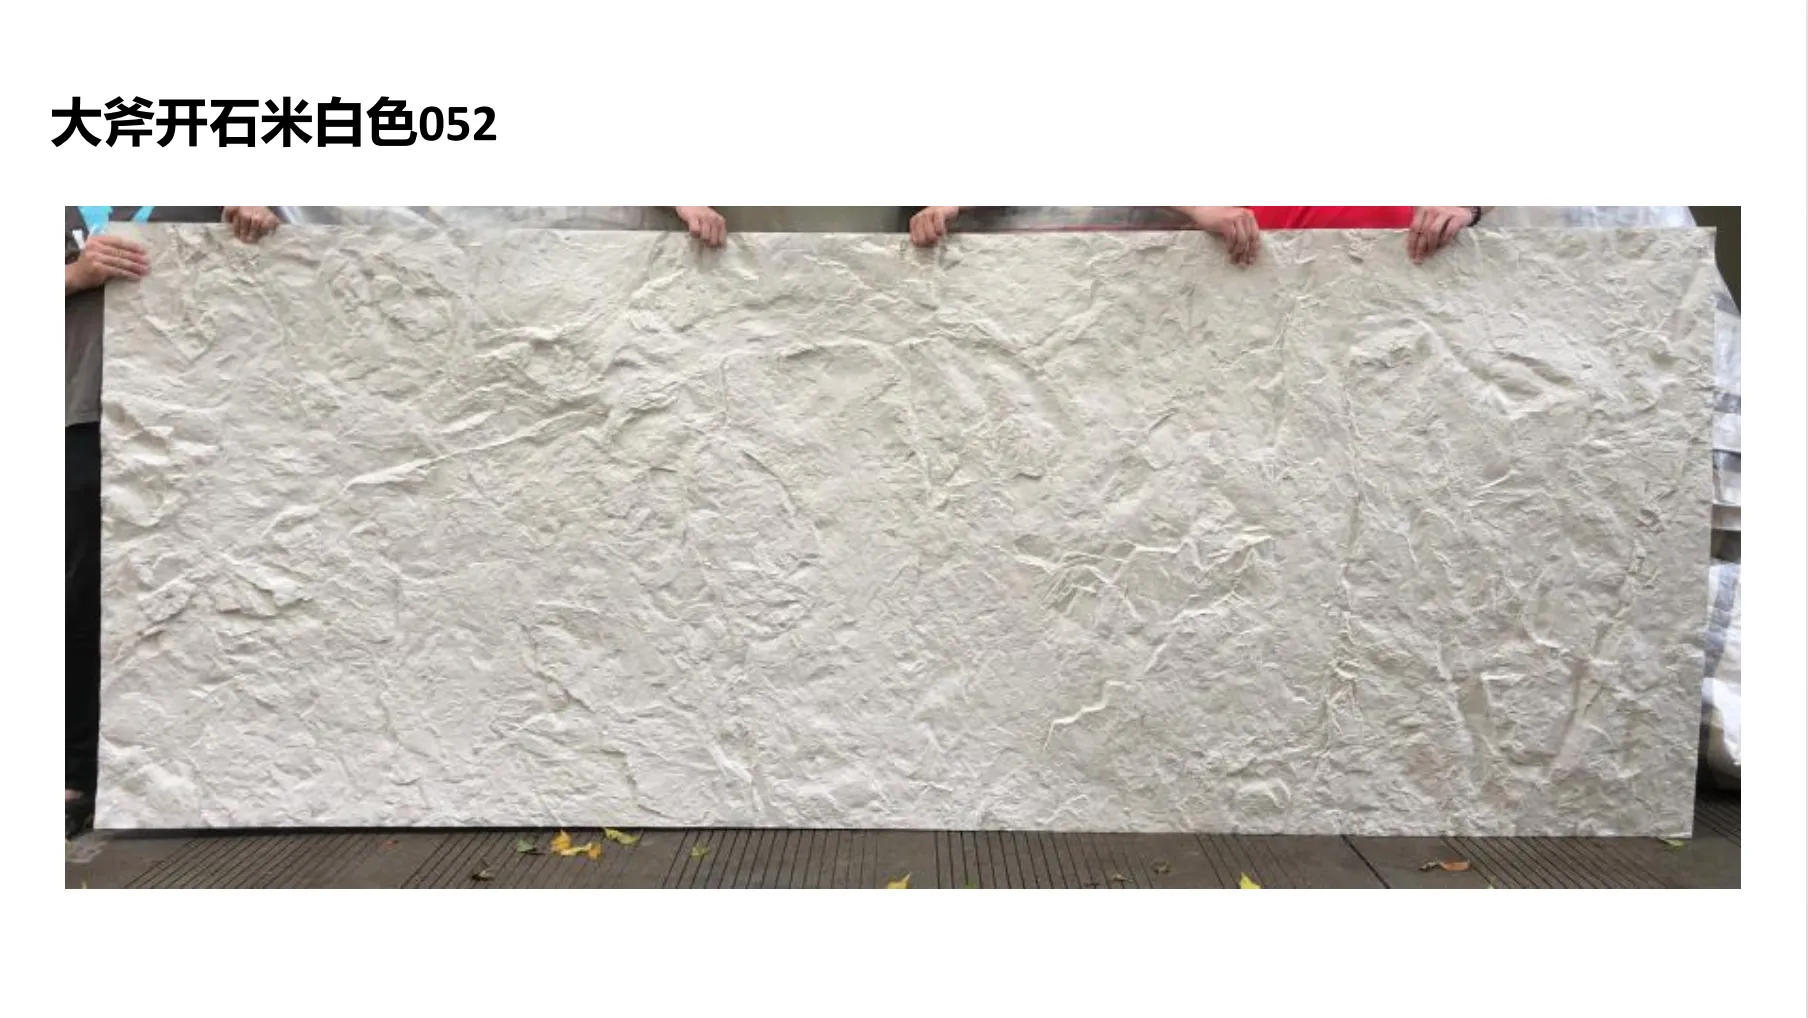
There's a moment in every renovation or build when a space stops feeling like a "project" and starts feeling like home. For me, that moment usually happens when the walls get their skin—when cold, blank surfaces transform into something that breathes, that tells a story. That's the magic of MCM Project Board Series. More than building materials, they're conversation starters, memory keepers, and a bridge between the raw beauty of nature and the precision of modern design. Today, we're diving into installing one of my favorites: the New Rock Cut Stone . Think of it as stone with a soul—rough-hewn edges that look like they were chiseled by mountain winds, but light enough to handle with your own two hands. Let's get started.
Before we grab our trowels, let's talk about why MCM stands out in a world of generic cladding. Traditional natural stone is stunning, but it's heavy—like, "call in a crane" heavy. And fragile. And expensive. MCM changed the game with MCM flexible stone —a technology that takes real stone (travertine, granite, slate) and bonds it to a lightweight, flexible backing. The result? All the texture, color, and character of natural stone, minus the backbreaking installation and fear of cracks. It's stone that bends, not breaks. Stone that you can carry up a flight of stairs without needing a gym membership.
Take the Travertine (starry green) line, for example. Hold a panel up to the light, and you'll swear you're looking at a slice of a mountain stream—swirls of mossy green, tiny fossilized "stars" (actually air bubbles from ancient mineral springs) that catch the light. Or Rammed Earth Board (gradient) , which mimics the soft, layered hues of desert soil at sunset, fading from terracotta to sand to blush. These aren't just "wall coverings"; they're mood setters. Want a bathroom that feels like a forest grove? Travertine (starry green). A living room that evokes desert calm? Rammed Earth Board (gradient). The options are as endless as your imagination—and because they're lightweight, you're not limited to ground floors. Install them on a balcony, a accent wall, even a ceiling (if you're feeling bold).
Installing MCM New Rock Cut Stone is doable for DIYers, but like any project worth doing, prep is key. Think of it like baking a cake: you wouldn't skip preheating the oven, right? Here's what you'll need. I've even thrown in pro tips—little hacks I've picked up from years of working with these materials.
| Tool/Material | Purpose | Pro Tip |
|---|---|---|
| Notched Trowel | Applies adhesive evenly to the wall and panel back | Use a 1/4-inch notch for New Rock Cut Stone—smaller notches mean less oozing glue! |
| Utility Knife with Carbide Blade | Cutting panels to size (yes, they're that easy to trim!) | Score the front first, then snap—like breaking a chocolate bar. Cleaner edges, less dust. |
| Level (2-foot and 4-foot) | Keeping panels straight—no wonky walls here! | Mark a vertical guideline with a pencil first. Trust me, your future self will thank you. |
| MCM Flexible Stone Adhesive | The "glue" that bonds panels to the wall (use MCM's recommended formula!) | Apply in small sections—adhesive dries fast, so work in 2x2 ft areas to avoid rushing. |
| Grout (Matching or Contrasting) | Filling gaps between panels for a polished look | For New Rock Cut Stone, try a sanded grout in "buff"—it lets the stone's texture shine without clashing. |
| Sponge and Bucket | Cleaning excess grout off panels | Use a damp (not soaking) sponge—too much water can stain Travertine (starry green)! |
Pro move: Lay out your panels on the floor first. This is called "dry fitting," and it's where the design magic happens. Arrange them like a puzzle—swap panels to balance color variations, position larger "feature" pieces (like a Travertine (starry green) panel with extra bubbles) where they'll catch the most light. It's like curating an art exhibit on your wall, and it prevents "uh-oh" moments mid-installation.
Okay, tools gathered, panels laid out—let's make that wall sing. I'm breaking this down into 5 steps, but think of each as a chapter in your project's story. Take your time. Breathe. This isn't just about nailing a panel to a wall; it's about creating a space that feels like *yours*.
MCM panels bond best to smooth, clean, dry surfaces. If your wall is old drywall, patch any holes with spackle and sand until it's as smooth as a baby's cheek. If it's concrete, scrub off dust and grease with a degreaser—no exceptions. I once skipped this step (rushed, of course) and had a panel pop off six months later. Lesson learned: the wall needs to be as ready for the stone as the stone is for the wall. Once clean, apply a coat of MCM's primer (it's specially formulated for flexible stone). Let it dry 24 hours—patience, grasshopper. This primer is like a first date: it sets the tone for a long, happy relationship.
Remember those panels you laid out? Now it's time to trim them to fit. Grab your tape measure and pencil—measure the wall height and width, then mark your panels. For corners or outlets, use a template (trace the shape onto paper, then cut the panel to match). I like to mark the back of the panel with a pencil—no need to worry about visible marks, since the adhesive will cover them. When cutting, use that carbide blade I mentioned earlier. Score the front (the stone side) firmly along your line, then flip the panel over and press gently—*snap*—it'll break cleanly. Pro move: Wear safety glasses. Stone dust is fine, but you don't want it in your eyes while you're channeling your inner Michelangelo.
Adhesive isn't just glue—it's the promise that your panels will stay put through rain, humidity, and the chaos of daily life. Stir MCM's adhesive thoroughly (it's thick, like peanut butter) and apply it to the wall in a "U" pattern, then use the notched trowel to comb it into ridges. Do the same to the back of the panel—this "double-bond" method ensures zero air pockets. I once met a contractor who skipped the panel back adhesive to save time. His panels lasted 3 years. Mine? 8 and counting. Double-bond, always.
Now, pick up that first panel (start at the bottom left, trust me—it's easier to build up). Align it with your vertical guideline, then press firmly, starting from the center and working outward. This pushes out air bubbles—think of it like popping bubble wrap, but way more satisfying. Use a rubber mallet (gently!) to tap the panel into place—you'll hear a solid "thud" when it's seated right. Check with your level—if it's off by even a hair, adjust immediately (adhesive sets in 15-20 minutes, so act fast). Repeat with the next panel, leaving a 1/8-inch gap between them for grout. Stand back every few panels and admire your handiwork—you're doing great!
Let the adhesive cure 24 hours (yes, another day—good things take time). Then grab your grout. Mix it to the consistency of toothpaste, then spread it over the gaps with a rubber float, holding it at a 45-degree angle. Work in small sections—grout dries fast! Wait 10 minutes, then wipe off excess with a damp sponge, rinsing often. This is when the wall really comes alive—the grout frames each panel like a picture, making the texture pop. For New Rock Cut Stone, I love a slightly contrasting grout (say, warm gray with the stone's earthy tones) to highlight those chiseled edges. Let the grout cure 48 hours, then seal it with MCM's stone sealer (it repels water and stains—coffee spills, kid fingerprints, you name it). And just like that—you've done it.
New Rock Cut Stone is a stunner, but don't sleep on MCM's other lines. I recently helped a friend redo her kitchen backsplash with Travertine (starry green) —those "stars" catch the overhead lights and make washing dishes feel like stargazing. Another client used Rammed Earth Board (gradient) on their outdoor patio ceiling, and now it's their favorite spot to watch sunsets. And because MCM panels are weather-resistant, they work indoors and out—no fading, no cracking, even in harsh climates. Want to mix and match? Go for it! A wall with New Rock Cut Stone on the bottom half and Weaving (khaki) panels on top? Bold, beautiful, and totally doable. MCM's beauty lies in its flexibility—not just the stone itself, but the freedom to design without limits.
Installing MCM New Rock Cut Stone isn't just a home improvement project—it's an act of creativity. Every chiseled edge, every swirl of color, every careful press of the trowel is a reflection of you. When friends ask, "Did you hire someone to do this?" you'll smile and say, "I did it myself." And that pride? Priceless. So grab your tools, pick your panels (I'm partial to New Rock Cut Stone and Travertine (starry green), but you do you), and start building. Your wall is waiting to tell its story—and it's going to be amazing.
*P.S. Tag us in your MCM projects—we'd love to see how you've made these materials your own. Happy building!*
Recommend Products


