
Welcome to the official installation guide for COLORIA GROUP's Epoch Stone Big Slabs. You've chosen a revolutionary product for your building's façade, and this guide is here to make sure your installation is as flawless and durable as the material itself. Transforming a building's exterior is a big deal, and using a high-quality product is only half the battle. The other half is expert installation. Whether you're a seasoned professional or a project manager overseeing the work, this comprehensive guide will walk you through every step, ensuring your project reaps all the benefits of this cutting-edge exterior wall cladding. Let's get started on creating a stunning, long-lasting building exterior that stands the test of time.
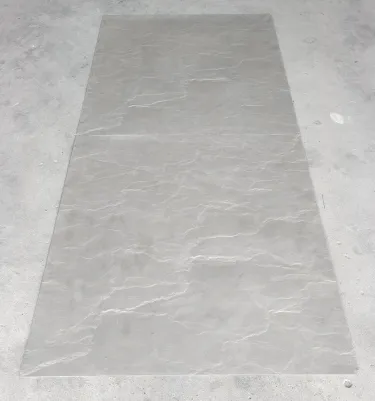
Before we get our hands dirty, let's talk about what makes Epoch Stone so special. It's not just another panel; it's a leap forward in building material technology. Epoch Stone is the premier brand name for our MCM Big Slab Board series, a product born from decades of research and innovation by COLORIA GROUP.
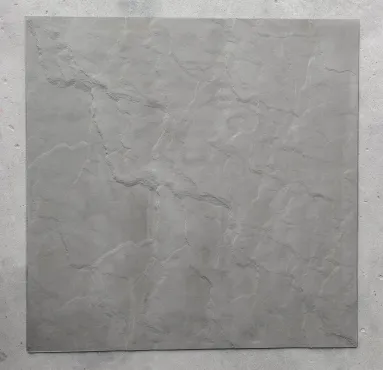
At its core, Epoch Stone is a Modified Cementitious Material (MCM). Think of it as taking the best qualities of natural stone, clay, and cement, and re-engineering them into something better. Through a unique, low-carbon manufacturing process, we create a material that is incredibly versatile, durable, and beautiful. When you choose Epoch Stone, you're not just cladding a wall; you're investing in performance, aesthetics, and sustainability.
A perfect finish starts with perfect preparation. Skipping steps here is a recipe for problems down the road. Take the time to ensure your site, tools, and substrate are ready for the installation.
Having the right gear on hand is non-negotiable. Here's a comprehensive list of what you'll need.
| Category | Item | Notes |
|---|---|---|
| Measuring & Marking | Measuring Tape, Laser Level, Chalk Line, Pencils | Precision is key. A laser level is highly recommended for establishing true horizontal and vertical lines. |
| Cutting | Angle Grinder with Diamond Blade or a Wet Saw | A high-quality continuous rim diamond blade gives the cleanest cuts. A wet saw minimizes dust. |
| Application | Notched Trowel (10-12mm), Mixing Buckets, Power Mixer/Drill with Paddle | The trowel notch size ensures the correct adhesive bed thickness. |
| Setting & Adjusting | Rubber Mallet, Level (4ft or longer), Suction Cups (for large slabs) | Suction cups provide better control and safety when handling large format slabs. |
| Finishing | Caulking Gun, Joint Tooling Spatula, Backer Rods, Masking Tape | Essential for creating professional, weatherproof joints. |
| Consumables | Epoch Stone Slabs, COLORIA Specialized Adhesive, Primer, Joint Sealant | Always use the system-approved materials from your building materials supplier, COLORIA GROUP. |
| Safety | Safety Glasses, Dust Mask (N95), Gloves, Steel-Toed Boots | Personal Protective Equipment (PPE) is mandatory. Cutting generates dust. |
The wall surface (substrate) must be sound, clean, and flat. Epoch Stone can be applied to various substrates like concrete, cement render, blockwork, and exterior-grade cement boards.
Do not install Epoch Stone on damp, dirty, or unsound surfaces. 90% of installation failures are due to improper substrate preparation. Taking shortcuts here will compromise the entire system.
With all the prep work done, it's time for the most rewarding part: installing the Epoch Stone slabs. Work methodically and double-check your alignment at every stage.
Start by establishing your reference lines. Use a laser level and chalk line to snap a perfectly level baseline at the bottom of the installation area. This is where your first row of slabs will sit. Also, snap a vertical (plumb) line at a starting corner. A dry layout (placing slabs on the ground in the intended pattern) is highly recommended for projects with complex patterns or multiple slab sizes. This helps you plan cuts, minimize waste, and ensure the final look is balanced and aesthetically pleasing.
Epoch Stone is easy to cut using the right tools. For straight cuts, a powerful angle grinder with a continuous rim diamond blade works well. Clamp a straightedge to the slab to guide the grinder for a perfectly straight line. For the best quality and minimal dust, a rail saw or a bridge wet saw is the ideal choice. When cutting, always cut from the finished face to minimize chipping on the visible side. Smooth any sharp edges gently with a diamond sanding pad.
Only use the specialized polymer-modified cementitious adhesive recommended by COLORIA GROUP. Mix the adhesive strictly according to the package instructions, using a power mixer to achieve a smooth, lump-free, peanut butter-like consistency. Let it "slake" (rest) for 5-10 minutes, then briefly remix before use.
The best application method is "back-buttering." First, apply the adhesive to the substrate using the flat side of the trowel, pressing it firmly onto the surface. Then, comb the adhesive with the notched side of the trowel, holding it at a 45-degree angle to create uniform ridges. Finally, apply a thin, flat "skim coat" of adhesive to the back of the Epoch Stone slab. This two-sided application ensures 100% adhesive coverage, which is critical for exterior wall cladding to prevent water ingress and frost damage.
Only apply as much adhesive to the wall as you can cover with slabs within the adhesive's "open time" (typically 15-20 minutes). If the adhesive starts to skin over, it must be scraped off and fresh adhesive applied.
Carefully place the back-buttered slab onto the adhesive bed on the wall, starting at your baseline and corner reference line. Use heavy-duty suction cups for better control of large slabs. Press the slab firmly into place with a slight twisting or sliding motion to collapse the adhesive ridges and ensure full contact.
Immediately check the slab for level and plumb. Use a rubber mallet to gently tap the slab into its final position. Place tile spacers between the slabs to maintain a consistent joint width (typically 3-10mm, depending on design).
Continue the process, working your way up and across the wall. Continuously check your work with a long level across multiple slabs to ensure a flat, lippage-free surface. Any excess adhesive that squeezes out into the joints or onto the face of the slabs should be cleaned off immediately with a damp sponge and clean water. Letting the adhesive dry on the face will make it very difficult to remove later.
For outside corners, miter cuts at a 45-degree angle on both joining slabs will produce the most professional, monolithic stone look. For inside corners, a simple butt joint is usually sufficient, with the joint sealed later. When cutting around windows, doors, and other openings, take precise measurements and transfer them carefully to the slab before cutting.
The job isn't done until the joints are sealed and the wall is clean. This final stage is crucial for both the long-term weatherproofing and the final aesthetic of the façade.
After the adhesive has fully cured (typically 24-48 hours), you can begin sealing the joints.
Once the sealant has cured, perform a final cleaning of the entire wall. Use a pH-neutral cleaner and a soft-bristled brush or sponge with clean water. Avoid harsh acids or abrasive cleaners, as they could damage the slab's surface. Rinse thoroughly with clean water to remove any cleaning residue.
One of the best features of an Epoch Stone façade is its low-maintenance nature. The dense, non-porous surface resists dirt, pollution, and biological growth. Generally, normal rainfall is sufficient to keep the surface clean. In areas with low rainfall or high pollution, an occasional wash with a mild detergent and water is all that is needed.
We recommend an annual visual inspection of the façade, paying close attention to the sealed joints. If any sealant shows signs of cracking or pulling away, it should be cut out and replaced to maintain the system's weather-tightness. Thanks to its robust composition, your Epoch Stone exterior will maintain its color and integrity for many years, providing lasting beauty and protection for your building.
Can Epoch Stone be installed over existing cladding like brick or tiles?
It depends. The existing cladding must be extremely well-bonded, clean, and flat. It's often safer and better in the long run to remove the old cladding and prepare the original substrate. However, installing over a sound layer of cement render is common. Always consult a technical representative from COLORIA GROUP for project-specific advice.
What is the fire rating of Epoch Stone?
Our Epoch Stone MCM Big Slab Board series achieves the highest fire-resistance classification, Euroclass A1 or its equivalent. This means it is non-combustible and does not contribute to fire, making it one of the safest choices for exterior wall cladding on buildings of any height.
How does the material perform in very hot or cold climates?
Epoch Stone is engineered for global performance. It has undergone extensive freeze-thaw cycle testing and performs exceptionally well in cold climates. Its stable composition and UV-resistant pigments also mean it resists fading and degradation in intensely hot, sunny environments, such as those in Saudi Arabia where we have a strong presence.
You mentioned MCM Flexible Stone. How is that different?
That's a great question! Our MCM Flexible Stone is part of the same family of materials but is specifically engineered to be thinner and more pliable. While Epoch Stone big slabs are perfect for large, flat or gently curved façades, our MCM Flexible Stone is the ideal solution for wrapping columns, covering sharply curved walls, and for interior applications where a lightweight, highly flexible stone veneer is needed. They are complementary products in the COLORIA GROUP ecosystem.
Is it really a sustainable choice?
Absolutely. We are very proud of its green credentials. The production process for our eco-friendly building materials uses unfired technology, consuming a fraction of the energy of traditional ceramics or cement production. It's made from natural mineral powders and can include recycled materials. Its lightweight nature also reduces transportation-related carbon emissions. It's a key part of our commitment to a more sustainable construction industry.
By following this guide, you are ensuring that your investment in COLORIA GROUP's Epoch Stone will deliver its full potential. You're creating more than just a protective skin for a building; you are crafting a durable, beautiful, and sustainable architectural statement. The combination of this revolutionary MCM Big Slab Board and a meticulous installation process results in a high-performance façade that will look incredible and perform flawlessly for decades. Welcome to the new era of exterior design.
Recommend Products


