
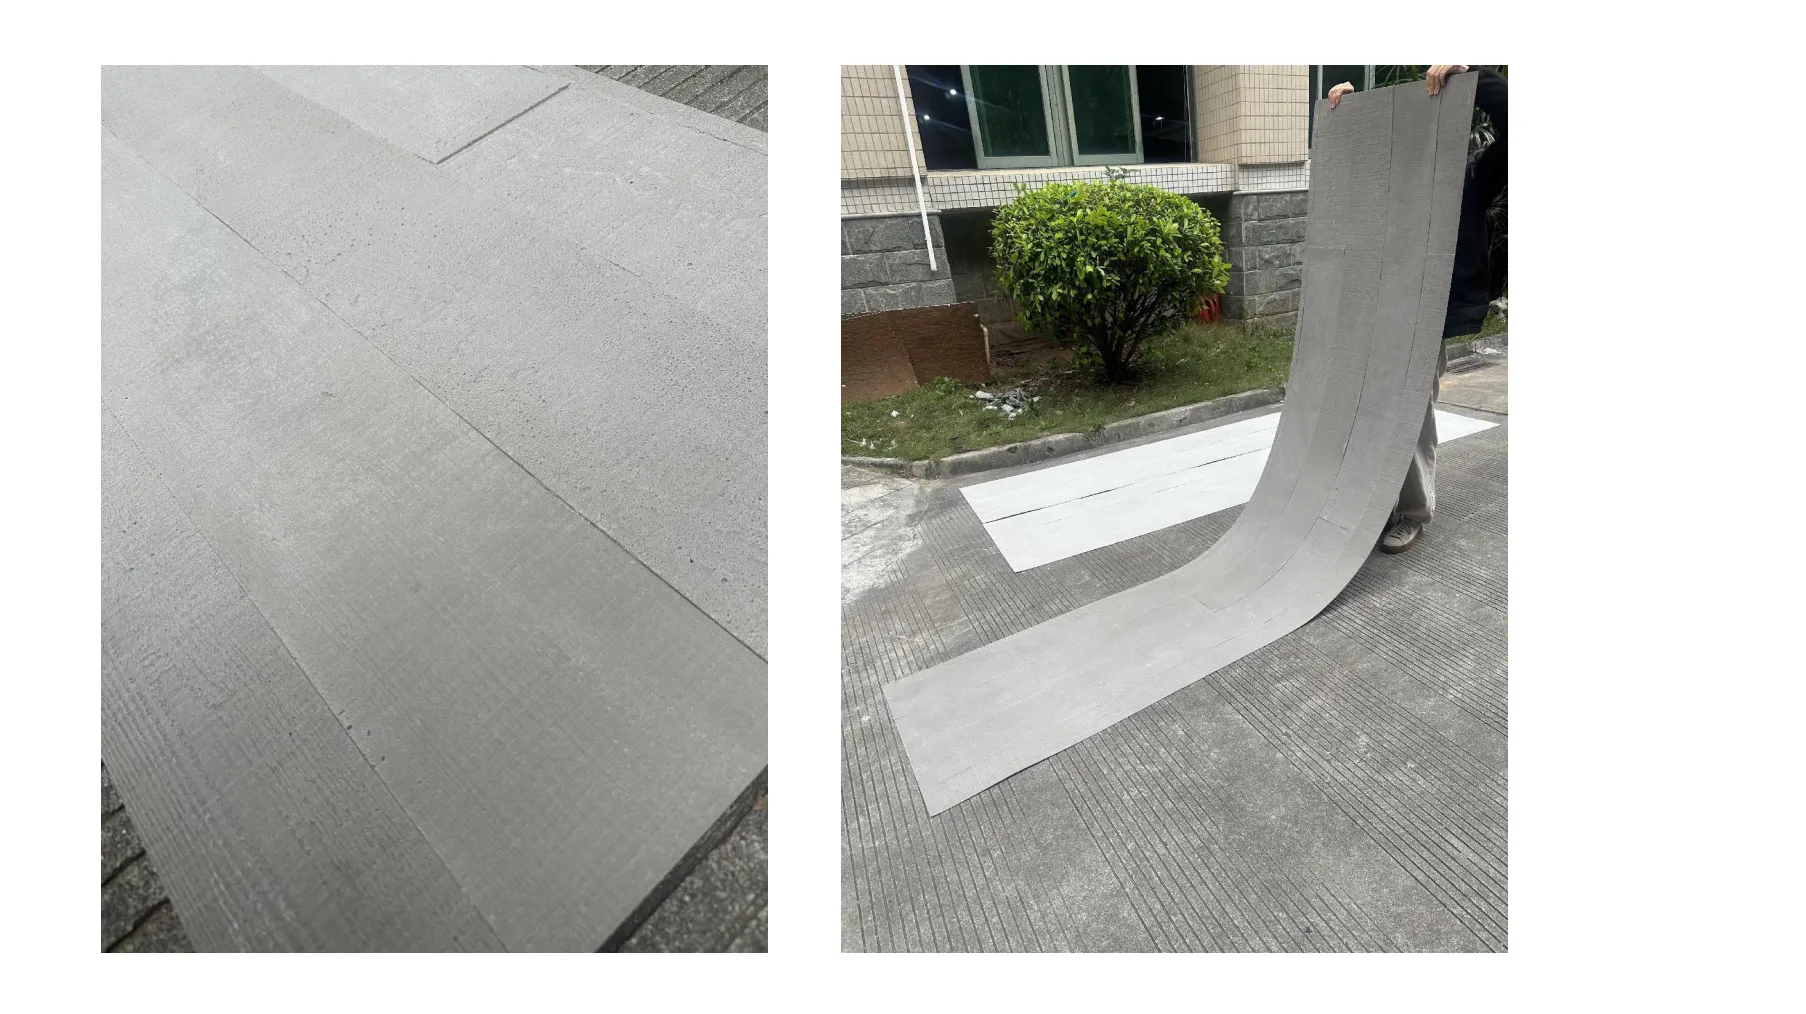
In the world of interior and exterior design, the quest for materials that marry durability, aesthetics, and ease of use is never-ending. Enter MCM wood-cement boards—a standout in the MCM big slab board series that's redefining how we think about wall and surface cladding. Blending the warm, organic texture of wood with the rugged resilience of concrete, these boards offer a versatility that appeals to homeowners, architects, and designers alike. What makes them even more impressive? Their flexible stone technology, which allows for seamless installation even with large-format slabs, turning once-daunting projects into manageable tasks.
Whether you're revamping a commercial space, upgrading your home's facade, or adding a statement wall in the living room, MCM wood-cement boards deliver. They're lightweight yet tough, resistant to moisture and fire, and come in finishes that mimic everything from weathered oak to fair-faced concrete —perfect for pairing with complementary materials like travertine (beige) for a layered, timeless look. But as with any premium material, the key to unlocking its full potential lies in proper installation. Let's dive into the step-by-step process of installing MCM wood-cement big slabs, breaking down each stage to ensure your project is both successful and stunning.
Before diving in, gather these essentials to keep the process smooth. Having the right tools on hand prevents delays and ensures precision:
| Tool/Material | Purpose |
|---|---|
| Measuring tape & straightedge | To take accurate dimensions of the installation area and mark cuts |
| Spirit level (24-inch or longer) | Ensures slabs are perfectly horizontal and vertical, preventing unevenness |
| Notched trowel (1/4-inch or 1/2-inch teeth) | Applies adhesive evenly, creating ridges that bond slabs securely to the substrate |
| Circular saw with masonry blade | Cuts large slabs to size without chipping or cracking the surface |
| Polyurethane adhesive (MCM-recommended) | Specially formulated to bond MCM materials to substrates like concrete, drywall, or wood |
| Plastic spacers (2-3mm) | Maintains consistent gaps between slabs for grouting (if desired) and expansion |
| Silicone sealant (clear or color-matched) | Seals edges and gaps to prevent moisture intrusion, especially in wet areas |
Start by evaluating the installation area. Walk the space to check for uneven surfaces, cracks, or structural issues—these can derail even the most careful installation. For walls, use a stud finder to locate support beams; for floors, check for sloping with a long level. Measure the height and width of the area, then calculate the number of slabs needed. Always add 10% to your total to account for cuts, waste, or mistakes. Pro tip: Sketch a rough layout on paper, noting where outlets, windows, or fixtures will require custom cuts—this saves time later when you're knee-deep in adhesive!
A clean, flat substrate is non-negotiable for adhesion. Remove any existing cladding, wallpaper, or debris, and fill cracks or holes with a patching compound (use a rapid-setting formula for faster drying). Sand rough spots until the surface feels smooth to the touch. For concrete walls or floors, etch the surface with a mild acid solution (follow manufacturer instructions) to create texture—this helps the adhesive grip better. For drywall, apply a primer to seal the surface and prevent moisture absorption. If installing outdoors, ensure the substrate is weatherproofed; fair-faced concrete works exceptionally well here, as its porous texture bonds naturally with MCM adhesives.
Unpack your MCM wood-cement slabs and inspect each for defects—chips, warping, or color inconsistencies. Arrange them on the floor first to visualize the layout; mix and match slabs from different boxes to ensure a uniform look (batch variations can occur). When cutting, mark measurements with a pencil and straightedge, then secure the slab to a workbench with clamps. Use a circular saw with a masonry blade, cutting slowly and steadily to avoid splintering the wood-grain finish. For intricate cuts (like around outlets), use a jigsaw with a fine-tooth blade. Always wear safety goggles and a dust mask—cutting MCM materials produces fine particles!
Now for the "glue" that holds it all together. Use a notched trowel to apply MCM-recommended polyurethane adhesive to the substrate, holding the trowel at a 45-degree angle to create uniform ridges. Cover only as much area as you can work with in 20-30 minutes—adhesive dries quickly, and you don't want it to set before placing the slab. For vertical installations (like walls), apply adhesive to both the substrate and the back of the slab (this is called "buttering") to prevent slippage. Avoid applying adhesive too thickly; a 1/4-inch layer is usually sufficient, but adjust based on the slab's weight (larger MCM big slab board series pieces may need a bit more).
Start from the bottom corner of the wall or the center of the floor (for larger areas) to maintain symmetry. Press the slab firmly into the adhesive, wiggling it slightly to ensure full contact with the ridges—you should see a small amount of adhesive squeeze out the edges (this means good coverage). insert plastic spacers along the sides to keep gaps consistent. Use a spirit level to check for levelness both horizontally and vertically; adjust immediately if the slab tilts (don't wait for the adhesive to set!). Continue working in rows, staggering the joints like brickwork to structural integrity. For vertical installations, use temporary supports (like wooden braces) to hold slabs in place while the adhesive cures—this is especially important for MCM big slab board series pieces, which can be heavy when wet.
Once all slabs are in place, let the adhesive cure for 24-48 hours (check the product label for exact times). Remove the spacers, then fill gaps with grout if desired—choose a color that complements your slabs (e.g., a warm beige grout for travertine (beige) accents). Wipe away excess grout with a damp sponge, working diagonally to avoid pulling grout out of the joints. After grout dries, apply a silicone sealant to edges, corners, and around fixtures to waterproof the installation. Finally, buff the slabs with a dry cloth to bring out their natural sheen—you'll be amazed at how the wood-grain texture pops!
With proper maintenance, your installation will last for decades. Sweep or vacuum regularly to remove dirt, and wipe spills immediately with a damp cloth. Avoid harsh cleaners (like bleach or abrasive scrubs), as they can damage the finish. Reseal the surface every 2-3 years with a water-based sealer to maintain water resistance—more often if installed in high-moisture areas like bathrooms or kitchens. For scratches, lightly sand the area with fine-grit sandpaper and reapply sealant. With minimal effort, your MCM wood-cement slabs will retain their beauty, even in high-traffic spaces.
Installing MCM wood-cement big slabs is more than a construction task—it's an investment in a surface that balances form and function. By following these steps, you'll transform raw materials into a stunning feature that elevates your space. Whether paired with flexible stone accents, fair-faced concrete walls, or travertine (beige) details, these slabs prove that durability and beauty don't have to be mutually exclusive. So grab your tools, trust the process, and get ready to enjoy a surface that's as tough as it is timeless.
Recommend Products


