
If you've been in the contracting game for a while, you know that certain materials have a way of making a project feel special. Marble Stream Stone is one of those materials. With its flowing, river-like patterns and subtle sheen, it's the kind of cladding that turns a ordinary building facade into something clients will brag about for years. But here's the thing: working with Marble Stream Stone isn't like slapping up standard siding. It's got personality—weight, texture, and a few quirks that demand attention. Whether you're tackling a high-end residential project or a commercial space aiming for that "wow" factor, getting the installation right is key. In this guide, we're breaking down everything you need to know, from pre-job prep to the final seal. We'll even toss in a few pro tips we've picked up over the years—because let's face it, nothing beats learnin' from someone who's been there.
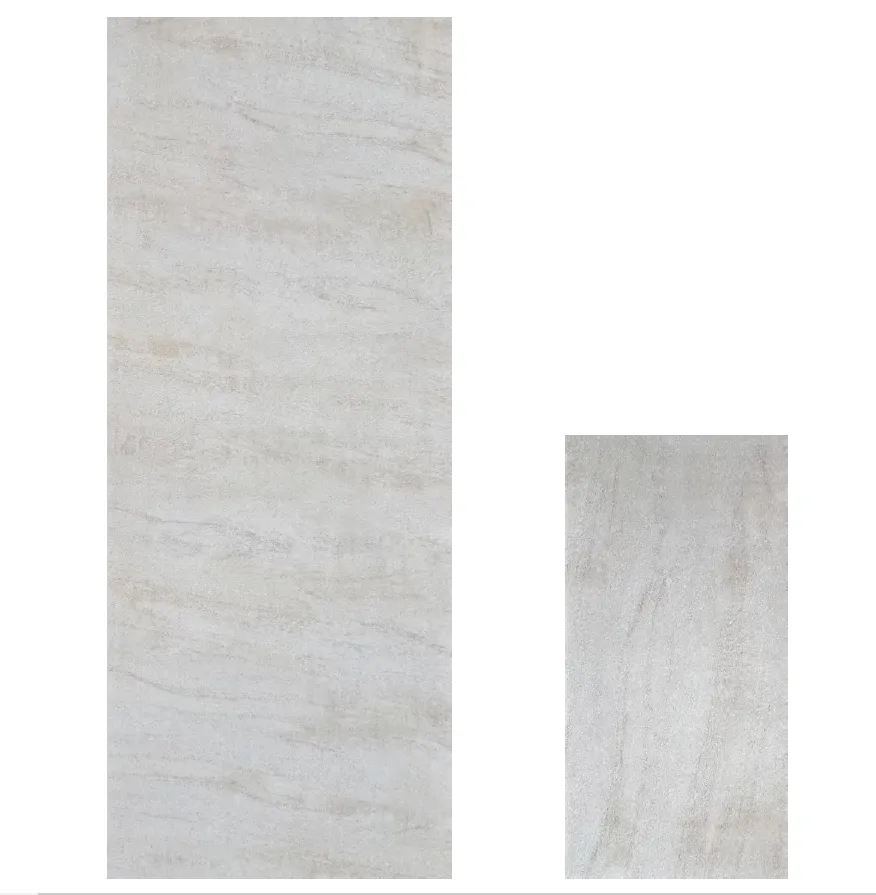
Before you even unload the first pallet, take a minute to get acquainted with Marble Stream Stone. Unlike, say, Fair-Faced Concrete —which is all about raw, industrial texture—Marble Stream Stone is a natural stone composite, part of the broader MCM Big Slab Board Series . That means it's durable, weather-resistant, and designed to mimic the look of quarried marble without the hassle of massive slabs. But don't let the "composite" label fool you: each panel has unique veining, so you'll want to lay them out like a puzzle before installation to ensure the pattern flows. Think of it like arranging tiles for a backsplash, but on a much bigger (and heavier) scale.
And while we're on the topic of material families, it's worth noting how Marble Stream Stone stacks up against other options in your toolkit. Take Flexible Stone Cladding Panels , for example. Those are lightweight, bendable, and great for curved surfaces—but they don't have the same heft or luxury feel as Marble Stream Stone. On the flip side, Travertine (Starry Blue) (a close cousin in the decorative stone world) has more porous, pitted texture, which means different sealing needs. The point? Knowing what makes Marble Stream Stone unique helps you plan for its specific needs—like extra support for its weight or precision in cutting to preserve those signature veins.
Pro Tip: When your shipment arrives, do a "dry layout" in a garage or empty space. Lay out all panels, flip 'em if needed, and rearrange until the veining looks natural. Take photos of the layout so you can reference 'em later when installing. Trust us—this saves hours of head-scratching on-site.
You've heard it a hundred times: "Measure twice, cut once." But with Marble Stream Stone, prep work goes way beyond measurements. Let's break it down into three non-negotiable steps.
Start by eyeballing the surface where you'll be installing the panels. Is it flat? Any cracks, bumps, or water damage? Marble Stream Stone is unforgiving—even a 1/8-inch dip can throw off the entire facade. Grab a 4-foot level and run it horizontally and vertically across the wall. Mark any high spots with a pencil; you'll need to grind those down. Low spots? Fill 'em with a high-quality mortar mix (we like using a polymer-modified version for extra adhesion). And don't forget about moisture: if the wall's been leaking or has high humidity, address that first. Trapped moisture under the panels can lead to mold, adhesive failure, or even staining—none of which your client will appreciate.
Here's a scenario we've seen too many times: a contractor skips moisture testing, installs the panels, and six months later, the stone starts to discolor. Turns out, the wall had a hidden leak, and the water seeped into the stone's pores. The fix? Tearing out panels, repairing the leak, and starting over. Save yourself the headache—use a moisture meter. Aim for readings below 15% before moving forward.
Unpack each panel carefully (wear gloves—those edges can be sharp!) and inspect for chips, cracks, or color inconsistencies. Marble Stream Stone is made in batches, and sometimes a panel might have a factory defect—a bubble in the resin, a vein that looks off, or a corner that's chipped during shipping. Set aside any questionable panels; most suppliers will replace 'em if you report 'em within 48 hours of delivery. It's also smart to check the thickness of each panel. Even within the same batch, panels can vary by 1/16 inch or so. Sort 'em by thickness and group similar ones together—this helps when aligning rows later. Thinner panels can go on lower sections where weight is less of an issue; thicker ones on upper walls where support is sturdier.
And hey, while you're at it, take a look at the MCM Big Slab Board Series specs again. These panels are heavier than standard cladding—usually 8-10 pounds per square foot. That might not sound like much, but multiply that by 500 square feet, and you're looking at 4,000+ pounds. Make sure your wall structure can handle the load. If you're installing over wood framing, check that the studs are 16 inches on center and rated for exterior use. For masonry walls, confirm the mortar is in good shape—no crumbling or loose bricks.
Once the wall is flat and structurally sound, it's time to prep the surface. Start by cleaning it thoroughly. Dust, dirt, or old paint will prevent the adhesive from sticking. Use a pressure washer (set to 1,500 PSI—too high and you might damage the wall) or a stiff-bristle brush with mild detergent. Rinse well and let it dry completely—at least 24 hours. If you're in a hurry (and who isn't?), use a leaf blower to speed up drying, but avoid high heat—you don't want to warp any existing materials.
For concrete or masonry walls, you'll need to apply a bonding agent. This helps the adhesive grip better. We recommend a latex-based bonding primer—roll it on evenly and let it dry until tacky (usually 1-2 hours). For wood walls, add a layer of exterior-grade plywood first, then the bonding agent. And if you're installing over Fair-Faced Concrete , sand the surface lightly with 80-grit sandpaper to rough it up—smooth concrete doesn't give the adhesive much to grab onto.
You don't need a fancy tool collection, but having the right gear makes a world of difference. Here's a breakdown of must-haves, plus a few "nice-to-haves" that'll save time:
| Tool | Purpose | Pro Tip |
| Diamond Blade Saw | Cutting panels to size (wet saw for best results—reduces dust) | Use a 10-inch blade with a continuous rim for clean cuts; replace blades after 50+ cuts to avoid chipping |
| Notched Trowel | Applying adhesive (use 1/2-inch notches for Marble Stream Stone) | Hold the trowel at a 45-degree angle to ensure even coverage |
| Rubber Mallet | Tapping panels into place without damaging edges | Wrap the mallet in a towel to prevent scuffing the stone |
| Spirit Level (2-foot and 4-foot) | Ensuring panels are plumb and level | Check level after tapping each panel—even a small shift can add up |
| Grout Float | Applying grout between panels | Use a rubber float with a soft edge to avoid scratching the stone |
| Sealant Gun | Applying silicone caulk around edges and penetrations | Use a color-matched caulk (we prefer clear or off-white for Marble Stream Stone) |
Skip the cheap tools here. A flimsy trowel will leave uneven adhesive; a dull saw blade will chip the stone. Invest in quality—your hands (and your reputation) will thank you.
Okay, prep's done, tools are ready—let's install some stone. We'll walk through this like we're right there with you, step by step.
Start by finding the center of the wall. Measure the width and mark the midpoint with a pencil. Using a chalk line, snap a vertical line through that midpoint—this is your reference line. Then, decide where the bottom row of panels will go. Most contractors start 1/2 inch above the ground (to prevent water splashing up) or at the base of the wall if there's a foundation ledge. Snap a horizontal chalk line here. Now, measure the height of your panels (standard is 24 inches, but check your specs) and snap horizontal lines every 24 inches up the wall. These lines will keep your rows straight—no more "eyeballing it" and ending up with a wavy facade.
Pro Tip: If the wall isn't perfectly square (and let's be real, most aren't), adjust your layout lines so the panels are plumb, even if that means the top row is slightly narrower than the bottom. Clients notice crooked lines way more than a 1-inch difference in panel width at the top.
Measure twice, cut once—seriously, we can't say it enough. For straight cuts, mark the panel with a pencil and straightedge, then clamp it to a workbench. Use a wet saw with a diamond blade; the water keeps dust down and cools the blade, preventing overheating. For curves or notches (around windows, outlets, or corners), use a angle grinder with a diamond blade. Go slow—rushing leads to jagged edges. And always wear safety gear: goggles, a dust mask, and gloves. We once had a guy skip goggles and get a stone chip in his eye—he was out of work for two weeks. Not worth it.
If you're cutting a lot of panels, set up a cutting station away from the installation area. Stone dust gets everywhere, and you don't want it mixing with your adhesive. Clean up the cut edges with a sanding block to smooth any rough spots—this helps panels fit together tighter, reducing grout lines.
Now for the fun part: sticking panels to the wall. Use a high-quality, polymer-modified thinset mortar designed for natural stone. Avoid generic adhesives—they might not stand up to the weight of Marble Stream Stone. Scoop a dollop of thinset onto your notched trowel and spread it evenly over a 2x2-foot section of the wall (don't try to cover the entire wall at once—thinset dries fast). Hold the trowel at a 45-degree angle and comb the adhesive in one direction—this creates ridges that collapse when you press the panel, ensuring full contact.
Here's a trick we learned from an old timer: back-butter the panels. That means spreading a thin layer of thinset on the back of the panel too. It adds extra adhesion and fills any small gaps between the panel and the wall. Just don't go overboard—too much thinset will squeeze out the sides and make a mess. Aim for 1/16-inch thickness on the back.
Lift the panel (get a helper—these things are heavy!) and align it with your layout lines. Press it firmly against the wall, then give it a few gentle taps with the rubber mallet (wrapped in a towel, remember?) to set it in place. Check with your level—both horizontally and vertically. If it's off, gently pry it up with a putty knife, adjust the thinset, and try again. Don't force it—you'll end up with a cracked panel or uneven adhesive.
Work in small sections, starting from the center reference line and moving outward. This keeps the pattern balanced. And stagger the joints—like brickwork. If you line up the vertical seams, the wall will look like a giant checkerboard, which is never the goal. Staggering adds visual interest and makes the facade stronger (think of it like how a brick wall resists pressure better than a wall of stacked blocks).
Let the adhesive dry for at least 24 hours before grouting—patience here prevents panels from shifting. Mix the grout according to the manufacturer's instructions; it should be the consistency of peanut butter. Use a rubber grout float to press the grout into the joints, holding the float at a 45-degree angle. Work diagonally across the panels to avoid dragging grout out of the seams. Let the grout set for 15-20 minutes, then wipe off the excess with a damp sponge (not soaking wet—you don't want to wash out the grout). Rinse the sponge frequently and change the water often—dirty water leaves streaks.
Pro move: After the initial wipe, wait another hour, then buff the panels with a dry microfiber cloth to remove any haze. Haze is that annoying film that forms on the stone—if you let it sit overnight, it's a nightmare to remove. Trust us, we've spent hours scrubbing haze off Travertine (Starry Blue) panels because someone skipped the final buff. Not fun.
The final step? Sealing. Marble Stream Stone is porous, so it needs a good sealer to repel water, dirt, and stains. Wait at least 72 hours after grouting for everything to dry completely. Then, apply a penetrating sealer (we recommend a water-based, breathable sealer) with a foam roller or sprayer. Work in small sections, wiping off excess sealer with a cloth after 5 minutes. Let it dry for 24 hours, then apply a second coat. For high-traffic areas or exteriors in rainy climates, add a third coat—better safe than sorry.
And hey, while you're sealing, take a minute to admire your work. That's the beauty of this job—when you step back and see a wall that was once just studs and concrete now transformed into something that looks like it was carved by nature? That's the reward.
Even the best-laid plans hit snags. Here's how to fix common issues with Marble Stream Stone installation:
Why it happens: High spots in the wall weren't ground down, or adhesive was applied unevenly. Fix: If the panel is still wet (within 1-2 hours of installation), gently pry it up, grind down the high spot, reapply adhesive, and reset. If it's dry, you might need to remove the panel (use a heat gun to soften the adhesive), fix the surface, and reinstall with new adhesive.
Why it happens: Surface was dirty, too moist, or the adhesive was old (check the expiration date!). Fix: Remove the panel, clean the surface with rubbing alcohol, let it dry, then reapply fresh adhesive. If the wall is too moist, use a dehumidifier or fans to dry it out before trying again.
Why it happens: Grout was mixed too thin, or the joints are too narrow (less than 1/8 inch). Fix: Rake out the cracked grout with a grout saw, mix a new batch (thicker this time), and regrout. For narrow joints, use unsanded grout—it's more flexible and less likely to crack.
Your job isn't done when the last panel is sealed. Give your client a quick maintenance guide to keep their Marble Stream Stone looking fresh:
Compare this to Flexible Stone Cladding Panels , which are lower-maintenance but don't have the same longevity. Marble Stream Stone, when cared for, can last 50+ years—so those maintenance tips are worth passing along.
Installing Marble Stream Stone isn't easy. It takes time, precision, and a little bit of patience. But when you're finished, and your client walks up to that wall, runs their hand over the smooth, flowing veins, and says, "Wow—this is exactly what I imagined," all that hard work pays off. And let's be honest—there's no better marketing than a beautiful, well-installed facade. Neighbors, passersby, even other contractors will notice. That's how you build a reputation.
So remember: prep thoroughly, take your time, and don't cut corners. Whether you're working with Marble Stream Stone, Travertine (Starry Blue) , or the MCM Big Slab Board Series , the basics stay the same. And if you ever hit a snag, just think back to this guide—or give a fellow contractor a call. We're all in this together, after all.
Now go out there and make that wall shine.
Recommend Products


