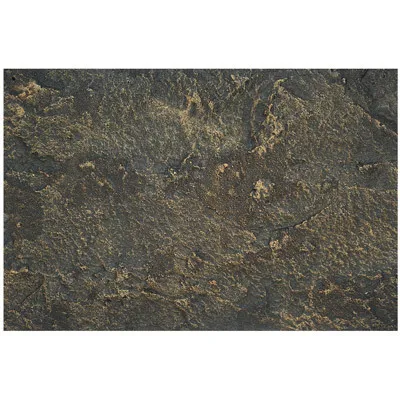
Hey there, fellow contractors! Welcome to the ultimate guide for working with
Lunar Peak Golden MCM. If you're looking to deliver top-notch residential and commercial projects, you've landed in the right place. We know that every project is a big deal, and getting the installation right is absolutely crucial for both aesthetics and durability. That's why we've put together this comprehensive guide, packed with insights and best practices to help you master the art of installing our incredible Modified Cementitious Material (
MCM
) products.
At
Lunar Peak Golden, we pride ourselves on being a
one-stop solution provider
in the architectural materials arena. We're all about making your life easier, offering a range of high-quality interior and exterior finishes that are not only beautiful but also sustainable. Our expertise spans decades, with a global reach and a strong foothold in places like Saudi Arabia, ensuring we understand diverse construction needs. So, whether you're dealing with our striking
MCM Big Slab Board
series or our versatile
MCM Flexible Stone
, this guide will arm you with the knowledge to achieve flawless results every single time. Let's dive in!
Chapter 1: Understanding Lunar Peak Golden MCM – The Foundation
Before we get our hands dirty with the installation, let's take a moment to truly appreciate what you're working with.
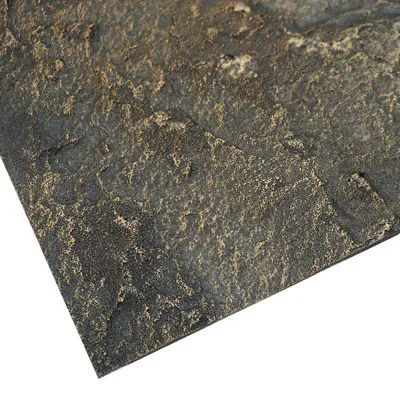
Lunar Peak Golden MCM isn't just another building material; it's a revolutionary product designed for modern construction. Modified Cementitious Material, or MCM, is an innovative blend of inorganic mineral powder, organic fibers, and other aggregates, processed through a unique low-temperature baking and forming technology. This gives it exceptional properties that traditional materials often lack.
1.1 What Makes MCM Special?
-
Flexibility:
Unlike rigid ceramics or natural stone, MCM products, especially our
MCM Flexible Stone
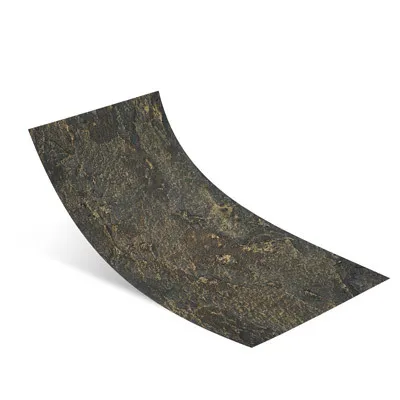
, can bend and contour to various surfaces without breaking. This opens up a world of design possibilities, especially for curved walls or intricate architectural details.
-
Lightweight:
This is a game-changer! MCM panels are significantly lighter than traditional stone or ceramic tiles, reducing the load on your building structure and simplifying transportation and handling on-site. Less weight means easier installation and lower structural requirements.
-
Durability:
Don't let the flexibility fool you; MCM is incredibly tough. It's resistant to UV, frost, heat, and moisture, making it ideal for both interior and exterior applications, even in harsh climates.
-
Eco-friendly:
This is a core value for Lunar Peak Golden. Our MCM products are made from natural, non-toxic materials, consume less energy in production, and are often recyclable. Choosing MCM means you're contributing to a greener build. We truly believe in providing
eco-friendly building materials
that don't compromise on performance.
-
Customization:
We mentioned this earlier, but it bears repeating. MCM can be produced in a vast array of colors, textures, and finishes, mimicking natural stone, wood, brick, and more. This allows for incredible design freedom and project-specific solutions. Our MCM Big Slab Board and 3D Printing Series are perfect examples of this versatility.
-
Safety:
MCM is fire-resistant and non-combustible, adding an extra layer of safety to your projects.
1.2 Product Series Overview (Relevance to Installation)
-
MCM Big Slab Board Series:
These large format panels are fantastic for creating seamless, grand surfaces, but require careful handling due to their size. Precision in cutting and alignment is key here.
-
MCM Project Board Series:
Designed for broader architectural applications, these are often more uniform and ideal for large-scale commercial projects. Efficiency in installation is a priority.
-
MCM 3D Printing Series:
Offers unique textures and patterns, allowing for truly bespoke designs. Installation involves matching patterns and potentially more intricate cuts.
-
MCM Flexible Stone:
Our most versatile series, perfect for curved surfaces, columns, and even furniture cladding. The flexibility aids in a smooth, adaptive application.
Chapter 2: Essential Pre-Installation Steps – Measure Twice, Cut Once (or Never)
Good preparation is the backbone of any successful installation. Skipping these steps is like building a house on sand – it just won't hold up. Take your time here; it will save you headaches and callbacks down the line.
2.1 Site Assessment and Surface Preparation
-
Surface Type:
MCM can be applied to various substrates like concrete, plaster, cement board, existing tiles, and even wood, provided they are stable and properly prepared.
-
Cleanliness:
The surface must be absolutely clean, dry, and free of dust, grease, loose paint, and any other contaminants. A quick wash and thorough drying are often necessary.
-
Soundness:
Check for any loose or crumbling areas. Repair cracks, fill holes, and ensure the substrate is structurally sound. Any weak spots will compromise the adhesion.
-
Flatness and Levelness:
While MCM is flexible, an overly uneven surface will lead to an uneven finish and potential issues with adhesion. For exterior applications, ensure proper drainage slopes are already established. A deviation of no more than 2-3mm over a 2-meter straight edge is generally acceptable.
-
Primer Application:
For optimal adhesion, especially on porous or dusty surfaces, applying a suitable primer is highly recommended. Lunar Peak Golden can advise on the best primer for your specific substrate. Allow the primer to dry completely according to the manufacturer's instructions.
2.2 Tools and Materials Checklist
Having the right tools at hand makes the job smoother and more efficient. Here's a general list, but always cross-reference with your specific project needs:
-
Lunar Peak Golden MCM panels (of course!)
-
Recommended MCM adhesive (specific to Lunar Peak Golden products)
-
Trowel (notched, size depends on MCM thickness and adhesive type)
-
Rubber mallet or roller for firming panels
-
Spirit level, laser level, and measuring tape
-
Utility knife or specialized MCM cutting tools
-
Mixing drill and paddle for adhesive
-
Caulking gun for sealant/grout
-
Spacers (if uniform joint lines are desired)
-
Cleaning cloths, sponges, and water buckets
-
Personal protective equipment (gloves, safety glasses, dust mask)
2.3 Acclimatization and Layout Planning
-
Acclimatization:
Allow the MCM panels to acclimatize to the project site's ambient temperature and humidity for at least 24-48 hours before installation. This helps prevent expansion or contraction issues after installation. Store them flat and protected from direct sunlight or extreme conditions.
-
Dry Lay-out:
This is a crucial step, especially for our
MCM Big Slab Board
series or projects with complex patterns. Lay out the panels dry on the floor or a large flat surface to determine the best arrangement, minimize cuts, and ensure pattern continuity (if applicable). This helps you visualize the final look and make any necessary adjustments beforehand.
-
Starting Point:
For walls, typically start from the bottom-up, or from a central point if symmetry is critical. For floors, begin from the center of the room and work outwards. Always establish a level and plumb starting line.
-
Cutting MCM:
MCM can usually be cut with a sharp utility knife by scoring and snapping for thinner panels, or a saw with a fine-tooth blade for thicker ones. For intricate cuts or our MCM Big Slab Boards, a tile saw or wet saw with a diamond blade might be needed. Always cut from the decorative side to minimize chipping. Remember to wear appropriate safety gear!
Important Safety Note:
Always prioritize safety. Wear gloves, safety glasses, and a dust mask, especially when cutting or mixing adhesives. Ensure proper ventilation in enclosed spaces.
Chapter 3: The Art of Adhesion – Applying Lunar Peak Golden MCM
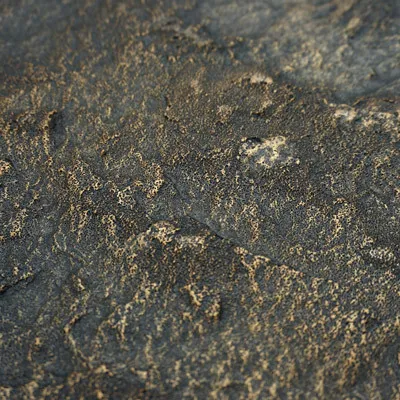
This is where the magic happens! Proper adhesive application is paramount to a durable and beautiful MCM installation. Our recommended adhesives are specifically formulated to work seamlessly with our products.
3.1 Mixing the Adhesive
-
Follow Manufacturer Instructions:
This cannot be stressed enough. Each adhesive has specific mixing ratios and times. Deviating from these can lead to poor performance.
-
Consistent Mix:
Use a mixing drill with a paddle attachment to achieve a smooth, lump-free consistency. Allow the adhesive to "slake" (rest) for the recommended time, then remix briefly before use.
-
Pot Life:
Be aware of the adhesive's pot life – the time it remains workable after mixing. Only mix what you can use within this period.
3.2 Adhesive Application Techniques
-
Trowel Selection:
The size and shape of your notched trowel are critical. Generally, a larger notch is used for larger, heavier panels (like
MCM Big Slab Board
) to ensure full coverage, while smaller notches are for thinner, lighter products. Consult our specific product datasheets for recommendations.
-
Substrate Coverage:
Apply the adhesive evenly to the substrate using the notched trowel. The goal is to achieve at least 85-90% adhesive coverage on the back of the MCM panel when it's pressed into place.
-
Back-Butter (for certain applications):
For larger panels, exterior installations, or rougher substrates, back-buttering the MCM panel (applying a thin, flat layer of adhesive to the back of the panel before applying the notched layer to the substrate) can significantly improve adhesion and coverage. This is especially recommended for our MCM Big Slab Boards and
MCM Flexible Stone
when used externally.
-
Open Time:
Be mindful of the adhesive's "open time" – the maximum time after applying adhesive to the substrate that a panel can still be set and achieve proper bond. Don't spread too much adhesive at once.
3.3 Panel Placement and Alignment
-
Placement:
Carefully place the MCM panel onto the adhesive bed, aligning it with your starting lines and any spacers.
-
Firm Pressure:
Press the panel firmly into the adhesive using hand pressure, a rubber mallet, or a roller. This ensures good contact and squeezes out any trapped air. If using a mallet, tap gently and evenly across the surface.
-
Check for Level and Plumb:
Regularly check panels with a spirit level to ensure they are level and plumb. Adjust immediately if necessary, before the adhesive sets.
-
Joint Spacing:
If you're creating distinct joint lines (common for MCM Flexible Stone mimicking brick or stone), use appropriate spacers to maintain uniform gaps. For seamless installations, panels are often butted tightly together.
-
Clean Excess Adhesive:
Immediately wipe away any adhesive that squeezes out from between the panels or gets onto the face of the panels with a damp sponge or cloth. Once cured, MCM adhesive can be very difficult to remove without damaging the surface.
Caution:
Never use excessive force when adjusting panels, especially larger ones, as this can damage the panel or compromise the adhesive bond. Work systematically and patiently.
Chapter 4: Finishing Touches – Grouting, Sealing, and Protection
Once the panels are securely in place, the finishing touches are what truly bring the project to life and protect your investment for years to come.
4.1 Grouting (If Applicable)
Grouting is generally required for MCM installations with visible joint lines, such as those mimicking brick or natural stone with our
MCM Flexible Stone
series.
-
Cure Time:
Wait for the adhesive to cure sufficiently (usually 24-48 hours, refer to adhesive instructions) before grouting. Grouting too early can dislodge panels.
-
Grout Type:
Use a high-quality, flexible, and weather-resistant grout that is compatible with MCM. For exterior use, make sure it's specifically designed for outdoor exposure.
-
Application:
Apply grout using a rubber float, pressing it firmly into the joints to ensure full filling. Work in small sections.
-
Cleaning:
As soon as the grout starts to set (but before it's fully hard), clean off excess grout from the MCM surface with a damp sponge, working diagonally across the joints to avoid pulling grout out. Rinse the sponge frequently. Multiple passes may be needed.
-
Haze Removal:
After the grout has fully cured (typically 24 hours), a light haze might remain. This can usually be removed with a clean, dry cloth or a specialized grout haze remover, if necessary. Always test in an inconspicuous area first.
4.2 Sealing and Protection
While MCM is durable, applying a suitable sealant can further enhance its longevity, especially in high-traffic areas or harsh environments.
-
Sealant Recommendation:
Lunar Peak Golden can recommend appropriate sealants for different MCM finishes and applications. Some MCM products may come pre-sealed or not require sealing.
-
Application:
Apply sealant evenly using a roller, brush, or spray, following the manufacturer's guidelines. Ensure full coverage without puddling.
-
Curing:
Allow the sealant to cure completely before exposing the surface to moisture or heavy use.
-
Corner and Edge Sealing:
For exterior applications, pay special attention to sealing corners, edges, and around openings (windows, doors) with a high-quality, flexible exterior sealant. This prevents water ingress behind the panels, which can be a common cause of failure for any
building materials
.
4.3 Post-Installation Cleaning and Site Handover
-
Final Clean-up:
Once all installation and finishing work is complete, perform a thorough clean-up of the entire work area. Remove any remaining debris, adhesive residue, or tools.
-
Inspection:
Conduct a final inspection of the installed MCM surfaces. Look for any inconsistencies, uncleaned spots, or areas that require touch-ups. Address these promptly.
-
Client Handover:
Provide the client with proper care and maintenance instructions for their new Lunar Peak Golden MCM surfaces. Explain the best practices for cleaning and any recommendations for periodic resealing. This builds trust and ensures the longevity of your work.
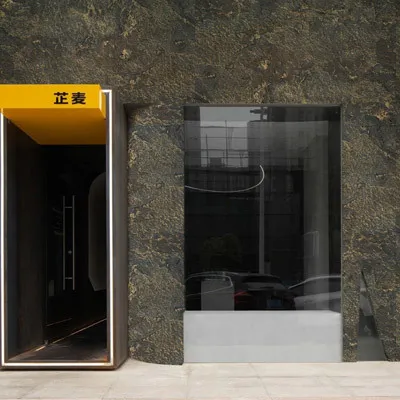
Chapter 5: Troubleshooting Common Installation Challenges
Even with the best preparation, challenges can sometimes pop up. Here's how to tackle some common issues you might encounter when working with
Lunar Peak Golden MCM.
5.1 Adhesion Issues
-
Problem:
Panels lifting or sounding hollow.
-
Causes:
Insufficient adhesive coverage, improper surface preparation (dusty/greasy/wet substrate), incorrect adhesive mix, expired adhesive, installing outside open time.
-
Solution:
Prevention is key! Ensure thorough surface prep, proper adhesive mixing and application (including back-buttering for large panels), and adequate pressure during placement. If a panel lifts, remove it, clean both the substrate and panel back, and reapply with fresh adhesive. For widespread issues, a full re-evaluation of the process is needed.
5.2 Uneven Joints or Misalignment
-
Problem:
Unsightly gaps or uneven lines between panels.
-
Causes:
Poor initial layout, failure to use spacers, uneven cutting of panels, not checking plumb/level during installation, substrate irregularities.
-
Solution:
For small areas, adjustments can sometimes be made while the adhesive is still wet. For larger errors, careful removal and reinstallation might be necessary. Always use a dry layout and consistent spacers. Ensure your substrate is as flat and level as possible. Our
MCM Project Board Series
benefits greatly from precise measurements and layout planning due to its intended large-scale application.
5.3 Panel Damage During Installation
-
Problem:
Chipping, cracking, or breaking of panels.
-
Causes:
Rough handling, improper cutting tools/techniques, dropping panels, applying too much force, panels not properly acclimatized.
-
Solution:
Handle MCM panels with care, especially the larger
MCM Big Slab Board
series. Use sharp, appropriate cutting tools. Always support panels adequately when cutting or moving. Ensure acclimatization to minimize material stress. If minor damage occurs, small chips can sometimes be repaired with color-matched grout or repair kits. For significant damage, the panel should be replaced.
5.4 Efflorescence (White Haze)
-
Problem:
White, powdery deposits appearing on the surface of the MCM or in the grout lines.
-
Causes:
Soluble salts migrating to the surface and crystallizing as water evaporates. This can be due to excessive moisture in the substrate, using too much water in grout/adhesive mix, or high humidity during curing.
-
Solution:
Ensure the substrate is dry before installation. Use the correct amount of water when mixing adhesives and grouts. If efflorescence appears, it can often be removed with a specialized efflorescence cleaner or a diluted acidic solution (always test in an inconspicuous area first!). Prevention through proper drying and sealing is the best approach.
Note:
For any complex or persistent issues, don't hesitate to reach out to
Lunar Peak Golden's technical support team. We're here to help you succeed!
Chapter 6: Advanced Tips and Best Practices
Beyond the basics, these tips will help you elevate your
Lunar Peak Golden MCM installations, ensuring exceptional quality and client satisfaction.
6.1 Working with Complex Geometries and Curves
-
Pre-bending:
For very tight curves, gently pre-bend the MCM panel to the approximate curvature before applying adhesive. This helps it conform more easily.
-
Small Sections:
For extremely complex curves or small radii, it may be easier to cut the MCM into smaller, manageable pieces.
-
Full Coverage:
Ensure 100% adhesive coverage on curved surfaces to prevent voids that could lead to cracking or delamination over time.
6.2 Integrating Lunar Peak Golden MCM with Other Materials
MCM's versatility means it often plays well with other
building materials
.
-
Transition Strips:
Use appropriate transition strips when moving from MCM to other floor or wall finishes to ensure a clean and durable seam.
-
Expansion Joints:
For large exterior areas or in climates with significant temperature fluctuations, incorporate expansion joints according to architectural specifications to accommodate material movement.
-
Sealant Choice:
select sealants that are compatible with all adjacent materials to prevent staining or adhesion failure.
The sheer size of our
MCM Big Slab Board
series demands extra care and specific techniques.
-
Team Lift:
Always use at least two people, if not more, to lift and position large slabs. Consider specialized lifting frames with suction cups for very large pieces.
-
Support During Curing:
For vertical applications, temporary bracing might be needed to support large panels until the adhesive has set sufficiently.
-
Minimizing Cuts:
Plan your layout meticulously to minimize the number of cuts required for large slabs, as each cut can introduce a potential weak point or aesthetic interruption.
6.4 Maintenance and Longevity for Clients
Educating your clients on proper care ensures their satisfaction for years to come.
-
Regular Cleaning:
Recommend gentle cleaning with mild soap and water. Avoid harsh chemicals, abrasive cleaners, or scouring pads, as these can damage the MCM surface or sealant.
-
Stain Removal:
For specific stains, advise clients to consult Lunar Peak Golden's guidelines or a professional cleaning service.
-
Resealing:
If a sealant was applied, advise clients on the recommended frequency for resealing, especially for exterior surfaces or high-wear areas.
-
Protection:
For floor applications, suggest using furniture pads or mats in high-traffic areas to prevent scratches.
MCM Installation Quick Reference
|
Stage
|
Key Task
|
Best Practice Tip
|
|
Preparation
|
Site Assessment
|
Ensure clean, dry, sound, and flat substrate; apply primer if needed.
|
|
|
Tool & Material Check
|
Verify all Lunar Peak Golden recommended tools and adhesives are on hand.
|
|
|
Acclimatization & Layout
|
Allow panels to acclimate; perform a dry layout to plan cuts and patterns.
|
|
Application
|
Adhesive Mixing
|
Strictly follow manufacturer's instructions for mixing ratio and pot life.
|
|
|
Adhesive Application
|
Use correct notched trowel; ensure 85-90% coverage (back-butter for large/exterior).
|
|
|
Panel Placement
|
Press firmly, use rubber mallet/roller; regularly check plumb and level.
|
|
Finishing
|
Grouting
|
Wait for adhesive to cure; use appropriate, flexible grout; clean thoroughly.
|
|
|
Sealing
|
Apply recommended sealant for enhanced durability (especially exterior/high-traffic).
|
|
|
Final Clean-up
|
Remove all debris and adhesive residue; conduct final inspection.
|
|
Maintenance
|
Client Education
|
Provide clear instructions for cleaning and ongoing care to the client.
|
Chapter 7: Why Lunar Peak Golden MCM is Your Project's Best Choice
We've walked through the ins and outs of installing
Lunar Peak Golden MCM, but let's quickly recap why choosing our products is a smart move for any contractor focused on quality, innovation, and sustainability.
-
Unmatched Versatility:
From the grandeur of our
MCM Big Slab Board
series for expansive facades to the intricate details achieved with our MCM 3D Printing, and the adaptability of
MCM Flexible Stone
for complex curves, our product range empowers designers and contractors to bring any vision to life. This broad utility for both interior and exterior wall decoration positions Lunar Peak Golden MCM as a prime candidate for a vast array of architectural styles and applications.
-
Sustainable Edge:
In today's environmentally conscious world, using
eco-friendly building materials
isn't just a preference; it's often a requirement. Lunar Peak Golden MCM's low-energy production and use of natural components contribute to greener buildings, helping projects achieve sustainability certifications and appealing to clients who value environmental responsibility. It's a win-win for both the planet and your project's reputation.
-
Durability Meets Design:
Our Modified Cementitious Material offers the best of both worlds: robust performance against the elements (UV, frost, moisture) and a stunning aesthetic that can mimic virtually any natural material. This means beautiful, long-lasting finishes that require minimal maintenance, ensuring client satisfaction for decades. The lighter weight of MCM also means less structural load, potentially saving on engineering costs and construction time.
-
Comprehensive Support:
As a
one-stop solution provider
, Lunar Peak Golden doesn't just sell products; we offer decades of industry experience and unparalleled support. From technical guidance on specific product applications to advice on achieving complex custom designs, our team is committed to ensuring your project's success from concept to completion. Our global presence, including a strong agency network in Saudi Arabia, means we understand diverse market needs and can provide tailored solutions.
-
Simplified Logistics and Installation:
The lightweight nature of MCM reduces freight costs and simplifies on-site handling, making installation more efficient and safer for your crews. While precision is always required, the inherent flexibility of many of our MCM products streamlines application processes, even on challenging surfaces. This efficiency translates directly into cost savings and faster project turnaround times, which are critical in competitive construction environments.
-
Future-Proofing Your Projects:
By choosing Lunar Peak Golden MCM, you're not just selecting a material; you're investing in a future-proof solution. The material's adaptability to customization trends, its ecological credentials, and its long-term performance mean your projects will remain relevant, beautiful, and resilient for years to come. This positions you as a forward-thinking contractor capable of delivering cutting-edge architectural solutions.
The landscape of
building materials
is constantly evolving, and staying ahead means embracing innovations that offer superior performance, aesthetic flexibility, and environmental responsibility.
Lunar Peak Golden MCM is precisely that innovation. It allows you to create distinctive, high-quality, and sustainable spaces that meet the demands of modern architecture and client expectations. Whether it's a bustling commercial hub or a serene residential haven, our MCM products provide the foundation for stunning and enduring designs.
Thank you for choosing
Lunar Peak Golden MCM. We're excited to see the incredible projects you'll create with our materials, backed by the best practices outlined in this guide. Happy building!