

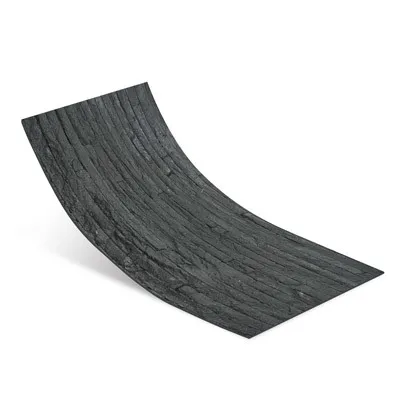
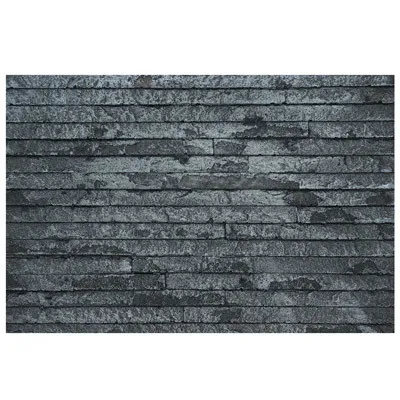
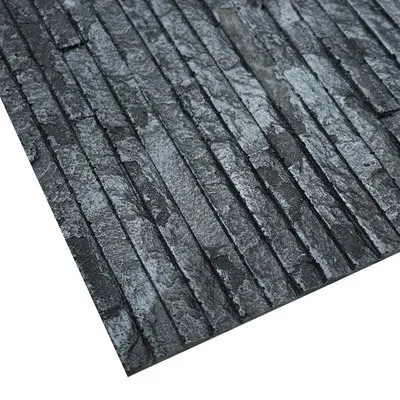
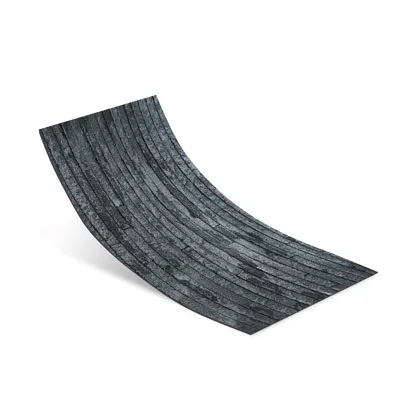
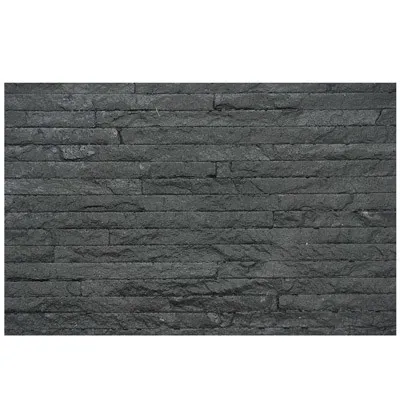
If you've spent any time on a construction site lately, you've probably noticed a shift in how designers and homeowners approach interior and exterior cladding. Gone are the days of one-size-fits-all materials—today's projects demand texture, durability, and a touch of personality. That's where Muretto Stone comes in. A staple in modern architectural design, Muretto Stone (available in light grey, dark grey, and beige variants) has become a go-to for contractors who want to balance aesthetics with practicality. But like any specialty material, installing it right takes know-how. In this guide, I'll walk you through everything from pre-installation prep to troubleshooting common hiccups, drawing on years of experience watching this stone transform spaces—when installed correctly, that is.
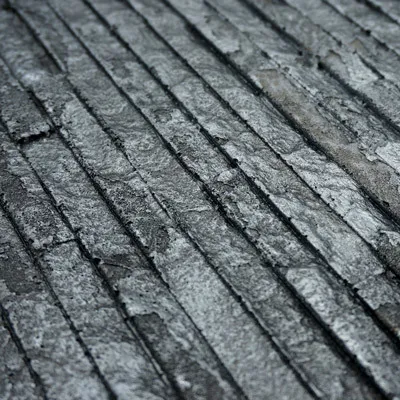
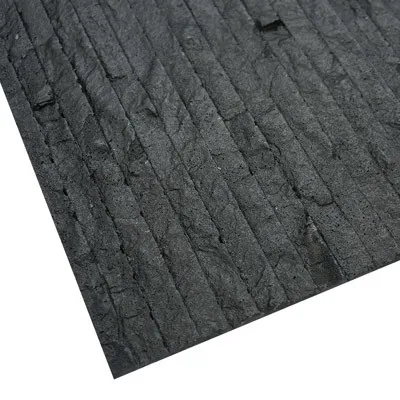
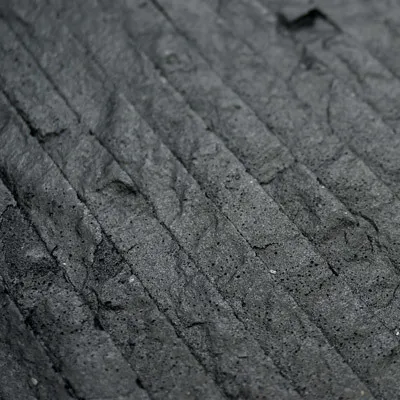
First, let's get clear on what makes Muretto Stone unique. Unlike smooth marble or uniform concrete, Muretto Stone has a distinct, almost hand-hewn texture that mimics traditional masonry. It's crafted from modified composite materials, which means it's lighter than natural stone but just as tough—ideal for both interior accent walls and exterior facades. The three primary variants—light grey, dark grey, and beige—each bring something different to the table: light grey adds airiness to small rooms, dark grey makes a bold statement in commercial lobbies, and beige warms up residential spaces. But regardless of the color, the key to making Muretto Stone shine lies in proper installation. Cut corners here, and you'll end up with cracked panels, uneven surfaces, or worse—stone that peels away from the wall a year down the line.
I've lost count of how many projects I've consulted on where the issue traced back to skimping on pre-installation. Muretto Stone, for all its durability, is only as stable as the surface it's attached to. Let's break down the steps you can't afford to skip.
Start by evaluating the substrate. Muretto Stone works best on flat, stable surfaces—think fair-faced concrete, clean drywall, or properly cured cement board. Avoid uneven masonry or surfaces with existing damage (cracks, moisture, or loose paint). If you're working with exterior walls, check for water seepage: a quick spray test with a hose can reveal hidden leaks that'll ruin your adhesive bond later. For interior walls, use a moisture meter to ensure humidity levels are below 10%—any higher, and the adhesive won't set properly.
Once you've confirmed the surface is sound, it's time to prep. Start by cleaning: use a stiff brush to remove dust, debris, and loose particles. For greasy surfaces (like kitchen backsplashes), a degreaser followed by a water rinse works wonders. Next, check for level. Even a 1/8-inch dip over 10 feet can cause panels to sit unevenly, leading to grout gaps or cracked edges. Use a long level to mark high and low spots, then sand down bumps or fill depressions with a rapid-setting mortar. Finally, prime the surface. I recommend a latex-based primer designed for stone cladding—it creates a tacky surface that helps the adhesive grip, especially important for porous substrates like fair-faced concrete.
Muretto Stone panels come in standard sizes, but every project has odd angles or custom cuts. Always order 10-15% extra material to account for waste, mistakes, and future repairs. If you're mixing Muretto Stone with other materials—say, rough granite stone for a contrasting accent wall—coordinate delivery times so both materials arrive on-site together. There's nothing worse than installing half a wall of Muretto only to realize the rough granite is backordered for a month.

You don't need a warehouse of specialty tools, but using the right equipment will save you hours of frustration. Here's your must-have list:
Pro tip: Skip the cheap trowels. A flimsy notched trowel will leave uneven adhesive coverage, leading to weak spots. Invest in a high-quality stainless-steel trowel—it'll pay for itself in fewer callbacks.
Now for the hands-on part. Let's walk through the installation process step by step, with tips to keep things smooth.
Yes, I know we primed earlier—but do it again. Primer dries quickly, and if you waited more than 24 hours since the first coat, a quick re-coat ensures the surface is still tacky enough to bond with the adhesive. Apply a thin, even layer and let it dry for 1-2 hours (check the primer's instructions—some require longer in humid conditions).
Follow the adhesive manufacturer's mixing ratios to the letter. Too much water, and the mortar will be runny; too little, and it'll be crumbly. Aim for the consistency of peanut butter—thick enough to hold a notch when you lift the trowel. Mix only as much as you can use in 30 minutes (less in hot weather, as it'll set faster). I've seen contractors mix 5-gallon buckets at once to save time, only to watch half of it harden before they can spread it. Work in batches, and you'll avoid waste.
Start at the bottom corner of the wall (this keeps panels from sliding as the adhesive sets). Use the notched trowel to spread adhesive in a 3x3-foot area—don't cover the entire wall at once. Hold the trowel at a 45-degree angle to create uniform ridges. Press the first Muretto Stone panel into place, wiggling it slightly to ensure full contact with the adhesive. Use the rubber mallet to tap it gently—you want it flush with the surface, not sunken or protruding. Check with the level to make sure it's plumb and level, then insert spacers along the edges to maintain consistent joint width.
Work in horizontal rows, staggering the joints like brickwork (this adds structural stability). For exterior installations, leave a 1/4-inch gap at the bottom of the wall to allow water drainage—Muretto Stone is water-resistant, but trapped moisture will still cause problems over time. As you go, periodically lift a panel (while the adhesive is still wet) to check coverage—you should see adhesive on at least 80% of the back. If not, you're spreading the mortar too thin.
Let the adhesive set for 24 hours before grouting (longer in cold or humid weather). Mix the grout to a creamy consistency, then use the float to press it into the joints at a 45-degree angle. Hold the float diagonally to the joints to avoid pulling grout out. After 15-20 minutes, when the grout starts to haze over, wipe the surface with a damp sponge (not soaking wet—too much water weakens grout). Rinse the sponge frequently, and use a dry cloth to buff away any remaining haze once the grout is fully dry (usually 48 hours).
| Muretto Stone Variant | Best For | Installation Notes | Complementary Materials |
|---|---|---|---|
| Light Grey | Interior accent walls, kitchen backsplashes, bathrooms | Shows less dust; use white grout for contrast | Fair-faced concrete, white wood |
| Dark Grey | Exterior facades, commercial lobbies, fireplace surrounds | Requires frequent cleaning; pair with dark grout to hide dirt | Rough granite stone (medium grey), charcoal burnt wood board |
| Beige | Residential exteriors, living rooms, hotel lobbies | Warms up spaces; avoid direct sunlight to prevent fading | Travertine (beige), lime stone (beige) |
Muretto Stone's texture makes it durable, but it's still prone to chipping if cut carelessly. For straight cuts, use a wet saw with a diamond blade. Mark the cut line with a pencil (masking tape helps the line show up better), then feed the panel slowly into the blade—rushing leads to jagged edges. For curves or notches, use an angle grinder with a masonry blade, working in small increments. Always cut on the "waste" side of the line (leave 1/16-inch extra) to account for chipping, then sand the edge smooth with 80-grit sandpaper.
For holes (e.g., for electrical outlets), start with a small drill bit to create a pilot hole, then use a hole saw designed for masonry. Keep the saw wet to reduce dust and heat—overheating can cause the stone to crack. And remember: measure twice, cut once. Muretto Stone isn't cheap, and a single mistake can mean replacing an entire panel.
Even the toughest stone needs protection, especially outdoors. For exterior installations, seal Muretto Stone with a breathable, water-based sealer after grouting (wait 72 hours for grout to cure first). Avoid solvent-based sealers—they trap moisture and can discolor the stone over time. Apply two thin coats with a paintbrush, letting each dry 24 hours. Re-seal every 2-3 years (more often in rainy or coastal areas).
For maintenance, stick to mild soap and water. Harsh cleaners (like bleach or acidic solutions) will eat away at the sealer and dull the stone's finish. For stains, blot (don't rub) with a damp cloth, then apply a paste of baking soda and water, letting it sit for 10 minutes before rinsing. And if you notice a loose panel? Act fast—remove it, clean the old adhesive off the back and the wall, then reattach with fresh mortar. Waiting allows moisture to seep behind the stone, risking mold or further damage.
Muretto Stone rarely works alone—it shines when paired with materials that highlight its texture. One of my favorite combinations is Muretto dark grey with rough granite stone (medium grey). The Muretto's subtle texture contrasts beautifully with the granite's bold, grainy surface, creating depth in feature walls. For a warmer palette, try Muretto beige with travertine (beige) or lime stone (beige)—the earthy tones complement each other, making spaces feel cozy yet sophisticated.
Exterior projects often pair Muretto Stone with flexible stone cladding panels, a lightweight alternative that mimics natural stone. Use Muretto for the main facade and flexible panels for accents like window surrounds or gables—this reduces weight without sacrificing style. And for industrial-chic interiors, Muretto light grey alongside fair-faced concrete is a match made in design heaven. The concrete's raw, unpolished look lets the stone's texture take center stage.
Even with perfect prep, problems can pop up. Here's how to fix the most common ones:
At the end of the day, installing Muretto Stone isn't just about putting up a cladding material—it's about creating a surface that tells a story. Its texture, color variations, and durability make it more than just a building product; it's a design element that can elevate a project from "nice" to "unforgettable." But as with any specialty material, success hinges on preparation, attention to detail, and a willingness to treat the stone with care.
So, the next time you're tasked with installing Muretto Stone, remember: take your time with prep, invest in quality tools, and don't cut corners on adhesive or grout. Your clients will notice the difference, and you'll avoid the headaches of callbacks. After all, in this industry, a job well done isn't just about finishing on time—it's about leaving a space that looks great for years to come. And with Muretto Stone, that's more than possible—it's expected.
Recommend Products


