
Hey there, design enthusiasts and DIY warriors! If you've been dreaming of bringing the warmth of natural wood into your space but cringe at the thought of constant maintenance, you're in the right place. Today, we're diving into the world of COLORIA MCM Poly Wood Board—a game-changer that marries the timeless beauty of wood with the durability of modern materials. Whether you're sprucing up a living room accent wall, revamping your outdoor patio, or adding texture to a commercial space, this guide will walk you through every step of installation, share pro tips, and even paint a picture of real-world applications that'll make you want to grab your tools and get started.
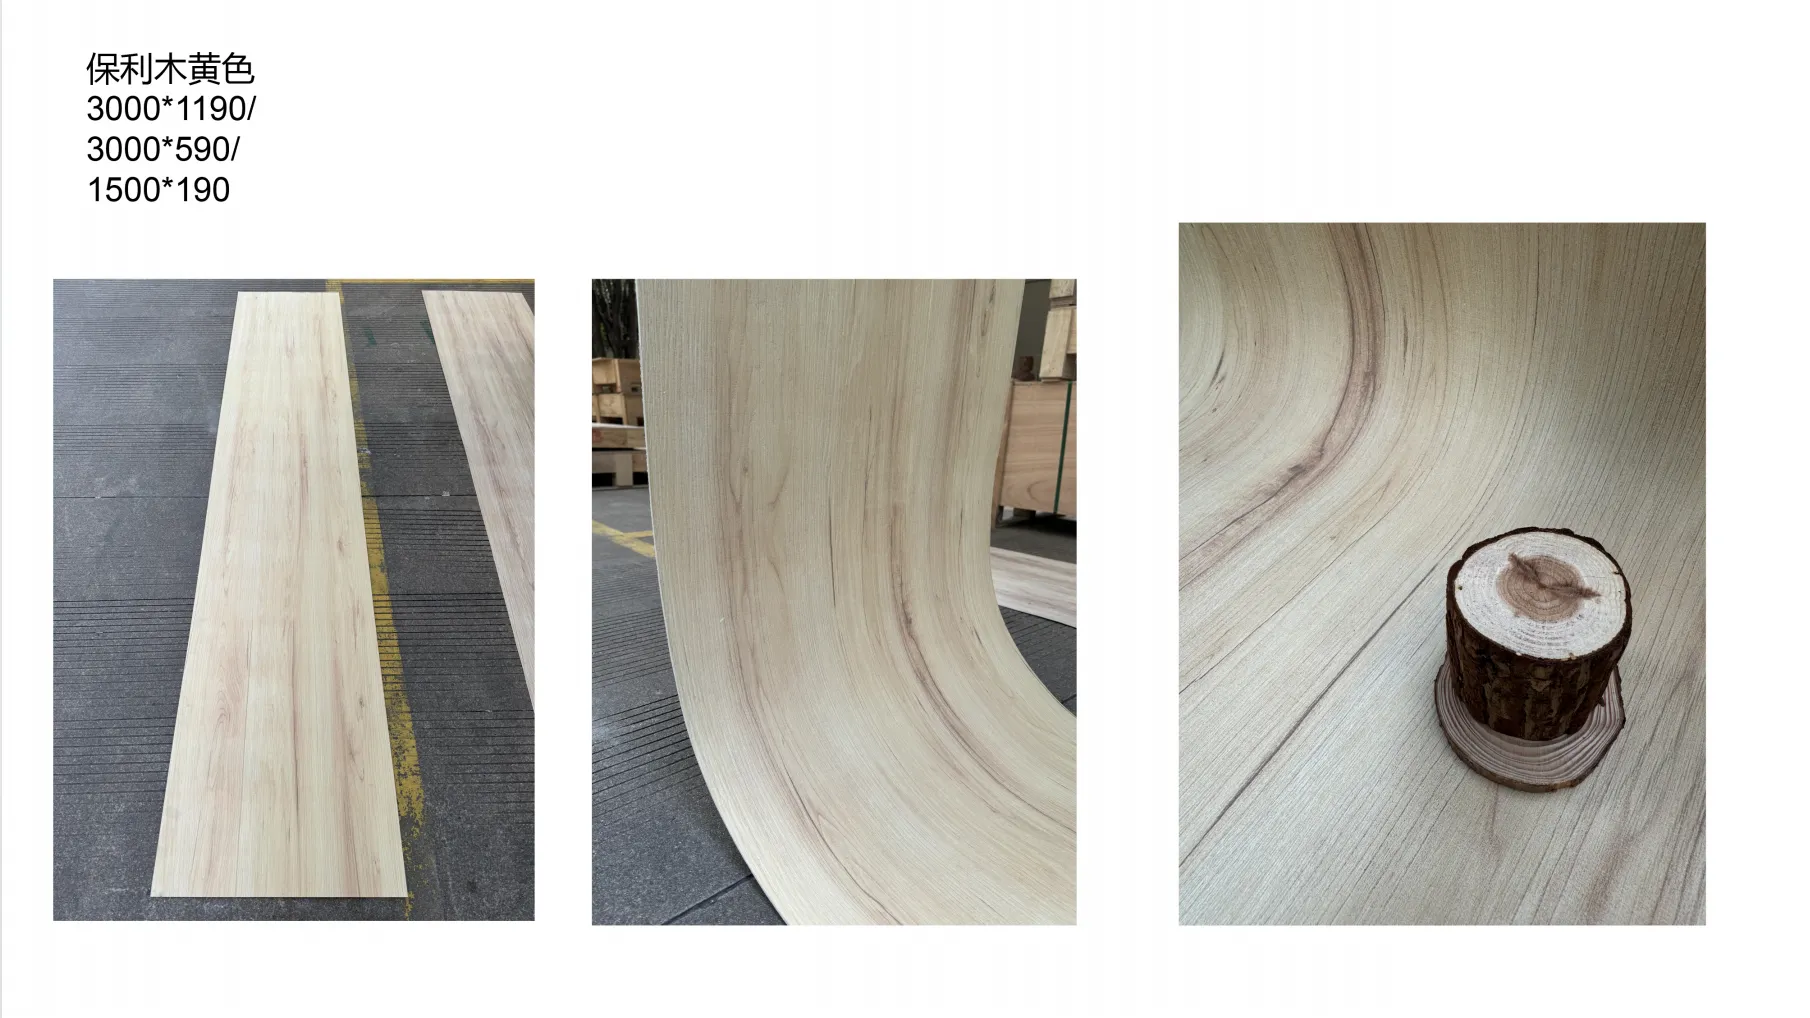
First off, let's clear the air: MCM (Modified Composite Material) isn't your average building material. It's lightweight, flexible, and designed to mimic natural textures—like the rich grain of wood—without the hassle of warping, rotting, or fading. And COLORIA's Poly Wood Board? It's the star of the show, blending the best of MCM Flexible Stone technology with an authentic Wood Grain Board finish that feels (and looks!) just like the real thing. Intrigued? Let's jump in.
Before we get our hands dirty, let's talk about why you'd choose this over traditional wood or even other composites. I've worked with my fair share of materials, and here's the lowdown:
Pro Tip: I once helped a client install Poly Wood Board in their beach house, and two years later, it still looks brand new—no warping from the salt air, no fading from the sun. Trust me, traditional wood would've needed a full replacement by now.
Like any DIY project, success starts with prep work. Rushing this step is the #1 mistake I see, so let's make sure you're set up for victory. Here's your checklist:
| Tool/Material | Purpose | Pro Tips |
|---|---|---|
| COLORIA Poly Wood Boards | The star of the show—measure your space first to avoid overbuying (add 10% extra for cuts/waste!) | Store boards flat in a dry area 24 hours before installation to acclimate to temperature/humidity. |
| Notched Trowel (6mm) | Applying adhesive evenly to the back of boards | Use a trowel with square notches for better adhesive coverage on smooth surfaces. |
| Water-Based Construction Adhesive | Securing boards to the wall/ substrate | Look for a low-VOC option—no harsh fumes, and it dries clear! |
| Utility Knife or Circular Saw | Cutting boards to size | For clean cuts, mark your line with painter's tape first—prevents chipping! |
| Level (2ft or longer) | Ensuring boards are straight | A laser level is a game-changer here, but a bubble level works too—just check often! |
| Tape Measure & Pencil | Measuring and marking cuts | Measure twice, cut once—oldie but goodie. I've saved many boards with this rule! |
| Rubber Mallet | Gently tapping boards into place | Avoid metal hammers—they can dent the surface. Rubber mallets are your friend. |
| Sponge & Mild Detergent | Cleaning up excess adhesive | Don't let adhesive dry on the surface—it's harder to remove later! Wipe immediately. |
Your Poly Wood Board is only as good as the surface it's stuck to. Here's how to prep:
1. Clean the Surface: Whether you're installing on drywall, concrete, or plywood, it needs to be dust-free, grease-free, and smooth. Grab a vacuum to suck up dust, then wipe with a damp cloth and let dry completely. If there's old paint or wallpaper, scrape it off—adhesive won't stick to loose material.
2. Check for Level & Repair: Use your level to scan the wall. Small dips (less than 1/4 inch) are okay, but bigger ones need fixing. For drywall, use spackle; for concrete, patch with a concrete filler. Let repairs dry, then sand smooth. Trust me, a wonky surface leads to wonky boards—don't skip this!
3. Plan Your Layout: Measure your wall height and width, then sketch a rough layout. Will you start at the bottom and work up? Left to right? I prefer starting from the bottom center and working outward—it keeps the pattern balanced. Also, decide on board orientation: vertical for height, horizontal for width, or even herringbone for drama. Pro tip: If you're using boards with a Wood Grain Board pattern, lay them out on the floor first to match the grain direction—this creates a seamless look.
Okay, tools are ready, surface is prepped, and you've got your layout mapped—let's install! I'm breaking this down into simple steps, so even if you're new to DIY, you'll feel confident.
Measure the space where the first board will go, then mark the board with a pencil and painter's tape (the tape prevents the MCM from chipping). If using a utility knife, score the board along the tape line, then bend it back— it'll snap cleanly. For longer cuts or intricate shapes, a circular saw with a fine-tooth blade works best. Always wear safety goggles and a dust mask—better safe than sorry!
Grab your notched trowel and apply a thin, even layer of adhesive to the back of the board. Hold the trowel at a 45-degree angle to create ridges—this ensures maximum contact with the wall. Don't skimp on adhesive, but avoid globs—excess will squeeze out and make a mess. For larger boards, add a few dollops of adhesive in the center to prevent sagging.
Line up your first board with your layout marks, making sure it's level (use that level again!). Gently press it into place, starting from the center and working outward to push out air bubbles. Then, take your rubber mallet and tap lightly along the surface to ensure the adhesive bonds—think of it like giving the board a reassuring high-five. Check the level once more—even a tiny shift can throw off the whole row!
Now, onto the next board! To avoid a "brick wall" look, stagger the seams—like how you'd lay bricks. This means cutting the second board in a row to be shorter than the first, so the joints don't line up. It's more visually appealing and makes the installation stronger. As you go, wipe away any adhesive that oozes out with a damp sponge—don't let it dry!
For inside corners, cut boards at a 45-degree angle so they meet cleanly. For outside corners, you can either miter them or use a corner trim (COLORIA sells matching trims for a polished look). If your wall has outlets or switches, measure carefully, mark the board, and cut out the hole with a jigsaw—take it slow, and test the fit before applying adhesive.
Once all boards are up, resist the urge to decorate immediately. Let the adhesive cure for 24–48 hours (check the adhesive bottle for exact time). Keep the room well-ventilated, and avoid touching or leaning on the boards during this time. I know, waiting is tough, but rushing leads to boards slipping—trust the process!
Pro Tip: If you're installing outdoors, do it on a mild, dry day. Extreme heat or cold can affect adhesive curing time. And if it rains mid-installation? Cover the boards with a tarp—moisture before curing can weaken the bond.
Sure, steps are helpful, but seeing (or in this case, imagining) the finished product is what really sparks inspiration. Let's walk through a few real COLORIA applications I've come across—no photos needed; I'll paint the picture for you.
One of my favorite projects was a client's living room in a suburban home. They wanted a focal point behind their sofa, so we went with Poly Wood Board in a warm oak finish. The Wood Grain Board texture added depth, and to make it pop, we paired it with Foamed Aluminium Alloy Board (Vintage Silver) floating shelves. The contrast between the woody warmth and sleek silver was stunning—like a modern cabin vibe with a luxe twist. The best part? The room feels bigger, thanks to the vertical board orientation, and the clients love how easy it is to dust (no more struggling with crevices in real wood!).
Another standout was a restaurant patio in a coastal town. The owners wanted that "beach bungalow" feel but needed something that could handle salt spray and rain. Enter Poly Wood Board in a driftwood finish, installed horizontally along the perimeter walls. We added matching Poly Wood benches, and the result? A space that looks like it's been there for decades, but will last twice as long. Diners rave about the "rustic charm," and the owners love that they don't have to seal or stain it every spring. Bonus: The MCM Flexible Stone flexibility let us curve the boards around the patio's circular fire pit—no sharp edges, just smooth, flowing lines.
Offices can feel cold and sterile, but a tech startup in the city wanted to change that. They used Poly Wood Board in a light maple finish on the reception area wall, paired with fair-faced concrete floors and black metal accents. The Wood Grain Board detail softened the space, making clients feel welcome, while the durability of MCM meant it could handle daily foot traffic and the occasional coffee spill. Plus, since it's lightweight, installation took just one weekend—no disrupting workdays. Win-win!
You've put in the work—now let's keep your installation looking fresh for years to come. Lucky for you, maintenance is a breeze:
Don't panic! Even pros make mistakes. Here's how to fix common issues:
There you have it—your complete guide to installing COLORIA MCM Poly Wood Board. From prep to finish, it's a project that's totally doable, even if you're new to DIY, and the payoff? A space that feels warm, inviting, and uniquely yours. Whether you're going for a cozy living room, a durable outdoor patio, or a stylish commercial space, this material checks all the boxes: beauty, brains, and brawn.
And remember, COLORIA's range doesn't stop at Poly Wood Board. Once you're hooked, explore their MCM Flexible Stone collection for other textures, or mix and match with Foamed Aluminium Alloy Board (Vintage Silver) for a look that's all your own. The possibilities are endless, and the results? Well, they speak for themselves.
So, what are you waiting for? Grab your tape measure, round up your tools, and let's turn that design dream into reality. And when you're done, snap a pic (even if we can't include it here, I'd love to imagine it!)—I have a feeling it'll be your new favorite room in the house.
Recommend Products


