
Preserving the Warmth and Character of Your Exterior
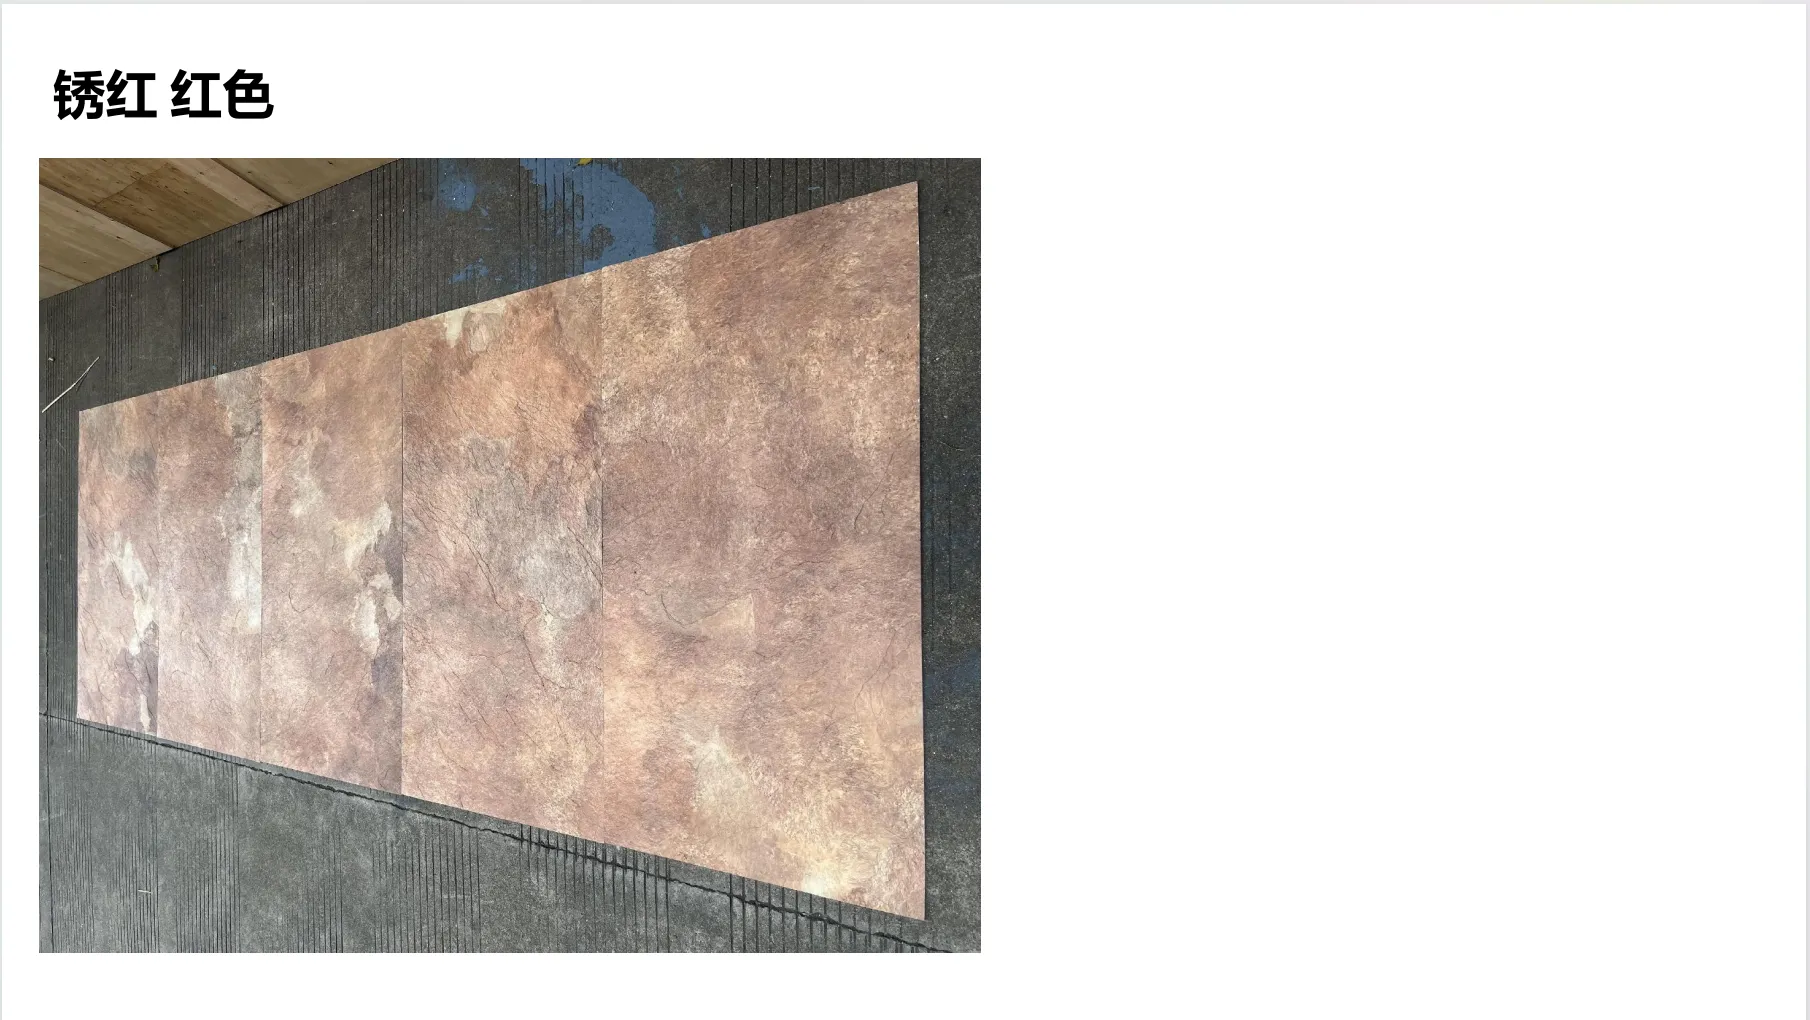
There's something irreplaceable about Rusty Red MCM cladding. It's not just a building material—it's a storyteller. That rich, earthy hue with hints of amber and terracotta, the subtle texture that mimics aged metal or weathered stone, the way it catches the light at dawn and glows like embers at dusk. Whether you've used it on a modern home, a boutique café, or a heritage renovation, Rusty Red MCM doesn't just cover walls; it defines spaces. But here's the thing about materials with character: they're not immune to life's little accidents. A stray ladder, a storm-borne branch, or even years of foot traffic can leave behind chips, scratches, or nicks that feel like a personal slight to that carefully curated aesthetic.
The good news? Repairing Rusty Red MCM isn't about erasing its history—it's about honoring it. This guide isn't just a list of steps; it's a toolkit for preserving the soul of your cladding. We'll walk through how to fix those imperfections, match that unique Rusty Red tone, and keep your cladding looking intentional, not brand-new. Because let's be honest: part of the charm is in the wear. We just don't want it to look damaged —we want it to look lived-in .
Before we dive into repairs, let's get to know the material we're working with. MCM—Modified Composite Material—is beloved for its flexibility, durability, and ability to mimic pricier natural stones or metals at a fraction of the weight. Rusty Red MCM, in particular, is a standout: it's crafted to evoke the warmth of aged iron, the depth of desert sandstone, or even the patina of a vintage barn roof. Unlike smooth, uniform cladding, it often has subtle variations in color (think flecks of orange or deep brown) and texture (a slight roughness that catches the eye without feeling harsh).
This uniqueness is why repairs can feel intimidating. You can't just slap on any red paint and call it a day—you need to match that specific "rusty" undertone, that delicate balance between matte and slightly metallic. And because Rusty Red MCM often pairs beautifully with other textures—like fair-faced concrete accents or wood grain board trim—your repair work needs to blend seamlessly with its neighbors, too. Think of it like touching up a watercolor painting: you don't want the fix to stick out; you want it to flow.
You don't need to be a pro to repair Rusty Red MCM, but having the right tools will make all the difference. Here's your shopping list (pro tip: most of these are available at hardware stores, and some might already be in your garage):
Skip the heavy-duty tools: angle grinders, power sanders, or industrial adhesives can do more harm than good. Rusty Red MCM is durable, but it's also sensitive to aggressive abrasion. Gentle is the name of the game here.
| Damage Type | What It Looks Like | Repair Focus |
|---|---|---|
| Chips | Small, shallow divots (think: a dime-sized or smaller missing chunk) exposing the base material. | Filling the divot, shaping to match the surrounding texture, color-matching. |
| Scratches | Thin, surface-level marks (light: barely visible; deep: catching your nail when you run it over). | Smoothing the edges, color-touching, blending the scratch into the cladding's natural texture. |
Chips can feel like the most daunting damage, but with a steady hand, they're actually straightforward to fix. Let's break it down:
Start by gently wiping the chipped area with a soft cloth dampened with mild detergent and water. Dirt or grime trapped in the chip will prevent the repair compound from adhering properly. Let it dry completely—patience here prevents bubbles later.
Use your fine-grit sandpaper to lightly sand the edges of the chip. You're not trying to remove material—just smooth any jagged bits so the repair compound blends in. Wipe away dust with a dry cloth when you're done.
Scoop a tiny amount of Rusty Red repair compound onto your putty knife (less is more—you can always add more later). Press it firmly into the chip, overfilling slightly (it will shrink as it dries). Use the edge of the knife to shape the compound to match the cladding's texture—if the surrounding area is slightly convex, mimic that curve; if it's flat, smooth it gently. For extra texture, you can lightly press a piece of travertine (starry red) tile (if you have a scrap) onto the wet compound to transfer its pattern—this works great for MCM that mimics natural stone!
Check the compound's instructions for drying time (usually 24 hours). Once dry, use your sandpaper to gently sand down the excess until it's flush with the cladding. Go slow—you don't want to sand into the surrounding undamaged area. Wipe away dust again.
Even the best repair compounds might need a little color boost. Dip a small brush into your Rusty Red touch-up paint and lightly stipple it over the repaired area (stippling = dabbing, not brushing back and forth) to match the cladding's uneven coloration. If your MCM has darker flecks, mix a tiny bit of brown or black paint and add those in sparingly—this is what makes the repair look natural.
Once the paint is dry, apply a thin layer of clear matte sealant over the repair. This protects against rain, sun, and future scratches. Use a small brush and keep the sealant within the repaired area to avoid altering the surrounding cladding's finish.
Scratches are trickier because they're often longer and shallower than chips, but the goal is the same: make them disappear into the cladding's natural character. Here's how:
These are usually just surface-level disruptions. Start by cleaning the area. Then, take a soft cloth and buff the scratch gently with a tiny bit of car wax (the kind with color pigments). The wax fills the scratch and adds a hint of color. Buff in circular motions until the scratch fades—this works well for minor marks.
Deep scratches need a bit more love. Follow steps 1-2 from the chip repair (clean and sand the edges). Then, instead of filling with compound, use a toothpick to apply a small amount of repair compound into the scratch itself (think of it like coloring in the line). Let it dry, sand lightly, then touch up with paint and seal as before. For scratches that run along wood grain board or linear textures, use a fine brush to "re-draw" the grain lines over the repair—this ensures the scratch doesn't break the pattern.
We can't talk about repairs without diving into color matching—it's the make-or-break step. Rusty Red isn't a single shade; it's a symphony of red, orange, brown, and sometimes even a hint of purple (depending on the manufacturer). Here's how to nail it:
Pro tip: If you're struggling to find an exact match, mix your own! Start with a base of terracotta or brick-red paint, then add small drops of burnt sienna (for warmth), a touch of black (for depth), or even a pinch of orange (to mimic that "rusty" glow). Test on a piece of cardboard until you get that perfect, lived-in red.
Repairs are great, but preventing damage in the first place is even better. Here are a few simple habits to keep your cladding in top shape:
And remember, even with the best care, your Rusty Red MCM will evolve over time—and that's a good thing. The color might deepen, the texture might soften, and it will continue to tell the story of your space. Repairs are just part of that journey, ensuring it tells that story beautifully for years to come.
Repairing Rusty Red MCM cladding isn't just about fixing a chip or scratch. It's about honoring the choice you made to bring warmth, character, and that unique vintage vibe to your space. With the right tools, a little patience, and a focus on blending rather than perfecting, you can make those imperfections disappear—leaving behind a cladding that looks just as intentional and inviting as the day it was installed.
So the next time you spot a scratch or a chip, take a deep breath. You're not just repairing damage—you're preserving a piece of your space's soul. And trust us, when you step back and see that Rusty Red cladding glowing in the sun, with every repair seamlessly woven into its story, you'll know it was worth it.
Recommend Products


