

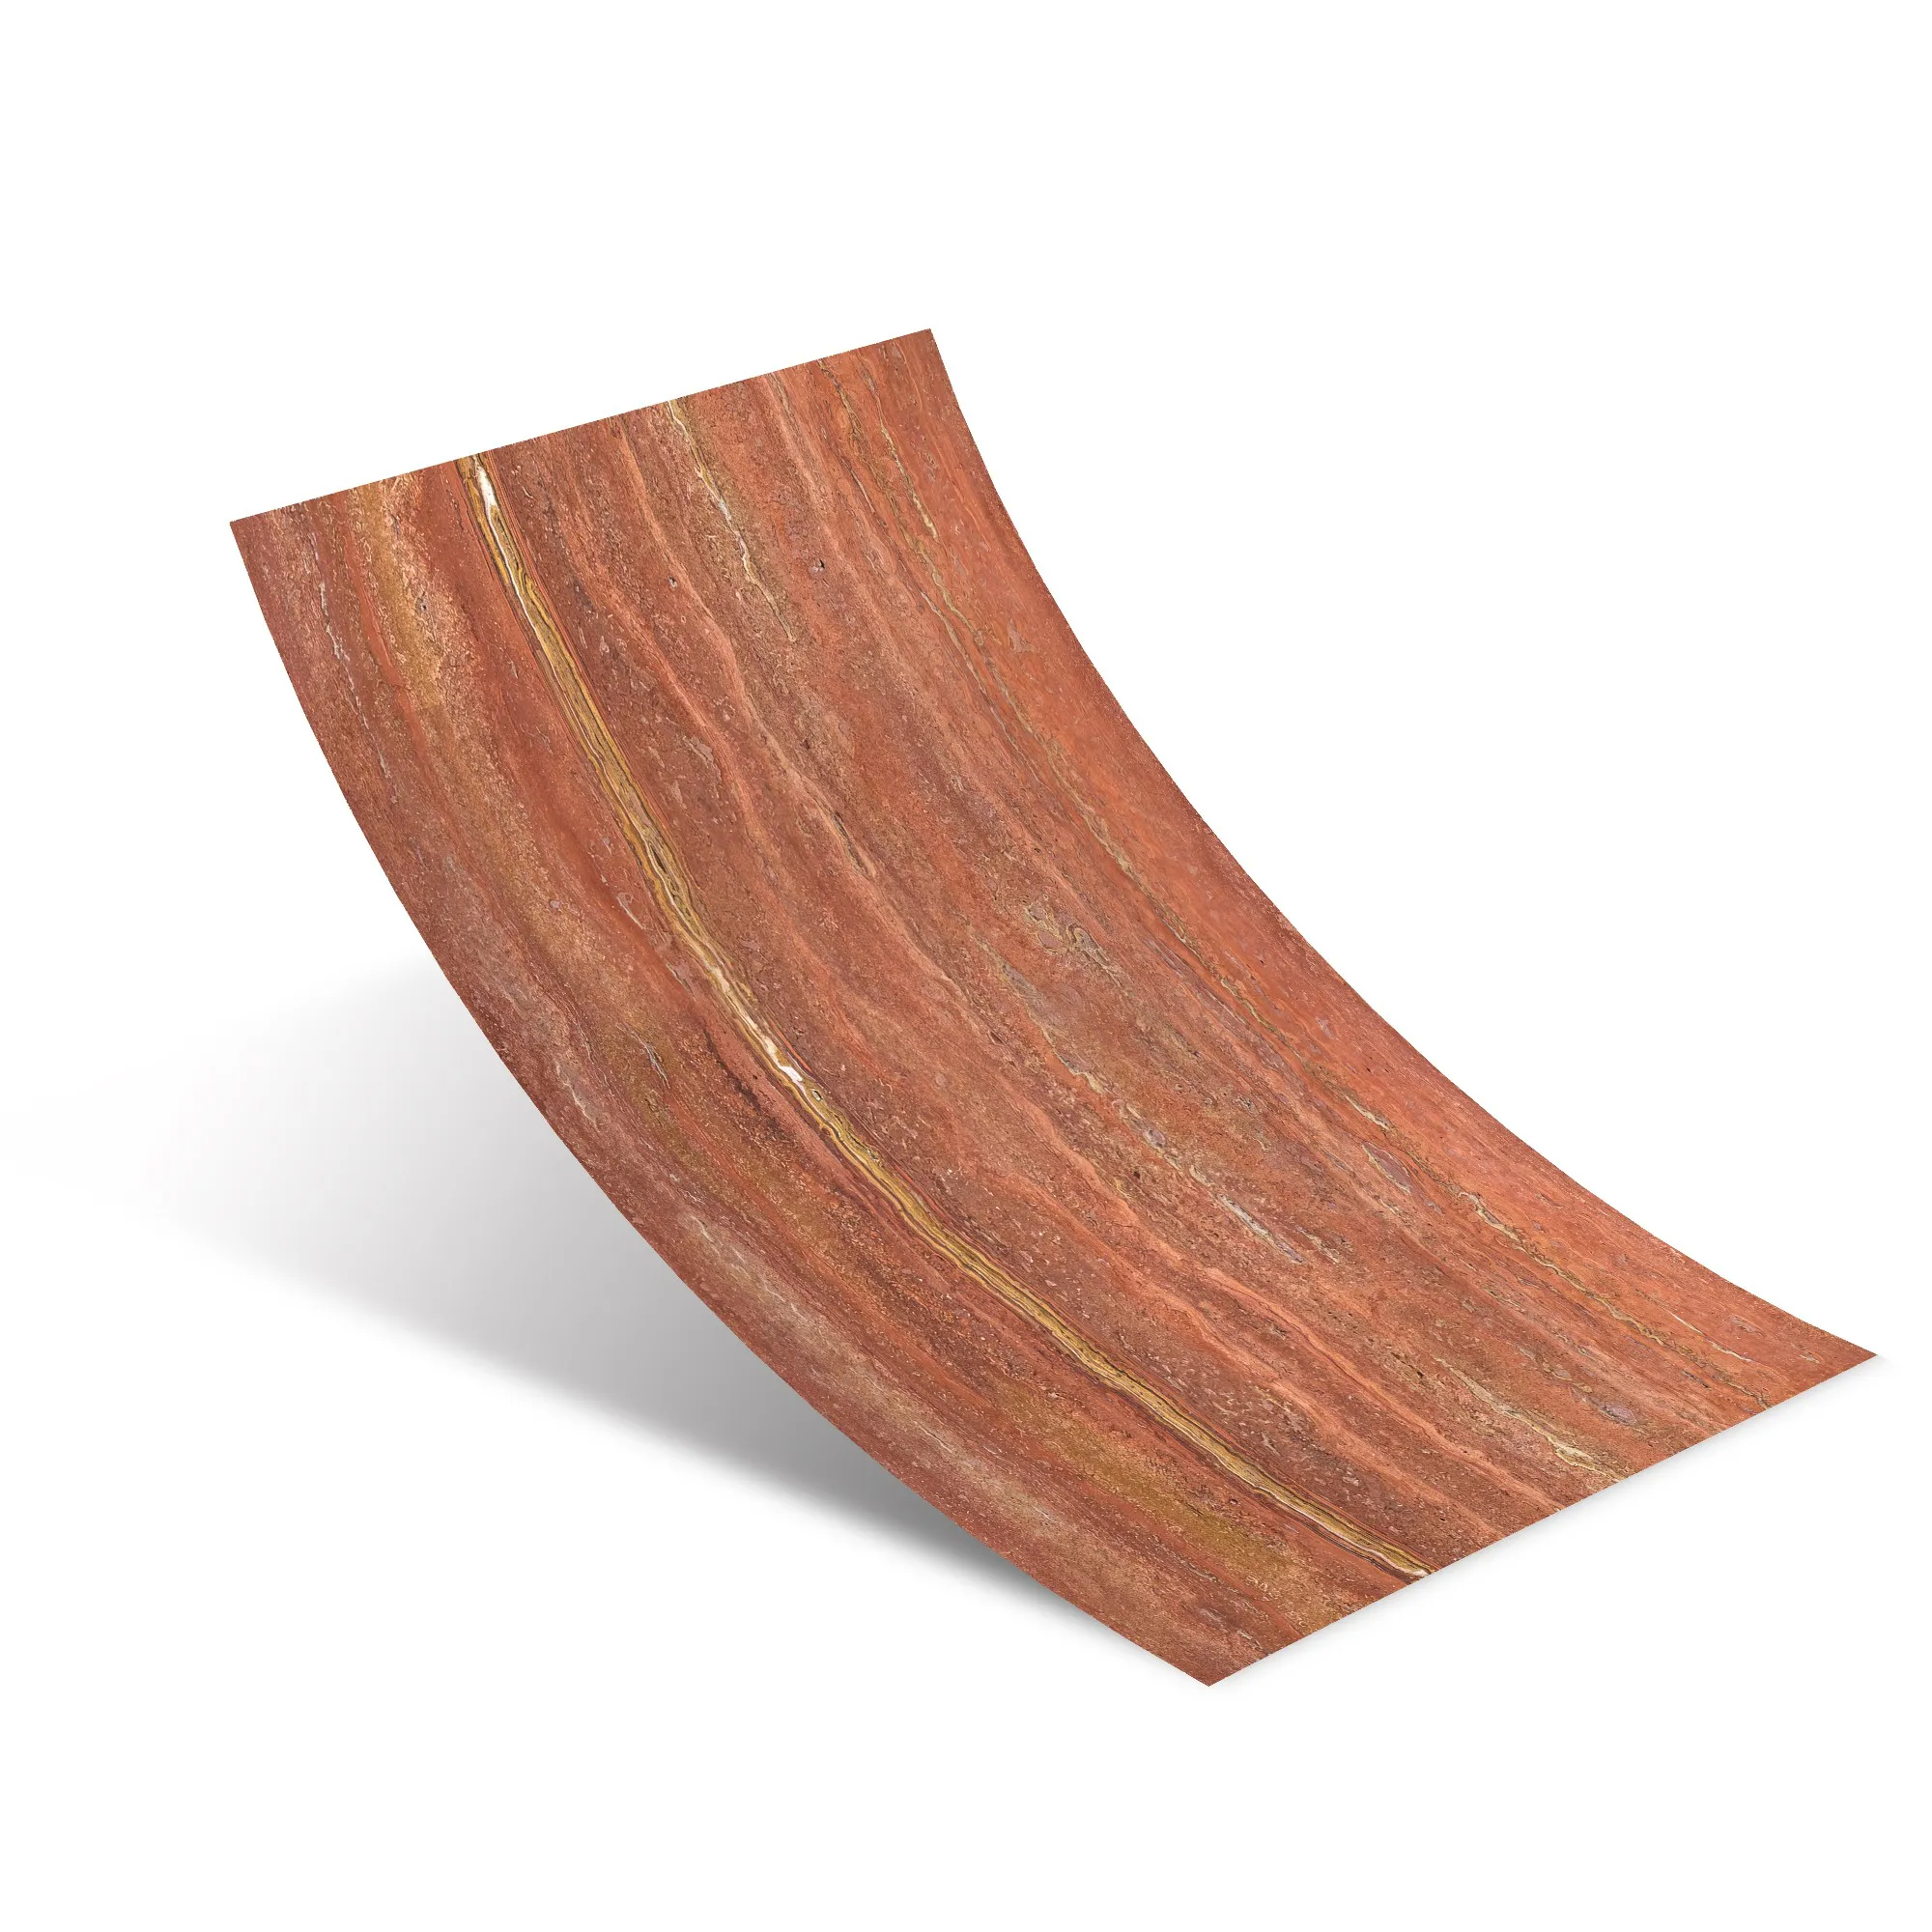
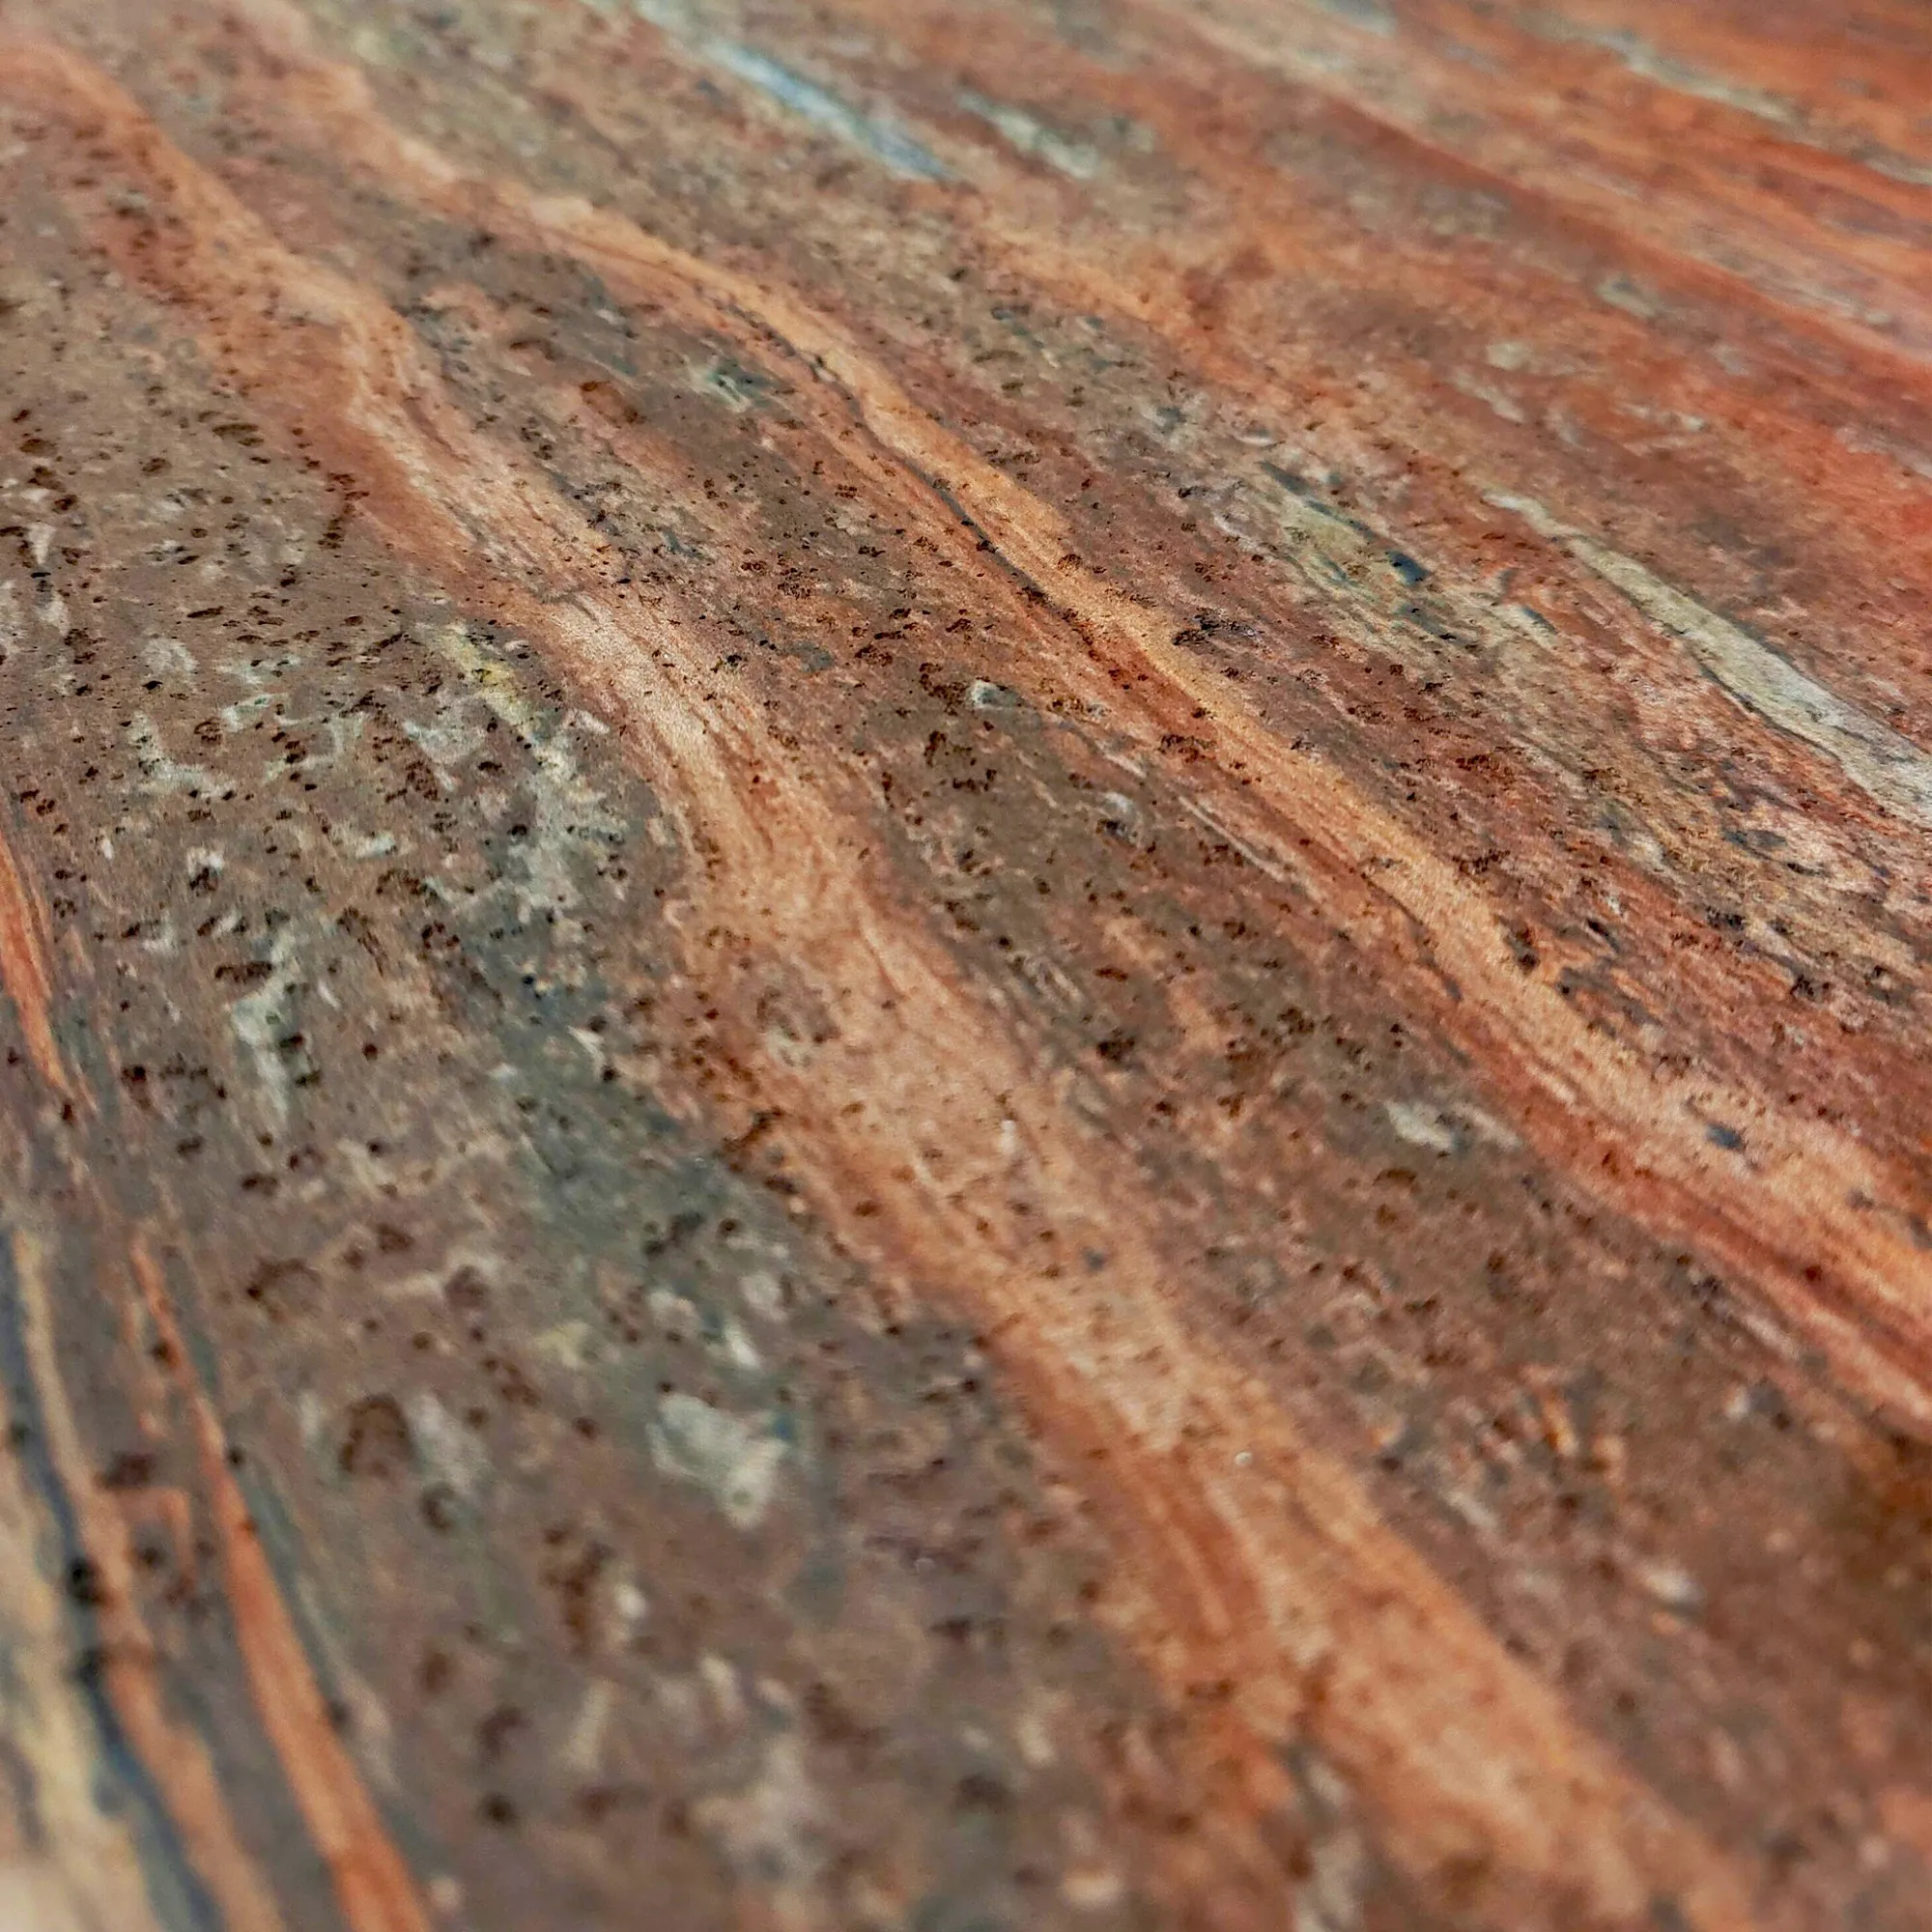
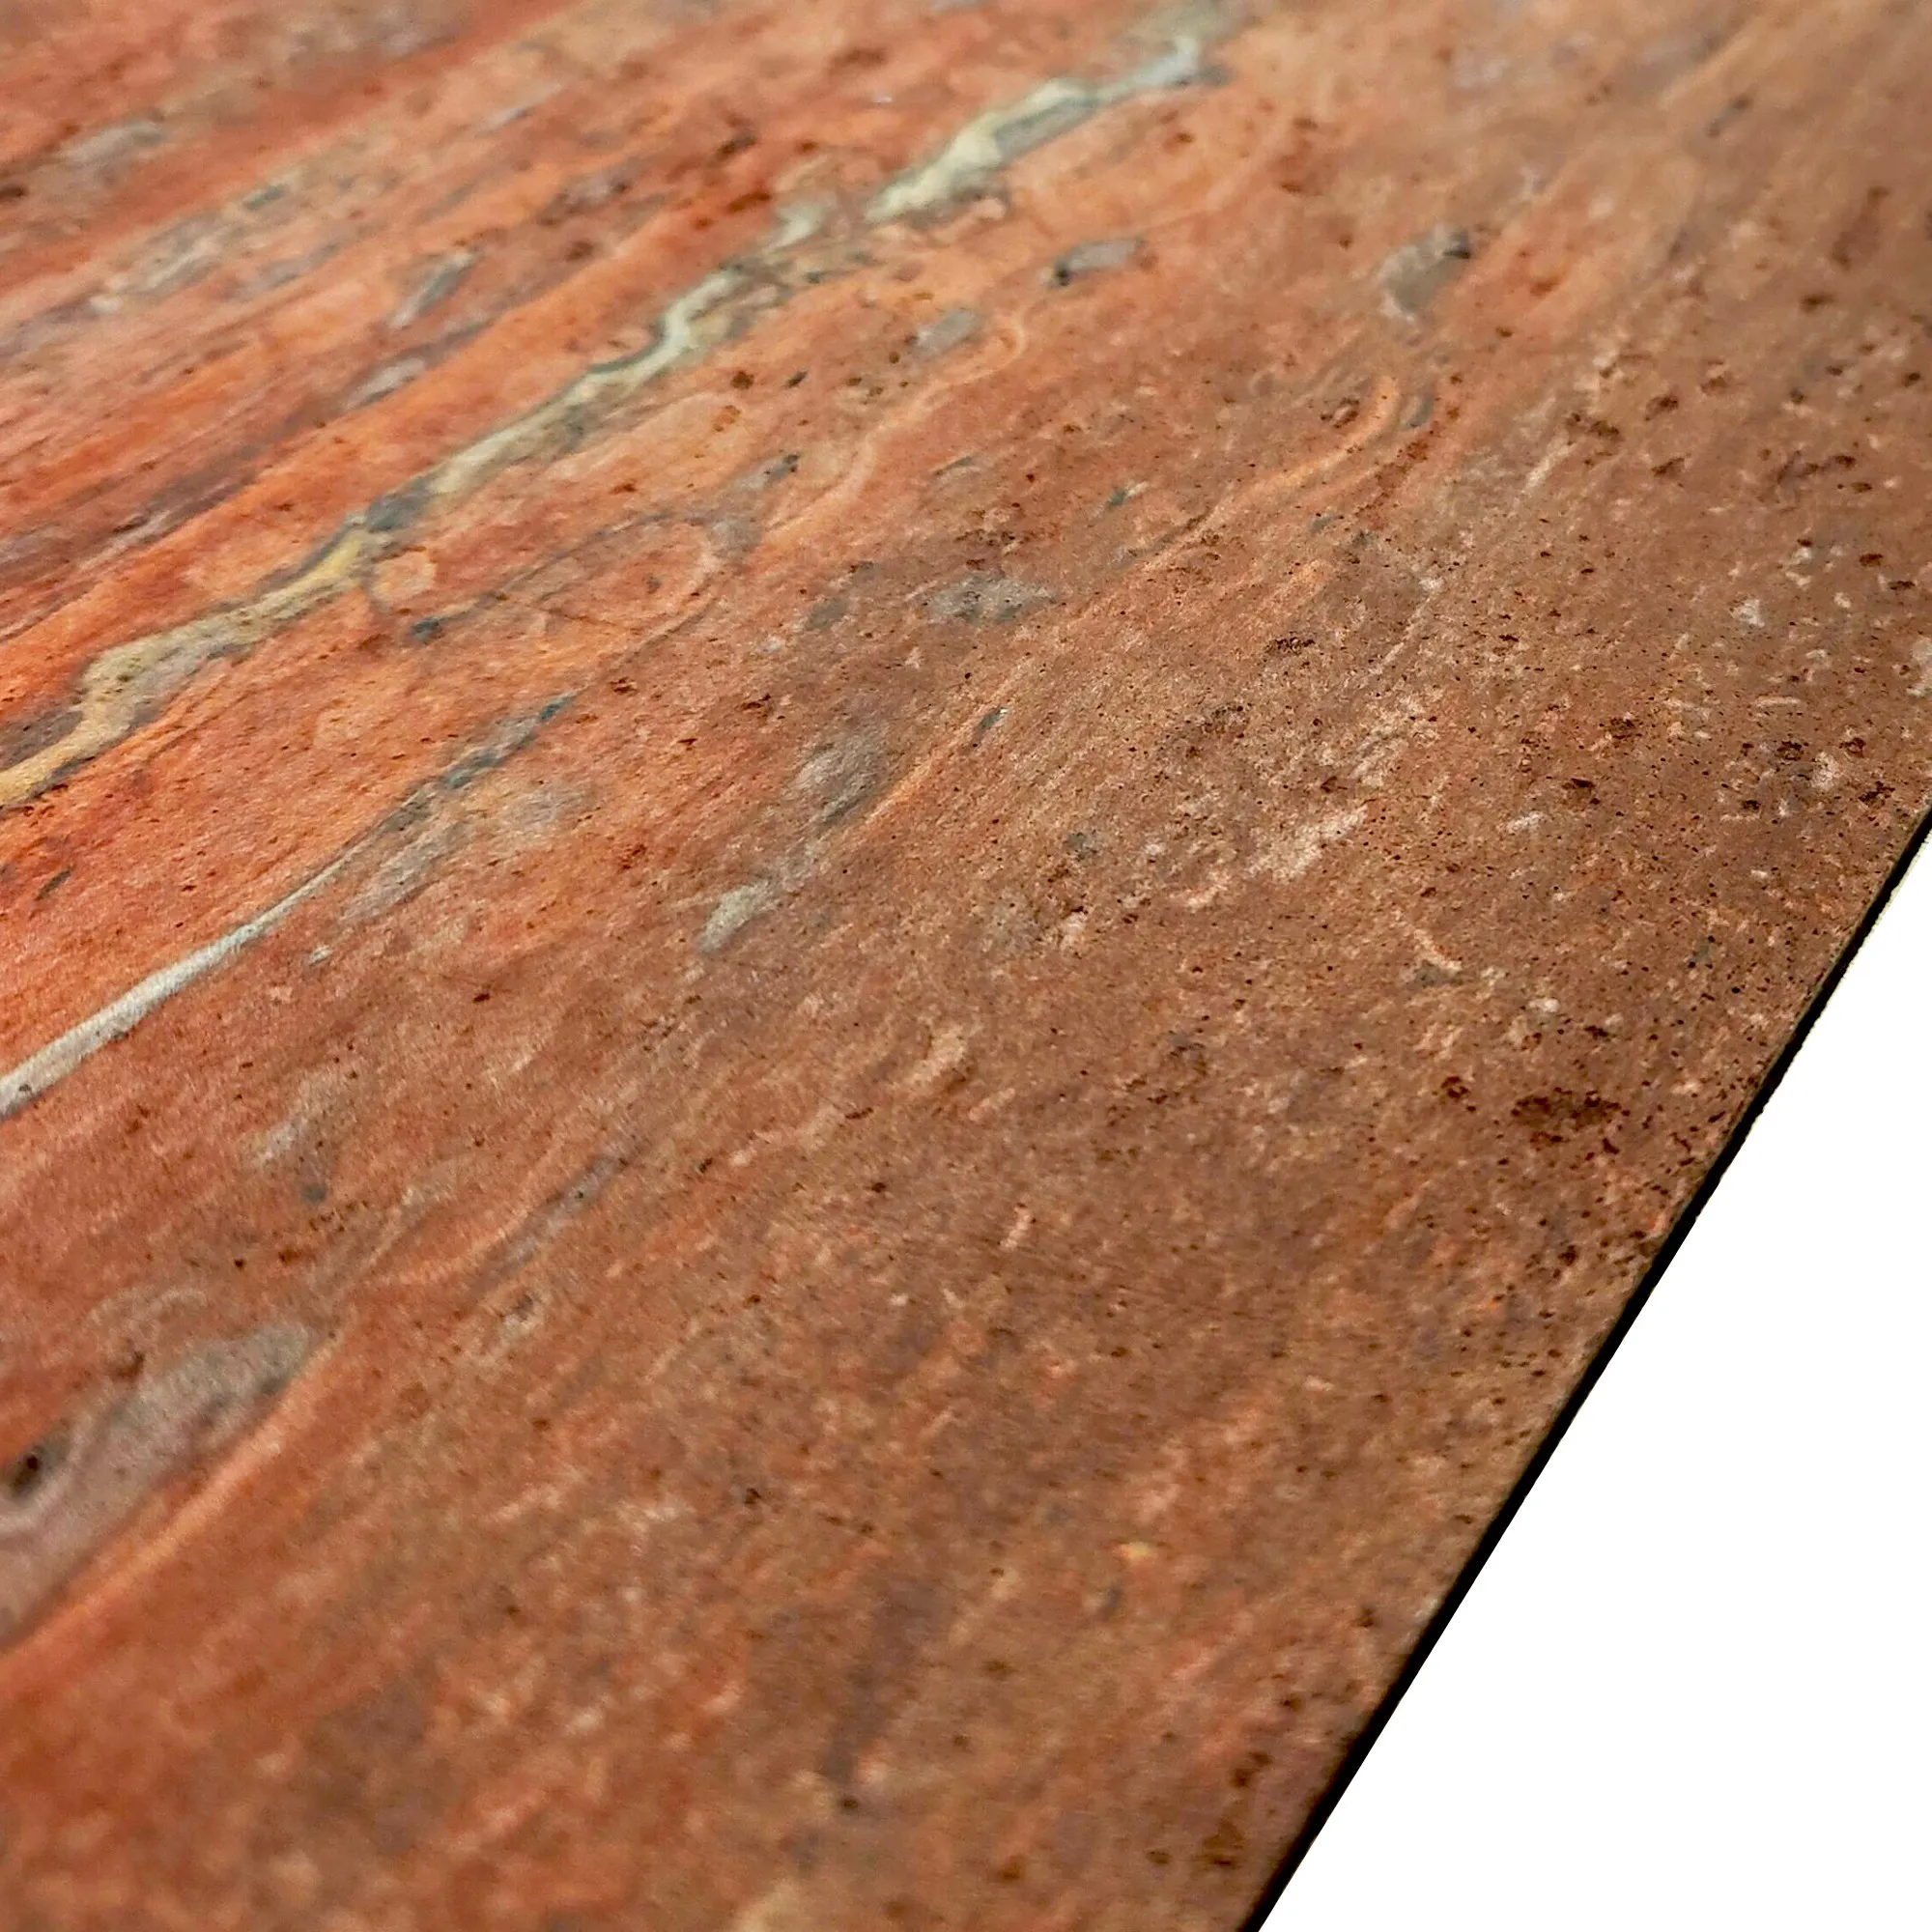
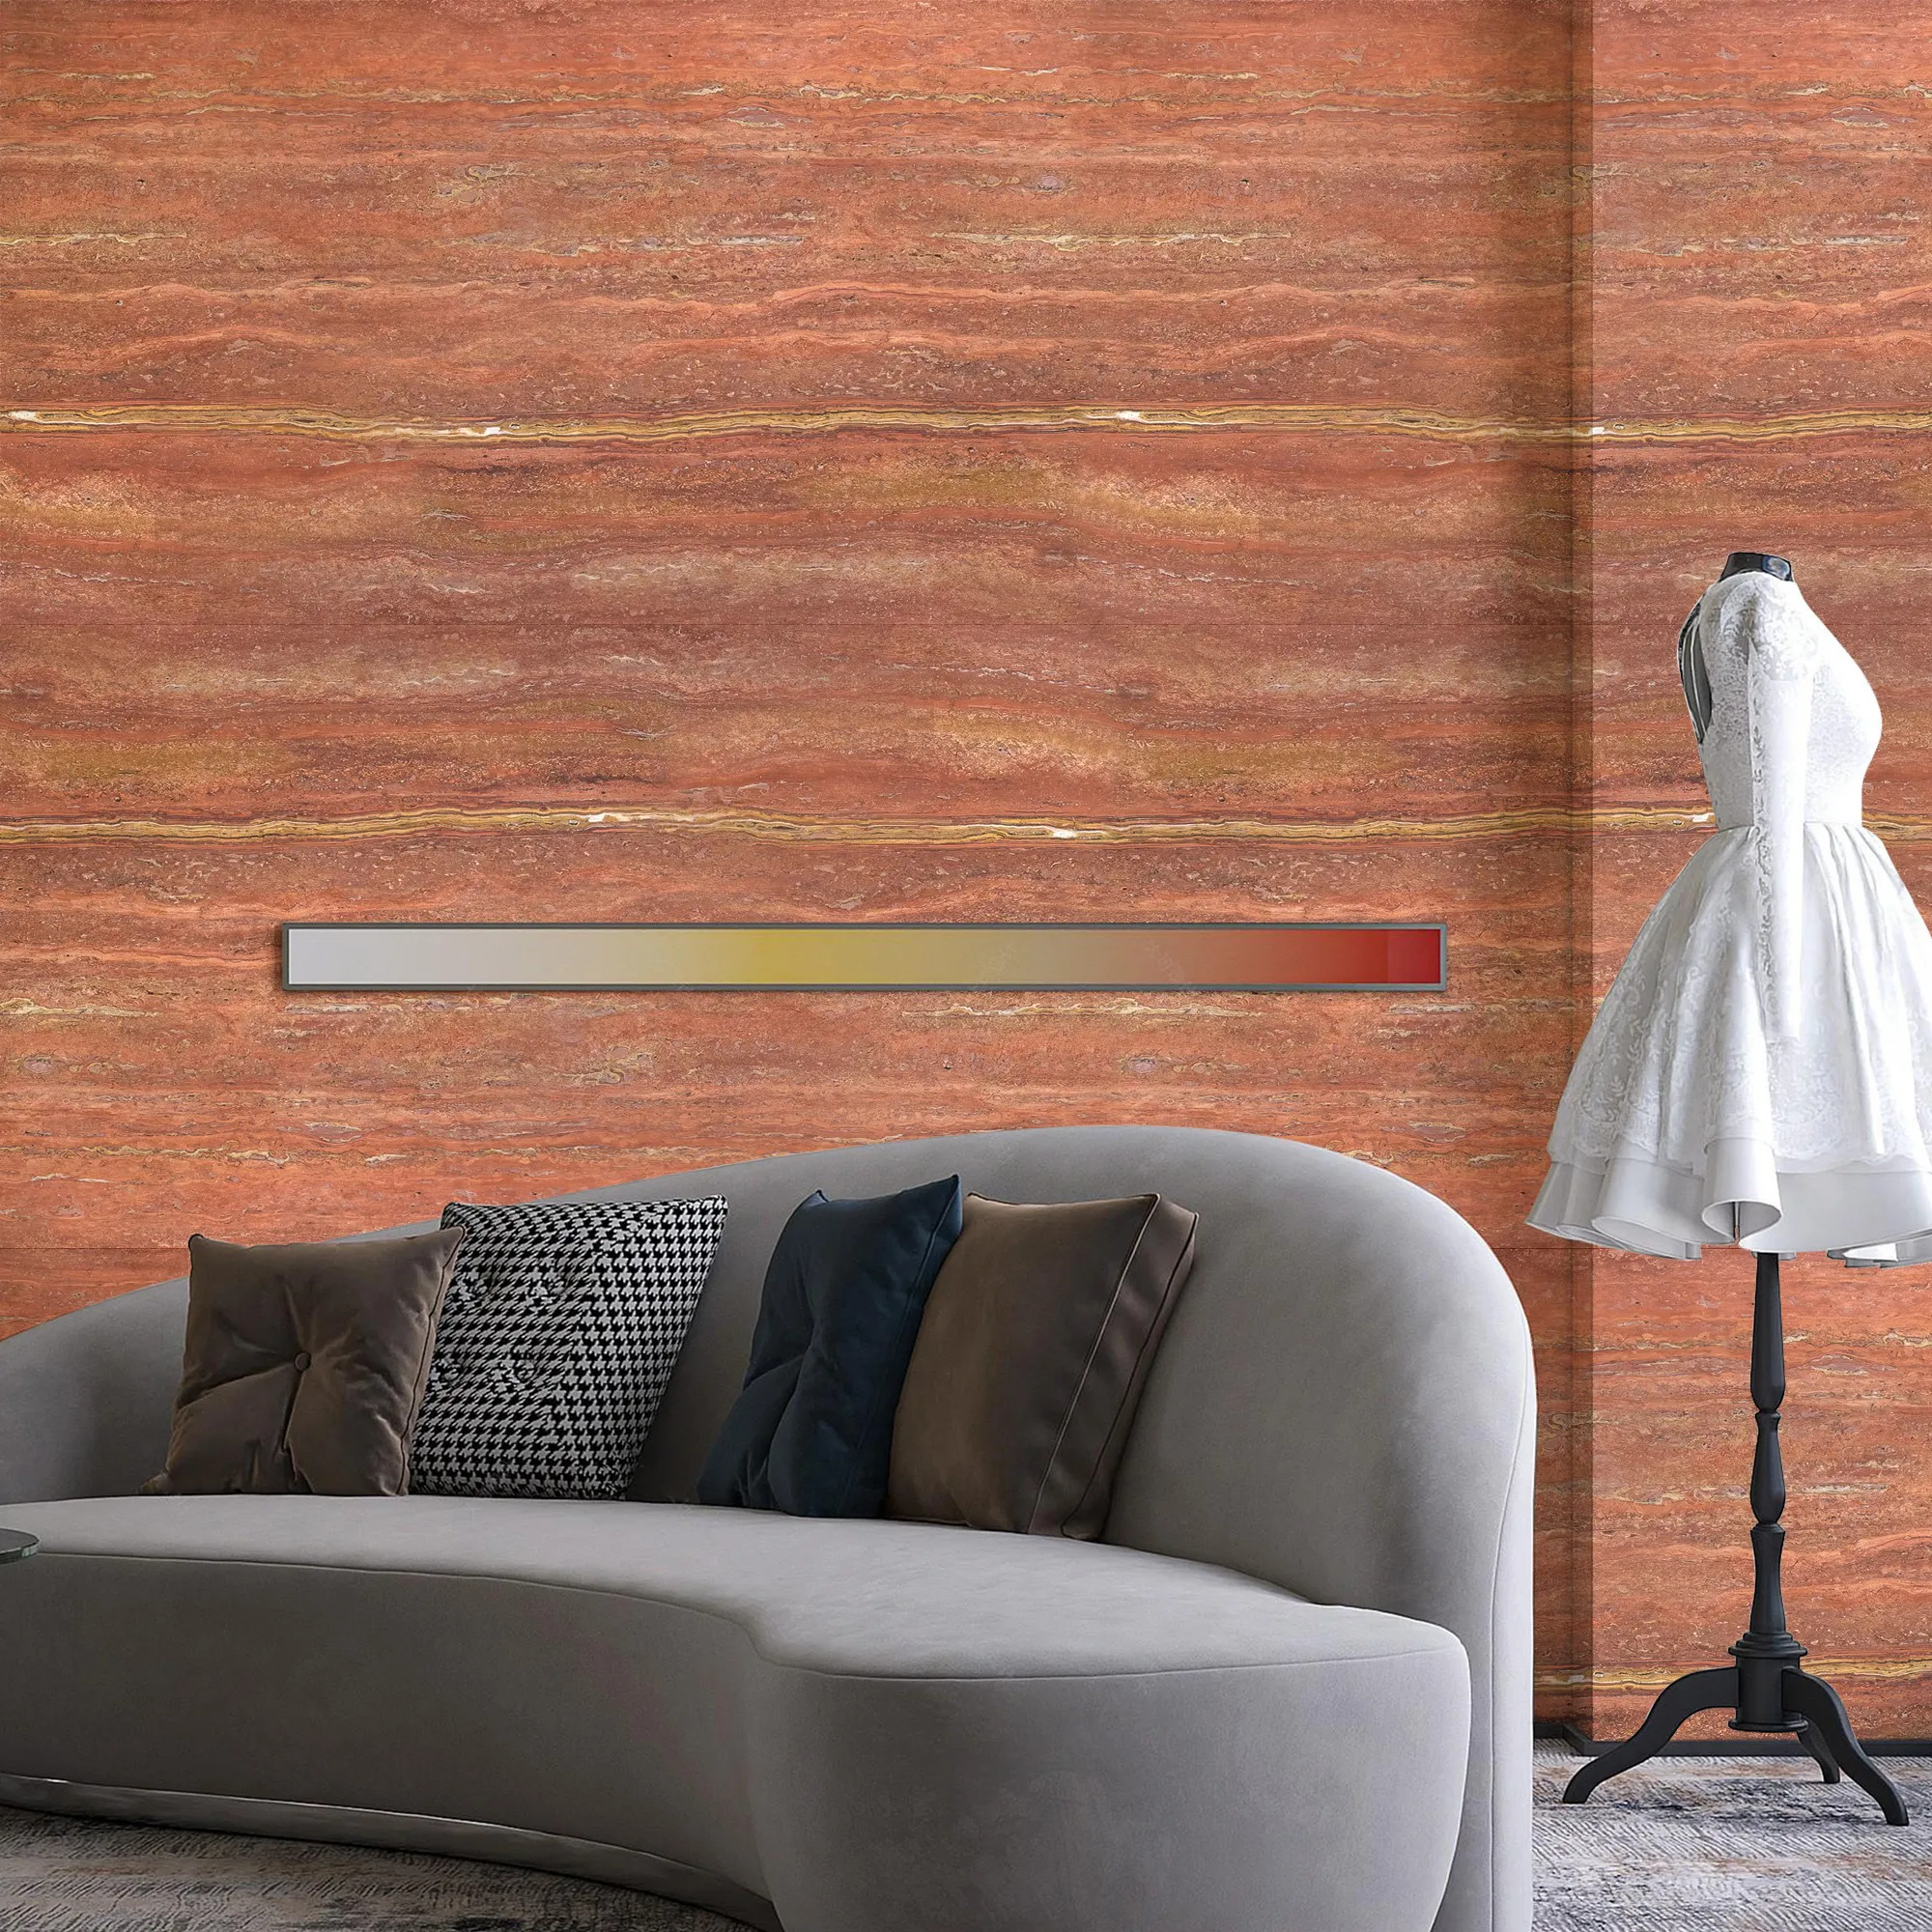
There's a reason designers and homeowners alike are obsessing over Starry Red Travertine from COLORIA's MCM (Modified Composite Material) series. It's not just stone—it's a story. The deep, velvety red base is swirled with lighter veins that mimic the trail of stars across a night sky, giving walls and surfaces a warmth that feels both timeless and modern. But here's the kicker: unlike traditional natural stone, which can be heavy, brittle, and a nightmare to install, Starry Red Travertine is part of COLORIA's MCM flexible stone line. That means it's lightweight, bendable (yes, bendable!), and designed to make installation feel less like a construction project and more like creating art.
Whether you're revamping a living room accent wall, upgrading your kitchen backsplash, or cladding an exterior facade, this guide will walk you through everything you need to know—from prepping your space to putting the final seal on your masterpiece. We've pulled in tips straight from COLORIA's in-house experts, the folks who've spent years perfecting the art of MCM installation. So grab your tools, put on your favorite playlist, and let's turn that blank wall into something unforgettable.
"Measure twice, cut once" might sound like a cliché, but when it comes to installing Starry Red Travertine (or any MCM panel, really), skipping prep work is like baking a cake without preheating the oven—you'll end up with a mess. Let's break this down into three non-negotiable steps.
First things first: your wall (or floor, if you're going vertical) needs to be ready. COLORIA's experts swear by fair-faced concrete as an ideal substrate—it's smooth, stable, and provides the perfect canvas for MCM panels. But don't panic if you don't have fair-faced concrete; drywall, cement board, or even properly primed wood can work too. The key is to check for:
Here's a pro move most DIYers skip: acclimating the panels. MCM flexible stone might be tough, but it's still sensitive to temperature and humidity changes. Unpack your Starry Red Travertine panels and lay them flat in the room where they'll be installed for at least 48 hours. This lets them adjust to the space's conditions, preventing warping or shrinking after installation. Pro tip: Keep them away from vents, heaters, or direct sunlight during this time—extreme temps are a no-go.
Starry Red Travertine's veining is part of its charm, so you'll want to arrange the panels to make those patterns flow. This is called "dry-fitting," and it's basically a dress rehearsal for installation. Lay the panels out on the floor (or against the wall, if they're lightweight enough) and shift them around until the veins align nicely. Avoid having small, narrow strips of panel at the edges—those look messy. Instead, adjust your starting point so the end panels are at least half the width of a full panel. For larger walls, using MCM big slab board series panels can reduce the number of seams, but even with standard sizes, a little planning goes a long way.
Pro tip from COLORIA's lead installer, Maria: "Take photos of your dry-fit layout with your phone. That way, if you have to move panels around, you can reference the pic to get back to that 'perfect flow' you spent 20 minutes creating."
You don't need to empty your savings account on tools for this project. In fact, most DIYers already have half of these lying around. Here's your shopping list (and yes, we've starred the non-negotiables):
| Tool/Material | Why You Need It | Pro Tip |
|---|---|---|
| *Tape Measure | For measuring the wall, panels, and ensuring straight lines. | Get a 25-footer—longer than you think you need, trust us. |
| *Level (4-foot) | To keep panels straight and avoid that "drunken wall" look. | A laser level is a splurge but worth it for large walls—no more holding a level and a pencil at the same time. |
| *Utility Knife with Extra Blades | To cut MCM panels. They're flexible, so no need for a saw! | Change blades often—dull blades tear the panel's surface. |
| *Notched Trowel (1/4 inch) | To apply adhesive evenly to the substrate. | Hold it at a 45-degree angle for the perfect adhesive depth. |
| MCM Adhesive | Specifically formulated for lightweight MCM panels. | Don't use generic tile adhesive—it might not bond well to the MCM material. |
| Grout (Matching or Contrasting) | For filling gaps between panels (optional, but recommended for a polished look). | For Starry Red Travertine, try a warm gray or off-white grout—red grout can clash. |
| Grout Float | To press grout into seams and smooth it out. | A rubber float works best—avoid metal, which can scratch the panels. |
| Sealer (Stone-Safe) | To protect Starry Red Travertine from stains and moisture. | Water-based sealer is easier to apply and dries faster than solvent-based. |
Bonus items: A rubber mallet (for gently tapping panels into place), painter's tape (to mark layout lines), and a sponge (for cleaning grout haze). Oh, and gloves—adhesive on your hands is a pain to remove, and Starry Red Travertine's color can transfer to skin if it's not sealed yet.
Now for the fun part: turning those flat panels into a stunning wall. Follow these steps, and you'll be admiring your handiwork by the end of the day (or weekend, if you're taking it slow—no rush, this is supposed to be enjoyable!).
We know we talked about this earlier, but it's worth repeating: clean the substrate one last time. Even a little dust can ruin the adhesive bond. Wipe it down with a damp cloth, then let it dry completely. If you're working with fair-faced concrete, you're already ahead of the game—it's porous enough to grip the adhesive, but smooth enough for even panel placement. For drywall, give it a light sanding first to rough up the surface—adhesive loves texture.
Most MCM adhesives come pre-mixed, but if you're using a powder formula, follow the instructions to the letter. Too runny, and it'll slide; too thick, and it won't spread evenly. Aim for the consistency of peanut butter—spreadable but not drippy. Mix only as much as you can use in 30 minutes (check the adhesive's pot life on the label) to avoid waste.
Grab your notched trowel and spread a thin, even layer of adhesive over a 3x3 foot section of the wall (don't try to cover the whole wall at once—adhesive dries fast!). Hold the trowel at a 45-degree angle and drag it across the surface to create ridges. These ridges ensure the adhesive spreads evenly when you press the panel down. For MCM big slab board series panels, which are larger and heavier, apply adhesive to both the wall and the back of the panel (this is called "back-buttering")—it adds extra security.
Line up your first panel with the layout lines you marked earlier. Press it firmly against the wall, starting from the bottom and working your way up—this prevents the panel from sliding. Use your hands to apply even pressure across the entire surface, then take your level and check that it's straight (both horizontally and vertically). If it's off, gently lift and reposition it—you have about 10 minutes before the adhesive sets, so don't panic. Pro tip: Use spacers (small plastic wedges) between panels if you're leaving grout lines—they ensure consistent spacing.
When you reach the edges of the wall or obstacles like outlets, it's time to cut. Measure the space you need to fill, then mark the panel with a pencil. Place the panel on a flat surface (a piece of scrap wood works great) and score the surface with your utility knife, following the line. Apply firm, even pressure—you don't need to cut all the way through in one go. Score it 2-3 times, then snap the panel along the scored line. For curves or complex cuts, use a jigsaw with a fine-tooth blade (MCM flexible stone cuts like butter compared to natural stone, so this is way easier than it sounds).
Work your way across the wall, applying adhesive in small sections and installing panels one by one. Stagger the seams like brickwork—this makes the wall look more natural and hides any slight misalignments. For example, if the first row starts with a full panel, the second row should start with a half-panel. This "staggered pattern" is especially important with Starry Red Travertine, as it prevents the veining from looking repetitive.
COLORIA expert tip: "Every few panels, step back and check the overall layout. It's easy to get caught up in the moment and miss a slight shift—better to fix it now than after the adhesive dries."
Wait 24 hours for the adhesive to fully cure, then grout the seams (if you're using grout). Mix the grout according to the package directions, then spread it over the panels with a rubber float, holding the float at a 45-degree angle to push the grout into the seams. Let it sit for 10-15 minutes, then wipe away the excess with a damp sponge (not wet—too much water weakens the grout). Rinse the sponge often to avoid smearing grout on the panels. Let the grout cure for another 24-48 hours before sealing.
Starry Red Travertine is porous, so sealing is a must to protect it from stains, water damage, and fading. Choose a stone-safe sealer (water-based is best for indoor use) and apply it with a foam brush or roller, following the manufacturer's instructions. Let it soak in for 5-10 minutes, then wipe away any excess with a clean cloth. Apply a second coat after the first dries (usually 2-4 hours), and you're done! The sealer will deepen the red color slightly, making those starry veins pop even more.
We've saved the best advice for last—these are the tricks COLORIA's installers use to make every project look like it was done by a pro. Memorize these, and your Starry Red Travertine wall will have neighbors asking for your contractor's number (spoiler: you are the contractor).
Congratulations—you've installed your Starry Red Travertine wall! Now, how do you keep it looking as stunning as the day you finished? Luckily, MCM flexible stone is low-maintenance, but a little care goes a long way.
Installing Starry Red Travertine MCM panels isn't just about adding a surface—it's about adding character, warmth, and a little bit of magic to your space. With COLORIA's MCM flexible stone, you get the beauty of natural stone without the hassle, and with this guide, you have all the tools (and tips) to make it a success.
So go ahead—step back, admire your handiwork, and take a photo (or ten). That wall didn't just build itself; you built it, and that's something to be proud of. And if you ever need a refresher, just come back to this guide—we'll be here.
Happy installing, and may your walls always shine as bright as your Starry Red Travertine.
Recommend Products


