
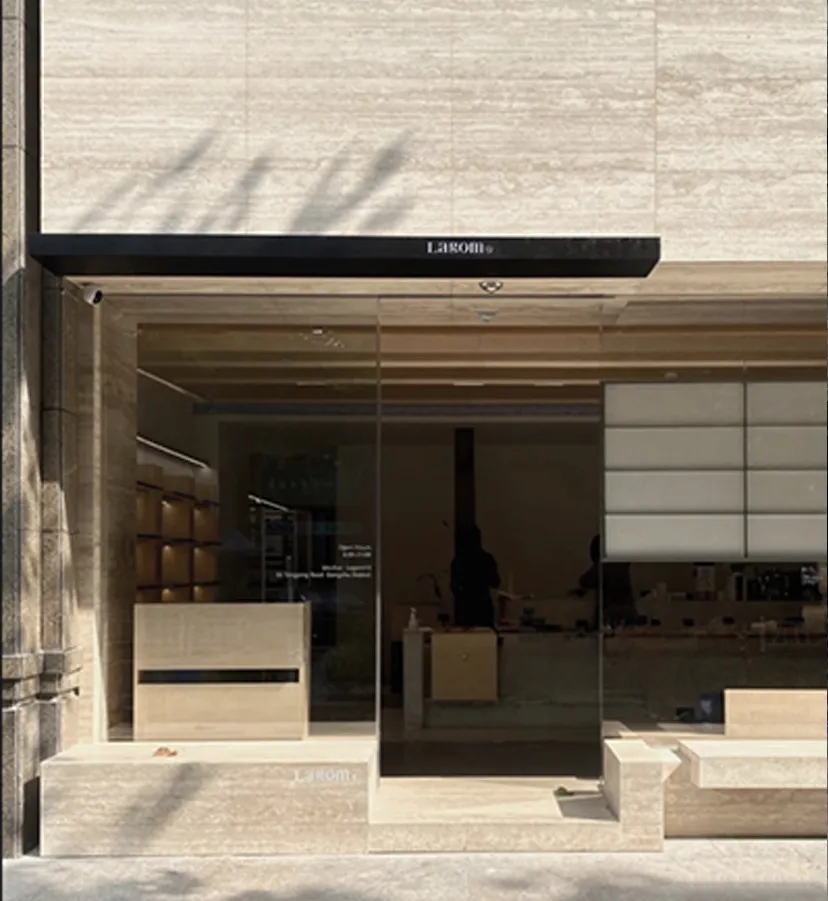
There's something timeless about travertine flooring. It's the kind of surface that ages like fine wine—gaining character with every scuff, yet retaining that inherent elegance that makes any space feel grounded and refined. But here's the truth: even the most beautiful travertine stone won't shine if the installation is shoddy. That's where COLORIA GROUP comes in. With decades of expertise in modified cementitious materials (MCM) and a lineup of game-changing products like MCM Flexible Stone and 3D Printing Series, we're not just selling materials—we're partnering with you to turn your flooring vision into a flawlessly installed reality.
Whether you're drawn to the celestial sparkle of Travertine (Starry Green), the industrial chic of Foamed Aluminium Alloy Board (Vintage Silver), or the futuristic precision of MCM 3D Printing Series, this guide will walk you through every step of the installation process. And don't worry—we'll keep it real, skip the jargon, and focus on what actually matters: how to get that "just-like-a-museum" finish with zero stress.
Before we dive into the "how," let's talk about the "why." Travertine has been a go-to for architects and designers for centuries, and it's not hard to see why. Its porous surface, unique veining, and earthy tones bring a slice of nature indoors, creating spaces that feel both grand and intimate. But traditional travertine comes with headaches: it's heavy (hello, structural concerns), prone to cracking during installation, and often needs frequent sealing to prevent stains.
That's where COLORIA's MCM (Modified Cementitious Material) technology flips the script. Our MCM Travertine and complementary products like Lunar Peak Series and Flexible Stone are engineered to keep all the beauty of natural stone—without the hassle. Let's break down the perks:
Pro Tip : If you're torn between styles, check out our Travertine Real Photos gallery online. Clients often tell us that seeing how Travertine (Starry Green) catches the light at different times of day or how Lunar Peak Silvery pairs with warm wood tones helped them make the final call.
Here's a secret professional installers won't always tell you: 70% of a perfect floor is in the prep work. Rushing this step is like building a house on sand—so let's slow down and get it right. We'll cover materials, subfloor prep, and tools you'll need (plus which ones COLORIA can help you source).
Not all travertine is created equal, and the same goes for MCM products. Your choice depends on the room's purpose, lighting, and design vibe. Let's break down some top picks for flooring:
| Product | Best For | Key Perk for Installation | Difficulty Level |
|---|---|---|---|
| Travertine (Starry Green) | Luxury living rooms, hotel lobbies | Starry crystal inlays reflect light, hiding minor installation gaps | Medium (requires careful alignment of star patterns) |
| MCM Flexible Stone | Bathrooms, basements (slight moisture) | Bends to fit uneven subfloors; water-resistant core | Low (forgiving during cutting and laying) |
| Lunar Peak Golden | Modern kitchens, home offices | Metallic finish hides dust, reducing post-installation cleaning | Medium (needs precise grouting to avoid discoloration) |
| Foamed Aluminium Alloy Board (Vintage Silver) | Commercial spaces (high traffic) | Lightweight underlay adds structural support without bulk | Low (interlocks easily with MCM panels) |
| MCM 3D Printing Series (Custom Shapes) | Statement floors (e.g., geometric patterns) | Pre-cut to your specs, so no on-site trimming needed | Low (just align and stick!) |
Not sure which product fits? COLORIA's design team offers free material consultations. Send us photos of your space, and we'll recommend options that match your style and installation needs.
Your subfloor is the foundation of your new floor—so treat it like one. Here's how to prep it like a pro:
Use a 4-foot straightedge to test the subfloor. Gaps larger than 3/16 inch need to be filled with a self-leveling compound. Why? Even minor dips can cause MCM panels to flex and crack over time. For uneven concrete, we often recommend using our Fine Line Stone (Grey) as a leveling layer—it's thin, lightweight, and bonds like a dream.
Sweep, vacuum, and wipe the subfloor with a damp cloth to remove dust, grease, or old adhesive. Any debris trapped under the panels will create bumps—and trust us, you'll notice them the first time you walk across the room in socks. For tough stains, use a pH-neutral cleaner (avoid bleach or vinegar, which can etch concrete).
Bring your MCM panels and adhesive into the installation space 48 hours before starting. This lets them adjust to the room's temperature and humidity, preventing expansion or contraction after installation. Store panels flat (never leaning) to avoid warping—especially important for large slabs like MCM Big Slab Board Series.
You've prepped, you've picked your materials, and you've got your COLORIA expert on speed dial (more on that later). Now let's lay those floors. We'll focus on a standard MCM Travertine installation, with tips for specific products like Flexible Stone or 3D Printing Series along the way.
Leave the kitchen scissors in the drawer. For MCM materials, you'll need:
Start by laying out your panels without adhesive to map the pattern. This is your chance to avoid "staircase" (where small, awkward cuts end up along a wall) and ensure Travertine (Starry Green)'s star patterns align nicely. For 3D Printing Series custom shapes, this step is non-negotiable—you'll want to confirm all pieces fit like a puzzle before gluing.
Pro Move : Snap a chalk line down the center of the room (lengthwise and widthwise) to create a grid. Start laying panels from the center point, working toward the walls. This ensures symmetry, especially for statement floors like those using Lunar Peak Black as an accent border.
Measure twice, cut once—oldie but goodie. For straight cuts, mark the panel with a pencil and use the circular saw on a low setting (MCM materials cut easily, so high speed can cause chipping). For curves or notches (hello, toilet flanges or floor vents), use a jigsaw with a diamond blade.
Flexible Stone Hack : MCM Flexible Stone can be scored with a utility knife and snapped by hand for small cuts—no power tools needed! Just score deeply along your line, then apply gentle pressure to break it cleanly.
Always wear eye protection and a dust mask when cutting—even MCM dust is no joke.
Mix your MCM-approved adhesive according to the instructions (we recommend our proprietary formula, which bonds in 24 hours and resists moisture). Use the notched trowel to spread adhesive in a "U" pattern over a 3x3 foot area—this ensures full coverage without air bubbles.
For Foamed Aluminium Alloy Board (Vintage Silver) underlayment: Apply adhesive directly to the subfloor, then press the alloy board into place, using a roller to remove gaps. Let it set for 12 hours before laying travertine on top.
Place the first panel along your chalk line, pressing firmly to seat it in the adhesive. Use the rubber mallet to tap gently around the edges—this ensures full contact with the subfloor. Check with your spirit level: if it rocks, lift and add a bit more adhesive (don't try to "shim" with extra glue under one corner).
Spacing Matters : Leave a 1/8-inch gap between panels for grout. For MCM Big Slab Board Series (which can be up to 120x60 inches), use spacers to keep gaps consistent—these large panels make uneven spacing super noticeable.
Flexible Stone Note : When laying Flexible Stone, roll over the panel with a 50-pound roller after tapping to ensure the adhesive bonds to every inch. This extra step prevents peeling later.
Wait 24 hours for the adhesive to set, then mix your grout. We recommend a sanded grout for floors (it's more durable) in a shade that complements your travertine—for Travertine (Starry Green), a soft gray or taupe keeps the focus on the star patterns.
Apply grout with a float, holding it at a 45-degree angle to push the grout into gaps. Let it set for 15 minutes, then wipe excess with a damp (not soaking) sponge, rinsing frequently. Avoid circular motions—they can pull grout out of joints.
Pro Cleanup : After 24 hours, buff the floor with a dry microfiber cloth to remove any grout haze. For Lunar Peak Series, use a non-abrasive cloth to avoid scratching the metallic finish.
MCM Travertine is more stain-resistant than traditional stone, but sealing adds an extra layer of protection—especially in kitchens or bathrooms. Use a penetrating sealer (we like water-based formulas for eco-friendliness) and apply with a foam roller, working in small sections. Let it soak in for 15 minutes, then wipe up excess. Wait 48 hours before walking on the floor.
Sealing Schedule : For high-traffic areas, reseal every 2 years; low-traffic spaces can go 3-5 years. Test with a drop of water—if it beads up, you're good; if it soaks in, it's time to reseal.
Let's be real: Even with this guide, flooring installation can feel overwhelming. That's why COLORIA's "one-stop solution" doesn't end at materials. From the moment you pick your first sample to the day you host your first dinner party on your new floors, we've got your back.
Our Expert Support Includes:
One client, a restaurant owner in Riyadh, told us: "I was nervous about installing MCM Flexible Stone in my outdoor dining area, but COLORIA's team walked me through every step—even helped adjust the adhesive mix for Saudi's humidity. Now those floors look brand-new two years later, despite rain and daily foot traffic." That's the support we're talking about.
Your new MCM Travertine floor is installed, sealed, and shining. Now how do you keep it that way? Spoiler: It's way easier than you think.
Sweep or vacuum regularly to remove dirt (abrasive particles are the #1 enemy of any floor). Mop with warm water and a pH-neutral cleaner (avoid vinegar, bleach, or ammonia—they can etch the surface). For spills, blot immediately (don't wipe!) to prevent staining—especially important for lighter colors like Travertine (Beige).
Give the floor a thorough clean with a stone-safe cleaner (we sell our own, or ask for recommendations). Use a soft-bristle brush on grout lines to remove built-up dirt, then rinse with clean water and dry with a towel.
Installing travertine flooring shouldn't feel like a DIY nightmare. With COLORIA's MCM technology—from the flexibility of MCM Flexible Stone to the custom precision of 3D Printing Series—and our expert support every step of the way, you can have a floor that's as beautiful as it is functional.
Whether you're dreaming of Travertine (Starry Green) in your master suite, Lunar Peak Silvery in your home office, or a bold mix of MCM products for a commercial space, we're here to make it happen. So what are you waiting for? Request a sample, schedule a consultation, or dive into our product gallery—your perfect floor is just a click away.
And remember: This isn't just flooring. It's the foundation of memories—morning coffees, family gatherings, late-night chats. With COLORIA, you're not just installing a floor—you're installing something that lasts.
Recommend Products












