If you've spent any time on a construction site lately, you've probably noticed a material that's been turning heads:
Marble Stream Stone. With its flowing, river-like veining and earthy color palette, it's no wonder architects and homeowners alike are demanding it for everything from kitchen backsplashes to outdoor patios. But here's the thing—installing this stone isn't just about slapping it on a wall and calling it a day. As contractors, we know the difference between a job that lasts 10 years and one that starts cracking in 12 months comes down to the details. So let's dive into what makes
Marble Stream Stone unique, how to install it right, and why cutting corners here is never worth it.
Before we get our hands dirty, let's clarify what we're working with.
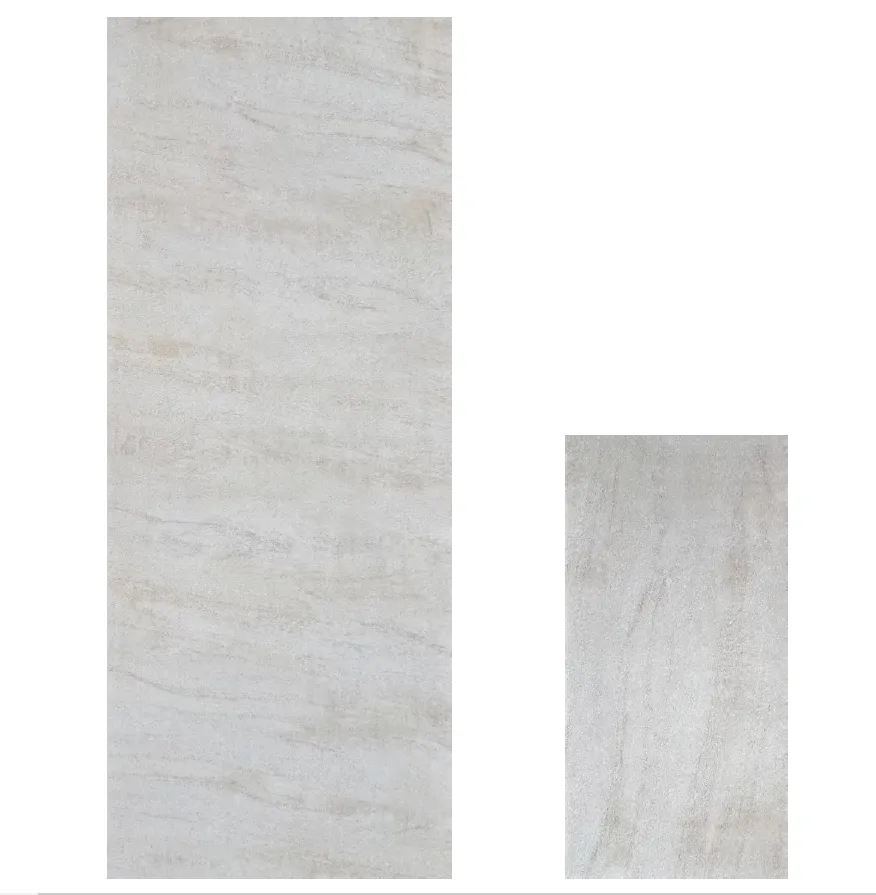
Marble Stream Stone is a engineered stone composite that mimics the look of natural marble but with added durability. Unlike raw marble, which is porous and prone to staining, this material combines crushed marble aggregates with resin binders, creating a surface that's both tough and visually striking. Its signature "stream" pattern—soft, winding veins in shades of gray, beige, and white—gives it a dynamic, organic feel that's hard to replicate with other materials. Think of it as nature's artistry meets modern engineering.
You might be thinking, "How does this differ from something like
travertine (starry blue)
or
marble interstellar gray
?" Great question. While
travertine has those classic pitted holes and interstellar gray leans into bold, cosmic patterns,
Marble Stream Stone is all about movement. It's the difference between a still lake and a gently flowing river—both beautiful, but serving different design vibes. And because it's engineered, you get more consistency in color and pattern than you would with fully natural stone, which is a win for large-scale projects where uniformity matters.
Pre-Installation Prep: The Foundation of a Great Install
I once worked with a new subcontractor who skipped surface prep on a
Marble Stream Stone fireplace surround. Six months later, the stone started popping off the wall. Turns out, the substrate had been painted with a glossy latex paint, and the adhesive couldn't grip. Moral of the story? Prep work isn't optional—it's the backbone of the entire installation.
Step 1: Inspect the Substrate Like Your Reputation Depends On It
Marble Stream Stone is only as stable as the surface it's attached to. Start by checking the substrate for cracks, unevenness, or moisture. If you're installing it over drywall, make sure it's properly sealed and free of dust. For concrete floors, do a moisture test—anything over 5 lbs/1000 sq ft/24hrs is a red flag. Use a leveling compound if the surface has dips deeper than 1/8 inch; even small imperfections can cause the stone to crack over time.
Step 2: Measure Twice, Order Once (Plus Extra)
This might sound like contractor 101, but
Marble Stream Stone's veining means you need to account for pattern matching. Always order 10-15% extra material. Why? Because if you run short, the next batch might have slightly different veining, and suddenly that "stream" you worked so hard to align looks like a river that hit a dam. Trust me, explaining a mismatched pattern to a client is way harder than shelling out for a few extra slabs upfront.
Step 3: Check the Material for Defects
Unpack each slab carefully and inspect for chips, cracks, or warping. Engineered stone is tough, but it's not indestructible—shipping and handling can sometimes cause hidden damage. If you spot a defect, set it aside and contact the supplier immediately. Installing a flawed slab now will only lead to callbacks later, and nobody has time for that.
Substrate Compatibility: A Quick Reference
Not all surfaces play nice with
Marble Stream Stone. To save you the guesswork, here's a breakdown of common substrates and whether they're a go, no-go, or need extra prep:
|
Substrate
|
Compatibility
|
Notes
|
|
Fair-Faced Concrete
|
Excellent
|
Ensure surface is sandblasted or etched for adhesion; avoid smooth, troweled finishes.
|
|
Drywall (Painted)
|
Needs Prep
|
Sand glossy paint, apply a bonding primer, and use lightweight mortar.
|
|
Wood (Plywood/OSB)
|
Proceed with Caution
|
Must be reinforced with cement board; wood expands/contracts too much otherwise.
|
|
Existing Tile
|
Possible
|
Only if tile is firmly attached; grind down high spots and use a flexible adhesive.
|
Installation Steps: From Cutting to Curing
Now for the fun part—actually putting the stone in place. Let's walk through the process step by step, with tips I've picked up from installing everything from small bathroom vanities to 500 sq ft feature walls.
1. Cutting: Precision is Key
Marble Stream Stone cuts cleanly, but you'll need the right tools. A wet tile saw with a diamond blade is non-negotiable—dry cutting will create dust clouds that clog your lungs and dull blades fast. When measuring cuts, mark the stone with a pencil (permanent marker can stain!) and use a straightedge to keep lines crisp. For curves or intricate shapes, a angle grinder with a diamond wheel works, but go slow—rushing leads to chipping. Pro tip: Dip the blade in water frequently to keep it cool; overheating can warp the stone's surface.
2. Adhesive: Not All Glues Are Created Equal
Skip the generic construction adhesive here.
Marble Stream Stone is heavier than standard tile, so you need a mortar that can handle the weight. Look for a polymer-modified thinset mortar labeled for "heavy stone" or "engineered marble." Avoid mastic adhesives—they're great for lightweight tiles but lack the bond strength needed here. Apply the mortar with a 1/2-inch notched trowel, holding it at a 45-degree angle to ensure full coverage. And don't skimp on the back-buttering—spreading a thin layer on the back of each slab eliminates air pockets that cause lifting.
3. Positioning: Let the Veins Guide You
This is where the art meets the science. Lay out the slabs on the floor first to map the veining—you want the "stream" to flow naturally, like water downhill. Start from the center of the wall or floor and work outward; this keeps the pattern balanced. Use spacers (1/8 to 1/4 inch, depending on grout line preference) to maintain even gaps, and tap the stone gently with a rubber mallet to set it in place. Check with a level after each slab—even a 1/16-inch tilt will throw off the entire row.
4. Grouting: Choose Wisely, Apply Carefully
Grout color can make or break the stone's look. For a seamless vibe, go with a shade that matches the stone's base color (usually beige or light gray). For contrast, a darker gray can make the veins pop—but test a small area first! Use a grout float to press the grout into the joints, then wipe excess with a damp sponge (not wet—too much water weakens grout). Let it set for 20-30 minutes, then buff with a dry cloth to remove haze. Pro move: Use a grout sealer afterward to prevent staining, especially in wet areas like showers.
5. Sealing: Protect That Shine
Even though
Marble Stream Stone is less porous than natural marble, sealing is still a must. Wait at least 48 hours after grouting, then apply a penetrating sealer with a foam brush. Let it soak in for 10 minutes, wipe off excess, and apply a second coat after 24 hours. For high-traffic areas like floors, consider a topical sealer for extra protection—just be aware it may alter the stone's sheen slightly.
Common Challenges (and How to Fix Them)
Let's be real—no installation goes perfectly. Here are the issues I've run into most often with
Marble Stream Stone and how to troubleshoot them:
Problem: Uneven Surface After Installation
Why it happens:
Substrate wasn't leveled properly, or tiles were set with inconsistent mortar thickness.
Fix:
For minor dips, use a grinding stone to smooth high spots. For major issues, you may need to remove and re-set the affected slabs—annoying, but better than a wavy wall.
Prevention:
Use a long level (4+ feet) to check substrate flatness before starting; self-leveling compound is your friend here.
Problem: Color Variation Between Slabs
Why it happens:
Even engineered stone can have batch variations, especially if you ordered from different production runs.
Fix:
Mix slabs from different boxes during installation to blend variations; avoid installing all slabs from one box in a single area.
Prevention:
Order all material at once and check batch numbers on boxes—suppliers usually note this on the label.
Problem: Adhesive Not Bonding
Why it happens:
Substrate was dusty, adhesive was too old, or temperature was too cold (below 50°F) during installation.
Fix:
Remove loose slabs, clean the substrate with a degreaser, and re-apply fresh adhesive. Use a heat gun to warm the area if temps are low.
Prevention:
Always check adhesive expiration dates and store materials in a climate-controlled space.
Marble Stream Stone is a star on its own, but pairing it with the right materials can take a project from "nice" to "jaw-dropping." Here are a few of my go-to companions:
MCM Flexible Stone
is a game-changer for projects with rounded edges or curved walls. Unlike rigid
Marble Stream Stone, this material bends up to 90 degrees, making it perfect for wrapping columns or accenting archways. I recently used it alongside
Marble Stream Stone in a hotel lobby—we wrapped the curved reception desk in
MCM Flexible Stone (in a complementary beige tone) and lined the walls with
Marble Stream Stone. The contrast of textures and the seamless flow around the curve made the space feel expansive and modern.
Want to add a touch of metallic elegance?
Lunar Peak Silvery
—a sleek, silver-hued engineered stone with subtle shimmer—pairs beautifully with
Marble Stream Stone's earthy tones. Imagine a kitchen backsplash in
Marble Stream Stone with a
Lunar Peak Silvery accent strip above the stove. The silver catches the light, while the stone's veining grounds the space. It's a high-end look without the high-end price tag of real metal panels.
For a modern, industrial vibe, pair
Marble Stream Stone with
Fair-Faced Concrete
. The raw, unfinished look of the concrete balances the stone's elegance, creating a space that feels both rugged and refined. I used this combo in a restaurant renovation—exposed concrete walls with
Marble Stream Stone countertops. The contrast was striking, and the concrete's neutral palette let the stone's veining take center stage.
Maintenance: Keeping It Looking New
Your job isn't done once the stone is installed—you'll want to arm your clients with tips to keep it looking fresh. Here's what to tell them:
-
Daily cleaning:
Use a soft cloth or mop with warm water and mild dish soap (avoid vinegar, lemon, or abrasive cleaners—they etch the surface).
-
Stain removal:
Blot spills immediately (especially oil or wine). For tough stains, make a paste of baking soda and water, let sit 10 minutes, then wipe.
-
Resealing:
Indoor surfaces: every 2-3 years. Outdoor/ high-traffic: every 1-2 years. Test with a drop of water—if it beads, you're good; if it soaks in, it's time to reseal.
-
Avoid:
Dragging heavy furniture (use felt pads), standing on countertops, or using sharp tools directly on the surface.
Pro Tip for Clients:
Keep a small sample of the grout and sealer on hand for future touch-ups. Nothing ruins a perfect install faster than a missing grout line or a stained spot that can't be matched.
Wrapping It Up: Why the Effort Matters
At the end of the day, installing
Marble Stream Stone is about more than following steps—it's about respecting the material. This stone has the power to transform a space from ordinary to extraordinary, but only if we take the time to prep properly, measure carefully, and fix mistakes when they happen. As contractors, we're the ones who turn architects' visions into reality, and with a material as unique as this, that responsibility feels even bigger.
So the next time you're tasked with a
Marble Stream Stone install, remember: Surface prep isn't optional, extra material is a must, and patience pays off. And if you ever hit a snag, just think of that finished wall—veins flowing like a river, durable enough to withstand kids, pets, and the chaos of daily life. That's the payoff. Now go out there and build something that makes people stop and say, "Wow, who did this?"