
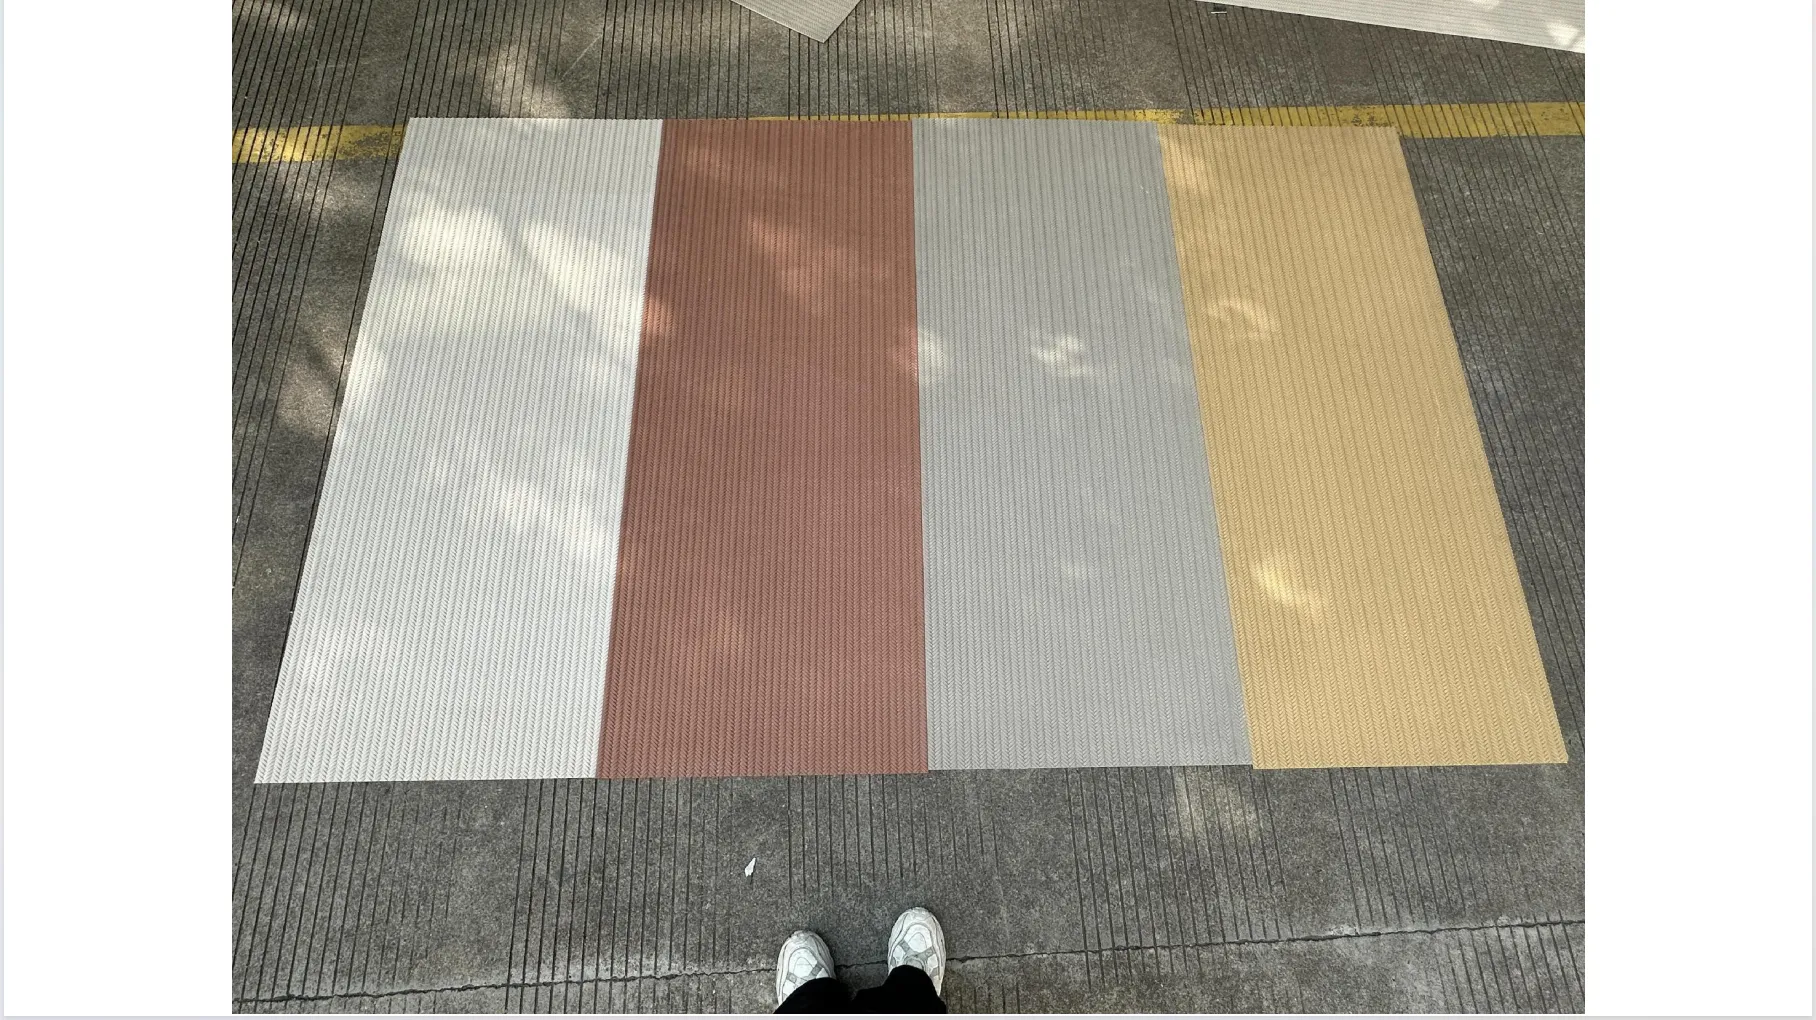
The woven flexible panel has become a favourite among architects and contractors who want the tactile depth of an interlaced stone texture without the weight, cost, and cutting waste of natural stone. It bends around curves, goes up quickly, and reads as a genuinely handcrafted surface. But the finished look depends far less on the panel itself than on how carefully it is installed. This guide walks through the woven real photos installation method from start to finish, so you can get a clean, durable result the first time.
The woven panel belongs to the MCM flexible stone family. Instead of a flat surface, overlapping strips of modified clay are arranged to form a woven texture that catches light and casts soft shadows, giving walls a sense of depth that a plain slab cannot match. It is supplied in a range of natural tones such as khaki, jacinth, grey, beige, and white, so the same pattern can be tuned to suit a warm residential interior or a cool commercial lobby. Because the material is flexible and lightweight, it can be fitted to flat walls, curved columns, and feature panels without heavy structural reinforcement.
Before you start, it is worth looking through the weaving real photos on the product page. Real photos show how the texture behaves in actual installations, how the joints are handled, and how the pattern direction affects the overall look. Having a visual reference in front of you while you work makes the layout stage much easier.
Gather everything before you begin. Stopping mid-installation to hunt for tools is the quickest way to end up with uneven adhesive and rushed joints.
The substrate must be clean, dry, and reasonably flat. Remove dust, oil, and any loose material, and fill obvious hollows or bumps. A quick check with a straightedge is worth the two minutes it takes: if the surface deviates more than a few millimetres over a two-metre span, level it before applying anything. On highly porous surfaces, a primer helps the adhesive bond properly and stops it being sucked out of the joint too quickly.
Mark horizontal and vertical reference lines with a chalk line or laser level. Decide on the panel orientation before you mix any adhesive. The weave direction should run with the longest wall dimension so the pattern flows naturally across the space. Dry-lay a few panels on the floor first to check how the texture lines up at the joints and where you will need to cut.
Mix the adhesive following the manufacturer's water-to-powder ratio, let it rest for a few minutes, then remix. Work in small batches so it does not skin over before you use it. Spread the adhesive over a manageable area, roughly half a square metre at a time, using the notched trowel to leave an even ribbed bed. For exterior walls and wet areas, back-butter the panel as well so the coverage is as complete as possible.
Start at the bottom corner and work upward, pressing each panel firmly into the adhesive bed. On curved surfaces, apply a gentle twist as you press so the panel follows the radius without creasing. Tap lightly with a rubber mallet to seat it fully, then check with a spirit level before the adhesive sets. Use spacers at the joints to keep the gaps even.
Run a rubber roller over the surface, working from the centre of each panel outward. This forces out trapped air and guarantees full contact between the panel and the adhesive. Skipping this step is the most common cause of bubbling and delamination later on, especially on exterior walls where trapped air expands in direct sunlight.
Once the adhesive has taken its initial set, fill the joints with a flexible grout and smooth them with a grout float. For exterior or moisture-prone areas, finish with a waterproof silicone sealant. At corners, either fold the panel around the edge for a seamless look or cut it cleanly and butt the two pieces together. Whichever you choose, keep the pattern aligned across the corner.
Clean off any excess grout with a damp sponge before it hardens, rinsing the sponge often. Then leave the installation to cure for at least 48 hours before applying any load or finish. In high-traffic or outdoor locations, a breathable stone sealer adds an extra layer of protection. Test the sealer on a spare offcut first to confirm it does not change the colour of the panel.
The woven panel needs very little day-to-day attention. A soft damp cloth handles most dust and marks, and a mild detergent is enough for stubborn stains. Avoid abrasive pads and acidic cleaners, which can dull the surface. Check the joints once a year, especially outdoors, and re-apply sealant every few years if the panels are exposed to the weather. If a panel is damaged, it can be cut out and replaced without demolishing the surrounding wall, which is one of the practical advantages of a lightweight flexible material.
A woven panel wall looks best when the installation is done patiently and methodically. Prepare the surface, plan the layout, keep the adhesive coverage complete, and press every panel out properly. Follow the steps above and the result will be a wall that looks handcrafted, stays flat, and holds up for years. To see the texture up close before you buy, browse the woven real photos on the Coloria Group website, or contact the team for samples and project-specific advice.
Recommend Products












